
How to set up automated SMS and emails for appointment reminders
Note: To set up automated reminders for your practice, you must have a role assigned to you that gives you access to the SMS and Email Templates tab in Settings. For more information on roles, see here.
In this article:
Create a new reminder template
Allow your patients to cancel their appointment online
Embedding a hyperlink to your emails or sms templates
Link a new product to a reminder template
Create a new reminder template
You can create a new reminder template from the Settings page:
1. Go to the SMS and email templates tab.
2. Click New in the top right-hand corner.

3. Fill out the General information section:
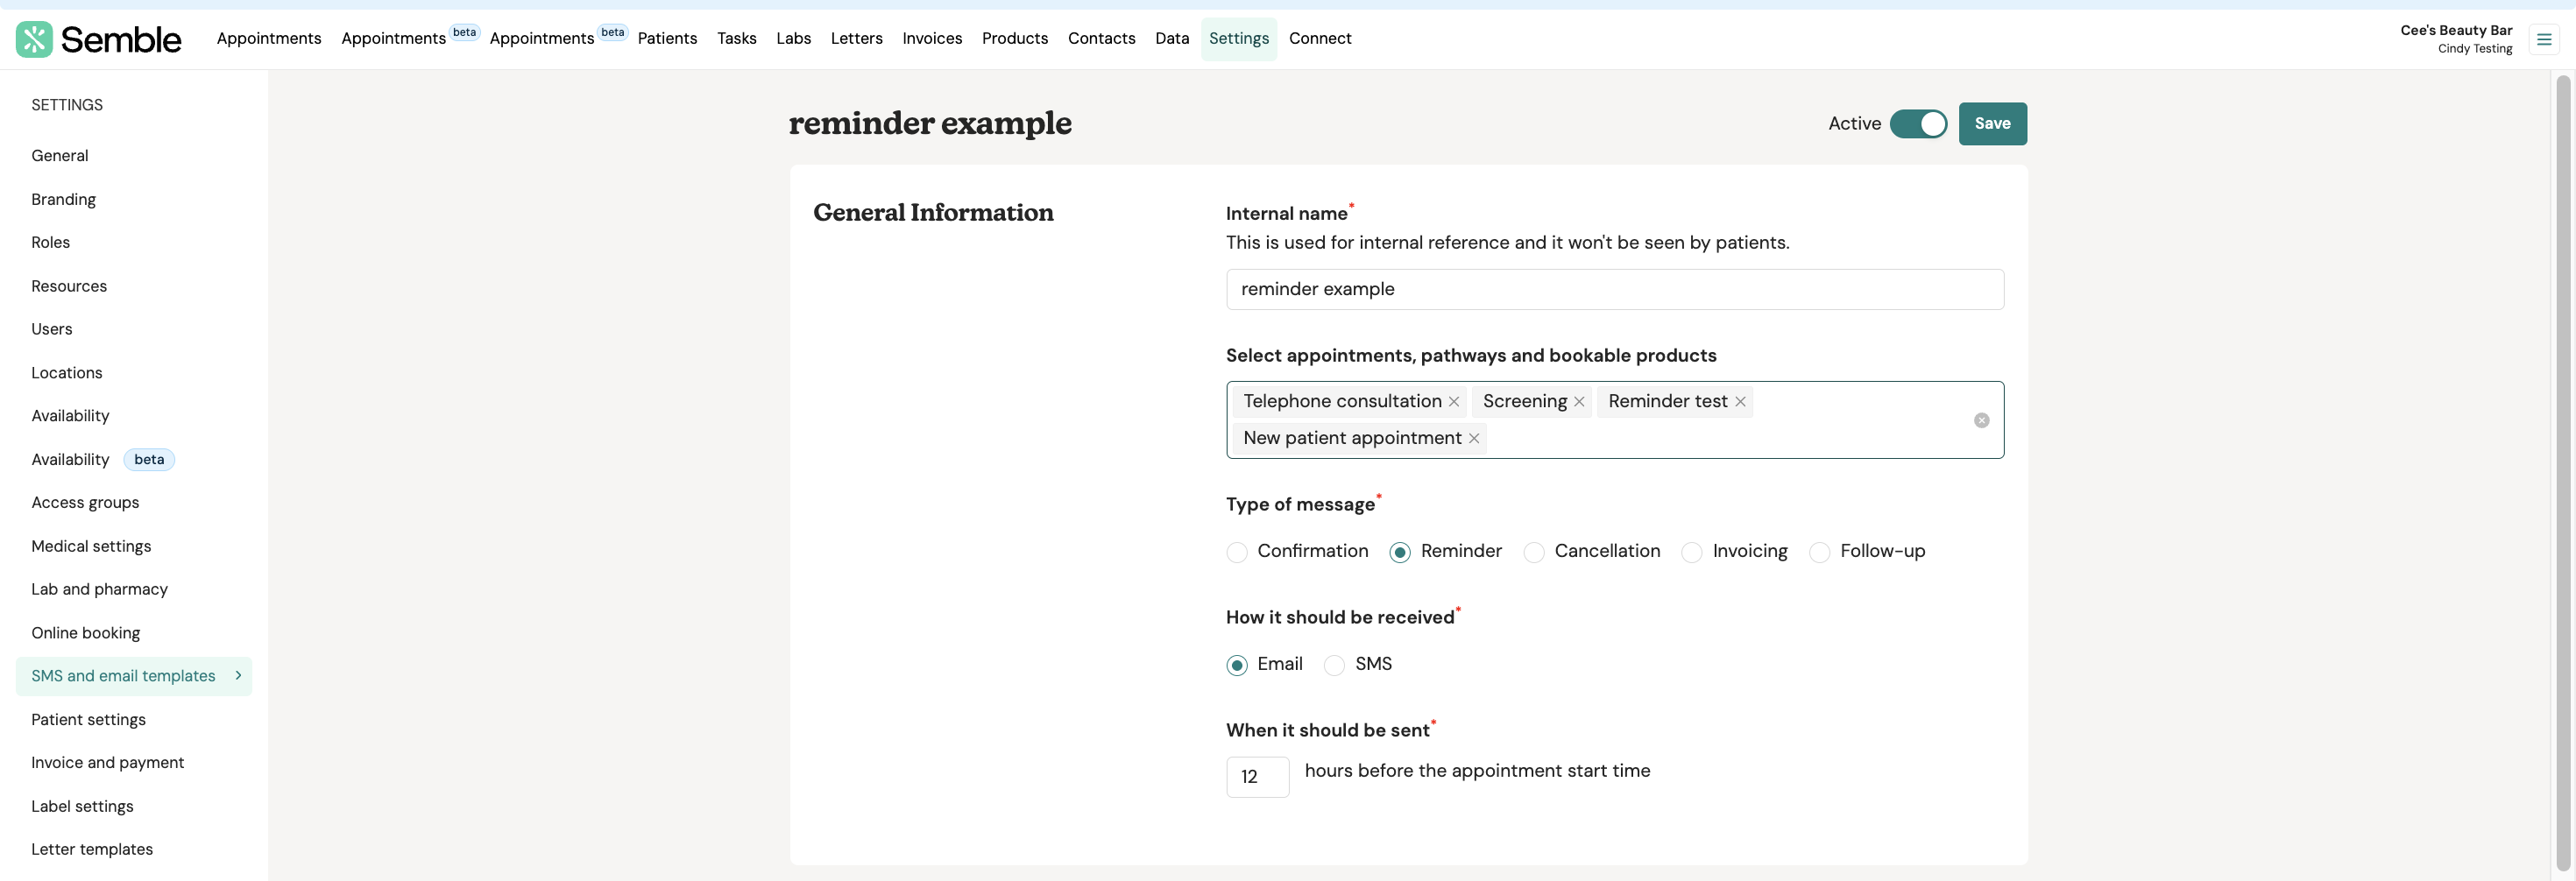
4. Enter the content for the email or SMS. You can directly type in the text editor, or click on the Tags to insert customised information, such as a patient's last name.

5. Tick Active at the top of the screen to make the reminder available to use.

6. Click Save.
Your created reminder will appear in the SMS and email templates tab.
Allow your patients to cancel their appointment online
You can insert a cancellation link when creating a new reminder template from the Settings page:
1. Go to the SMS and email templates tab.
2. Select the custom reminder that you want to insert the cancellation link into.

3. Scroll down to the Content section.
4. Click your cursor into the Email content box where you want to insert the cancellation link, then type any lead up to the cancellation link that you want.

5. Click the Cancellation link tag.

6. Click Save at the top of the screen.
Now, when one of the linked products is booked, the reminder email is sent to the patient with an option to cancel online:

7. If you have activated the email alert, the system will automatically send a cancellation notification email to that email address below.

Embedding a hyperlink to your emails or sms templates
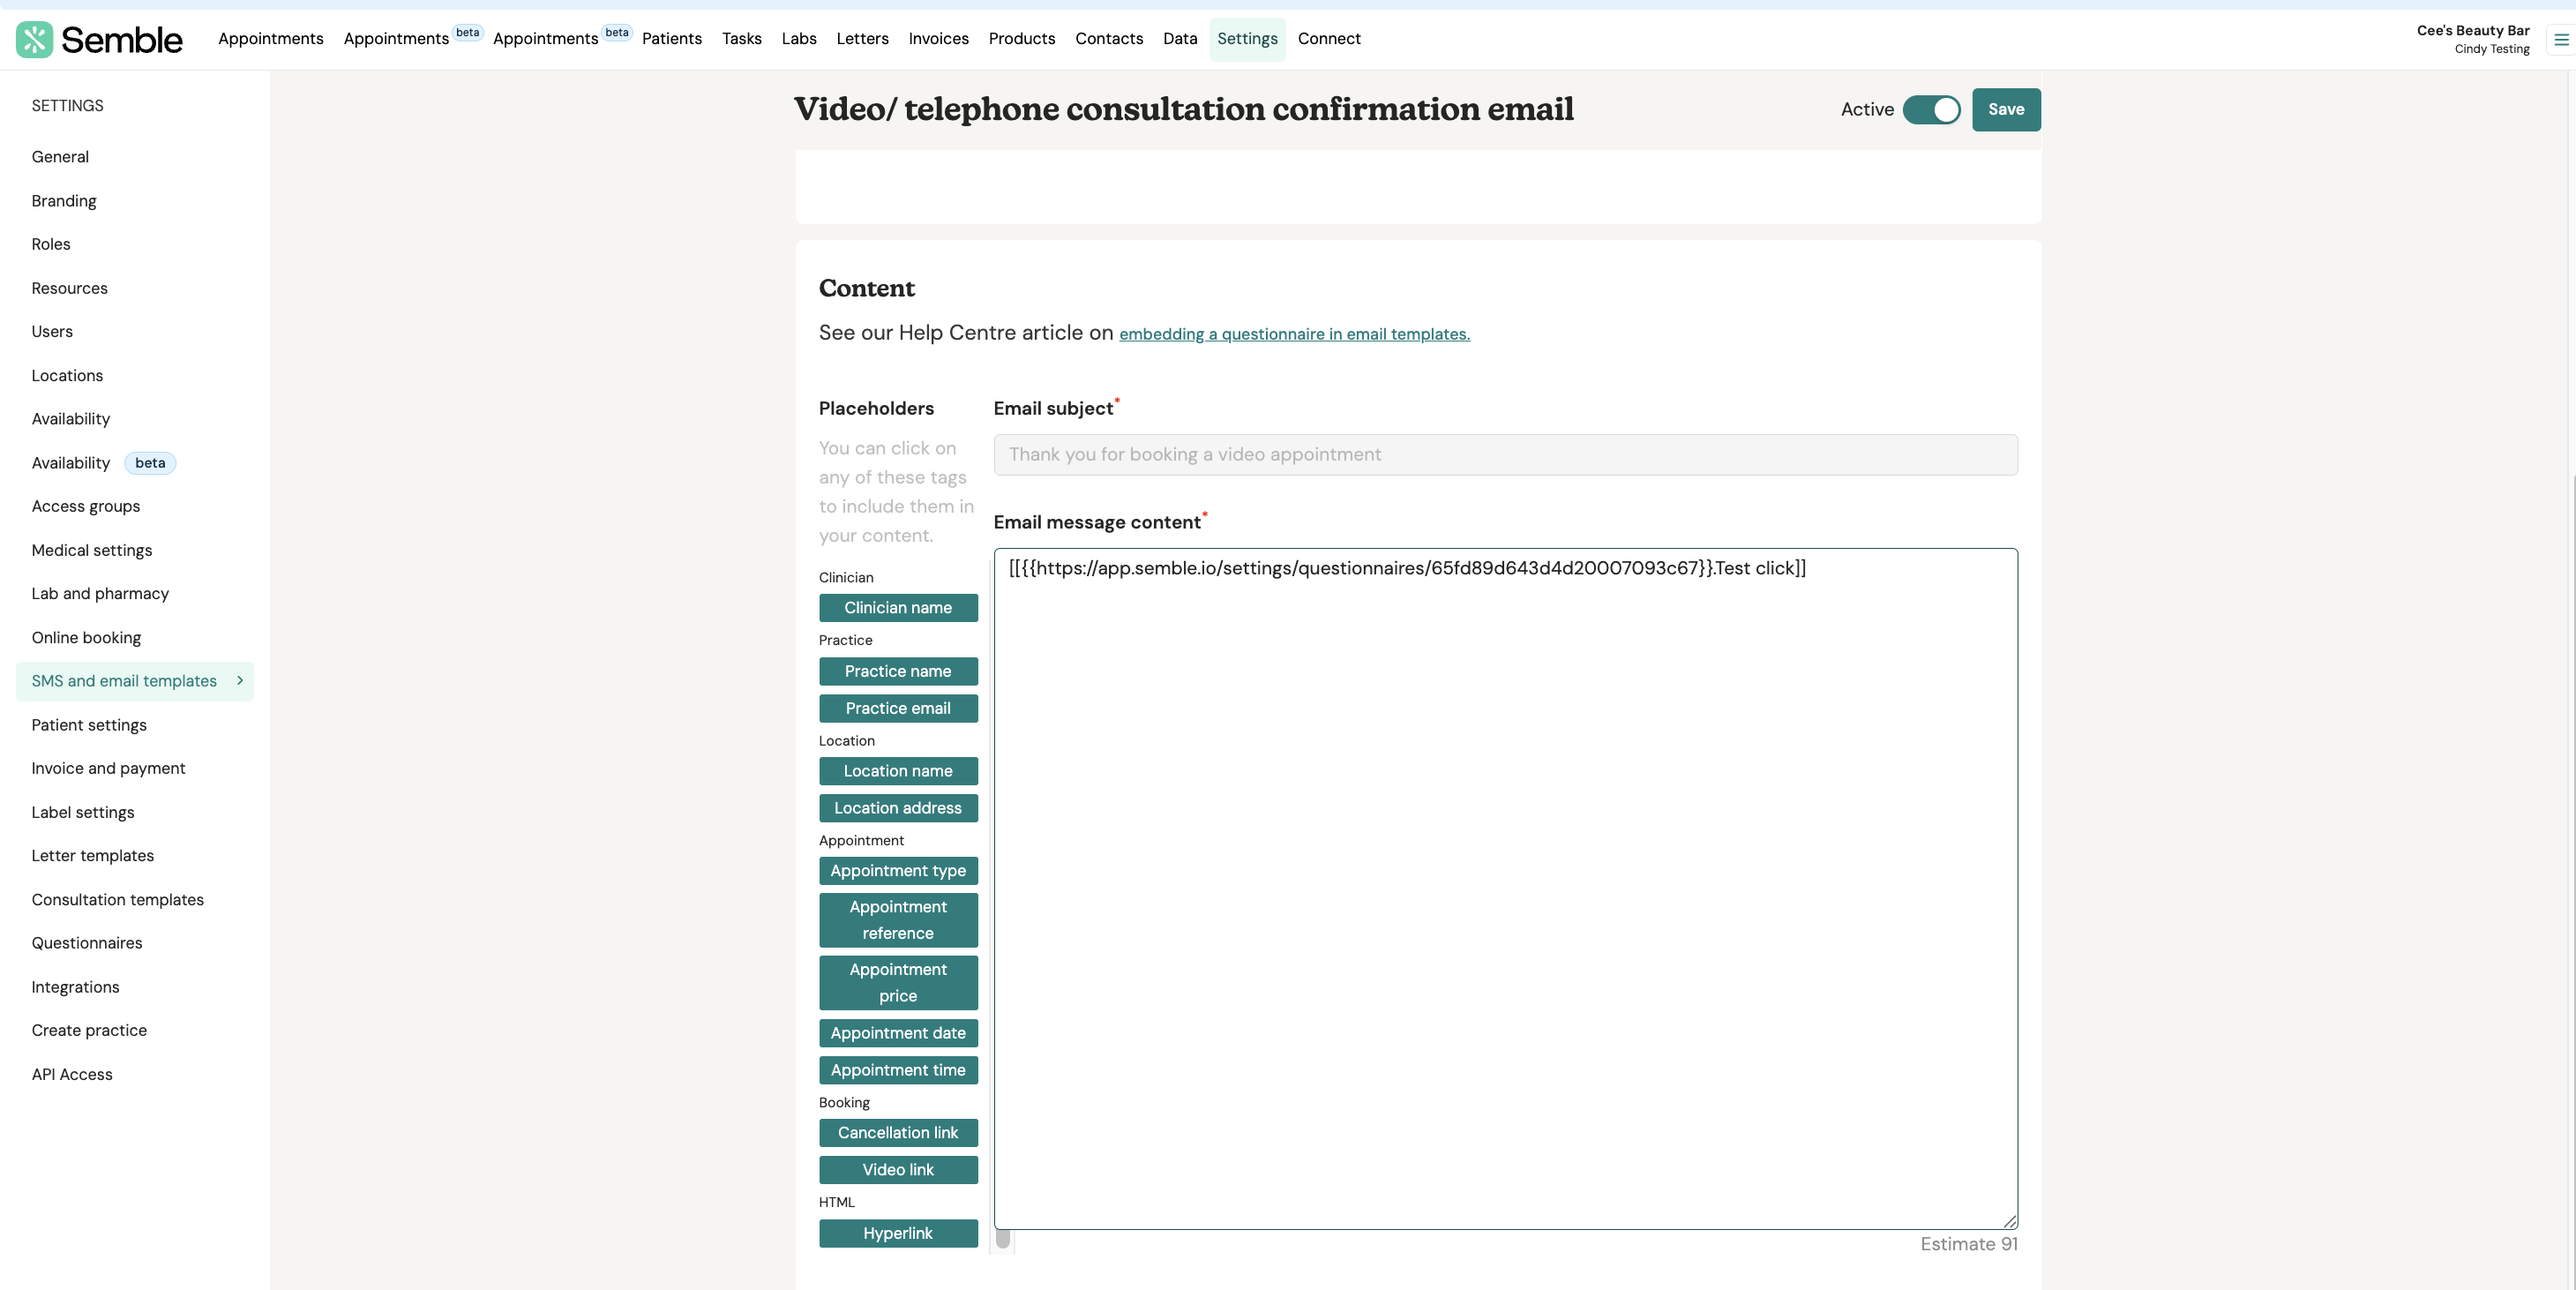
You can now add a hyperlink to your emails and sms, this can be done by clicking the hyperlink button as circled and the placeholder in the "Email message content" will appear:

NOTE: It is very important not to remove any of the brackets or other characters used and only replace exactly as specified above.
Kindly paste your link where it says "replacewithlink.com" and free type the text you want your patient to see in the section where it says "YourLinkTextHere", it should look similar to the example below:
Note: SMS messages do not support HTML formatting. To ensure hyperlinks work correctly, include the plain URL (e.g., http://example.com) without any additional formatting.
Using the example above, this is what your patient will see in the email they receive. They will see the words "test click" which they will click and that will lead them to the URL you inserted above:

Note: If you create new templates, these will not be automatically applied to appointments created prior to the template's creation.
However, you can still apply the new template to these existing appointments by manually ticking these boxes in the calendar for each appointment made prior to the template's creation:

Link a new product to a reminder
Make sure your practice have first activated the reminder before you attempt to do this.
1. Go to the Products page.
2. Click New in the top left-hand corner of the page.

3. Create the new product as you normally would. For more information on creating new products see here.
4. Scroll down to the Reminders section, and use the dropdown menus to choose the reminder(s) you want activated for that product.

5. Click Save at the top of the screen.
When you now book an appointment with that product, your configured reminders will be automatically sent out to the patient.
Edit a reminder template
You can edit a reminder template at any time from the Settings page:
1. Go to the SMS and email templates tab.
2. Select the reminder template that you want to edit.

3. Make the edits you want. Note: there may be some restrictions to the edits you can make with templates marked as a system template.
4. When you have made the edits you want, click Save at the top of the screen.

NB: If you edit an existing template, any email/SMS already scheduled will be sent using the new edited version of the template.
SMS Sender Name
You can set the name that will appear on SMS messages sent by your practice, from the Settings page:
1. Go to the General tab.
2. Scroll down to the SMS settings section.
3. Type the name you want to appear on SMS messages into the SMS sender name box. Note: Names must be between 3-11 characters long, and have no spaces.

4. Click Save at the top of the page.
All SMS messages sent by your practice will now have the configured text as their sender name.
If no sender name is set up, the sender name will default to 'SEMBLE'.
For more information on SMS pricing please click here.
Wrong Email Template Sent to Patients
If the incorrect email template is being sent to your patients for a specific appointment type, follow these steps to check and update your settings:
1. Go to Your SMS & Email Templates
2. Check the “Select Appointments, Pathways, and Bookable Products” Section: Ensure that the correct product or service is linked to the appropriate email template.

3. Remove Incorrect Products from Templates: Click the "X" next to any incorrect product to remove it.
If, for example, your Face-to-Face Appointment template includes a Video Consultation product, this could cause the wrong template to be sent.

4. Save Your Changes: After making the necessary adjustments, ensure you save the settings so that future messages use the correct template.

Note: If you have more than one template you may need to check all of them to confirm