How to create a prescription, customise the default footer for dispensed medical labels, create and print your own labels for medication dispensed by your practice.
Note: To customise your practice's prescription label footer and create your own dispensed medication labels, you must have a role assigned to you that gives you editing permissions for Patients and Consultations.
In this article:
Create a Dispensed Medication Label
Edit your Practice's Prescription Label Footer
Create a Medication as a Product
Linked articles:
Set up and Submit Prescriptions to a Pharmacy
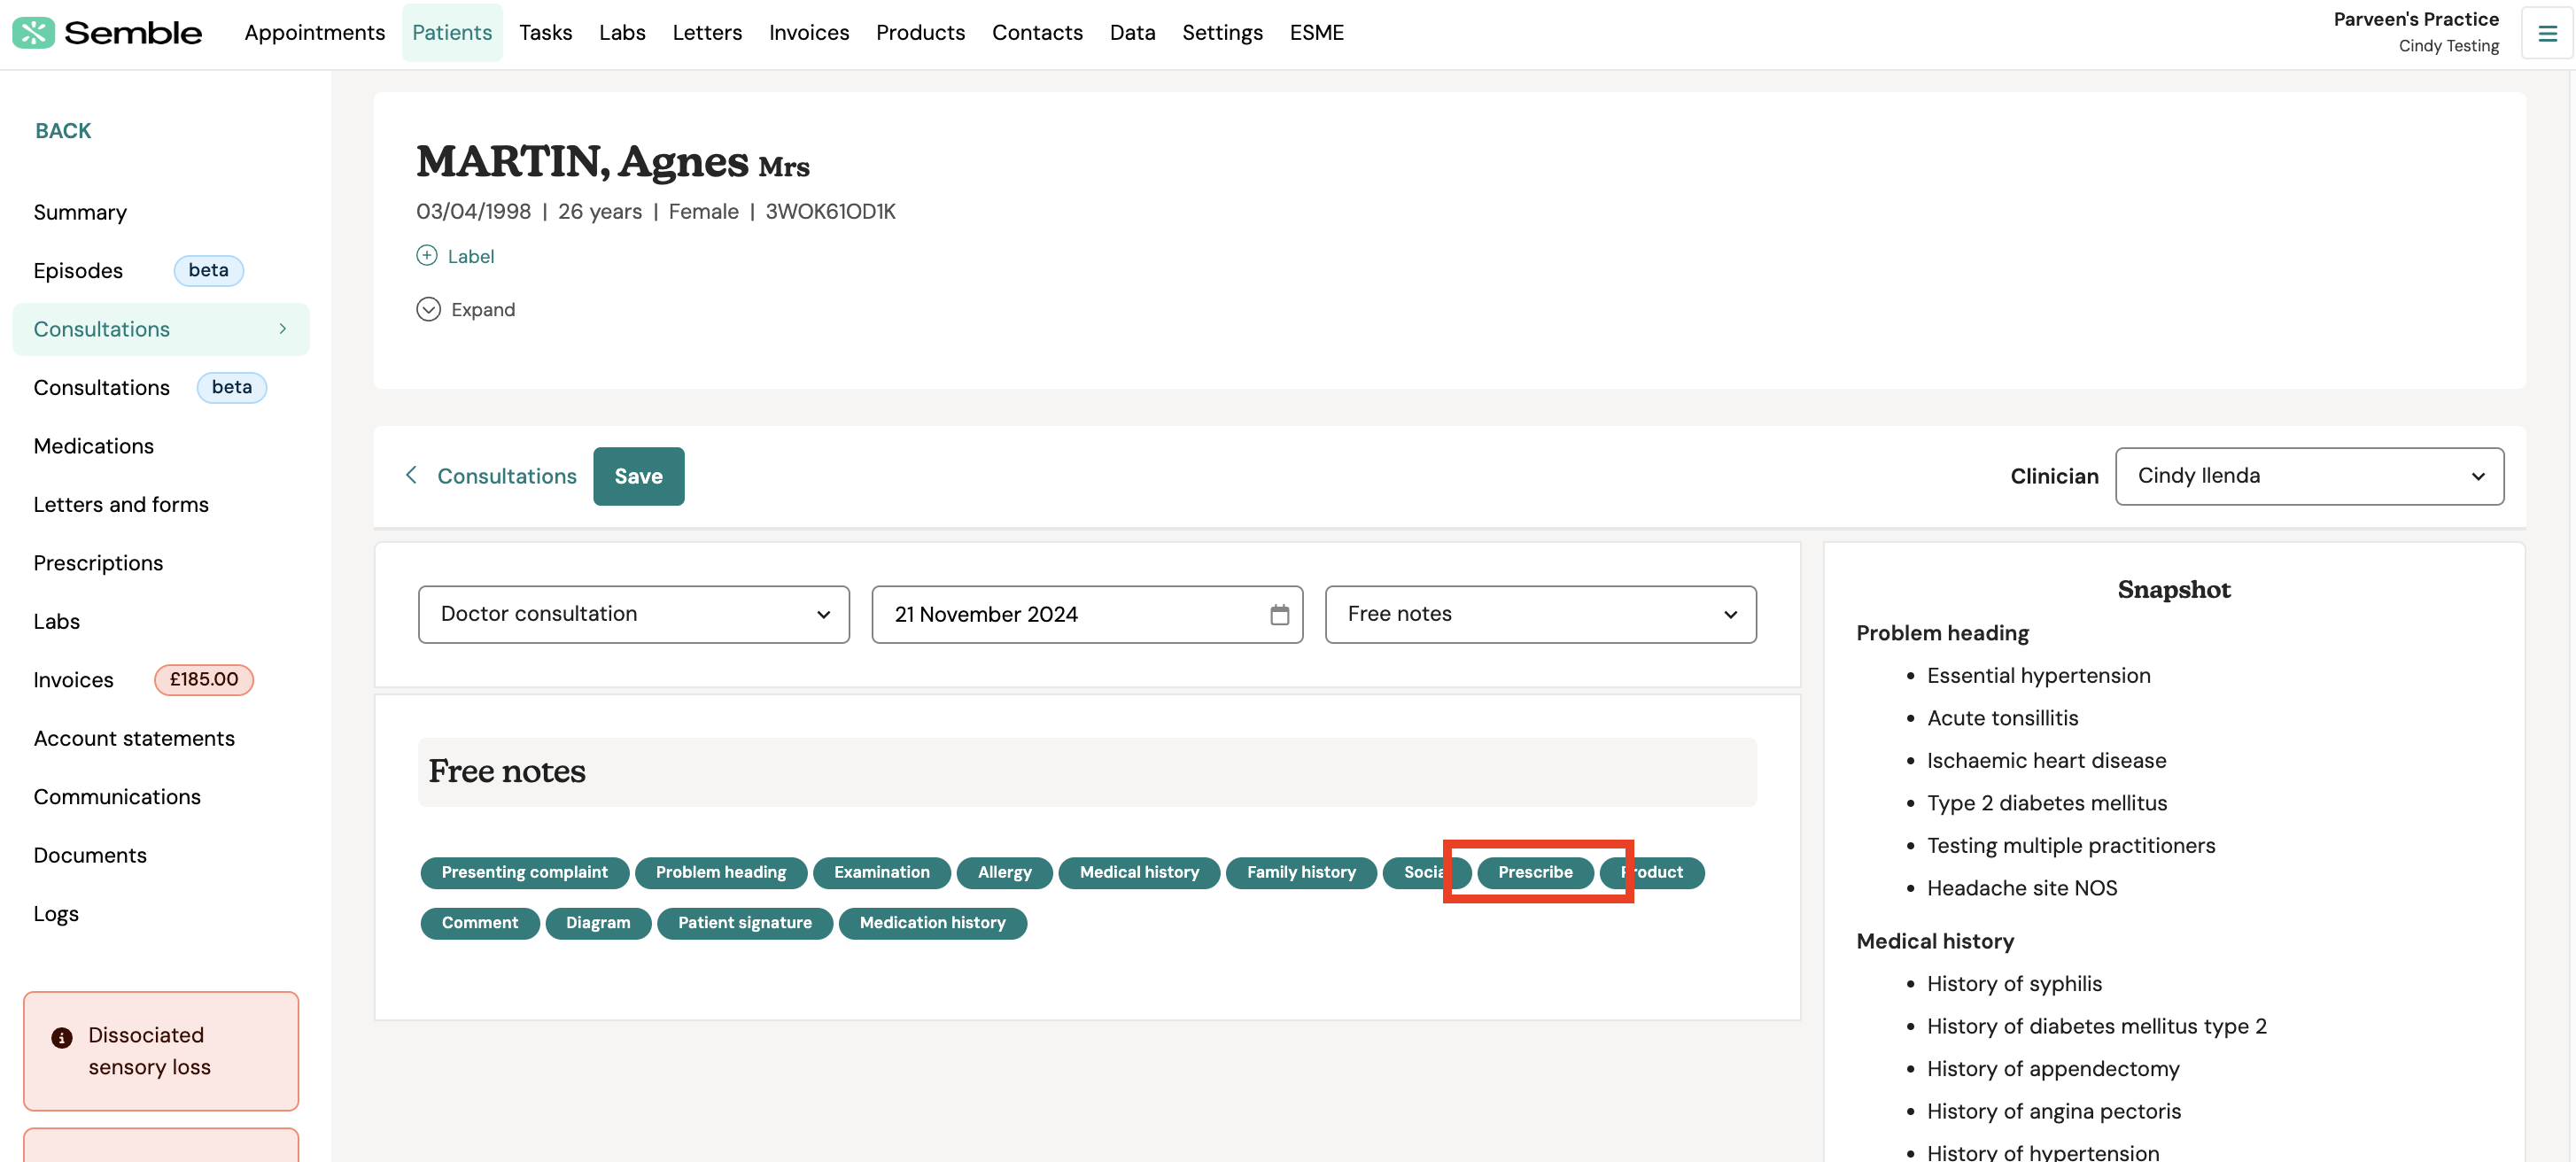
2. Click the Medication tag at the bottom of the notes.
3. Select the medication you want to prescribe.
Note: If you are sending a prescription to CloudRX, make sure the medication has by CloudRX after its name.
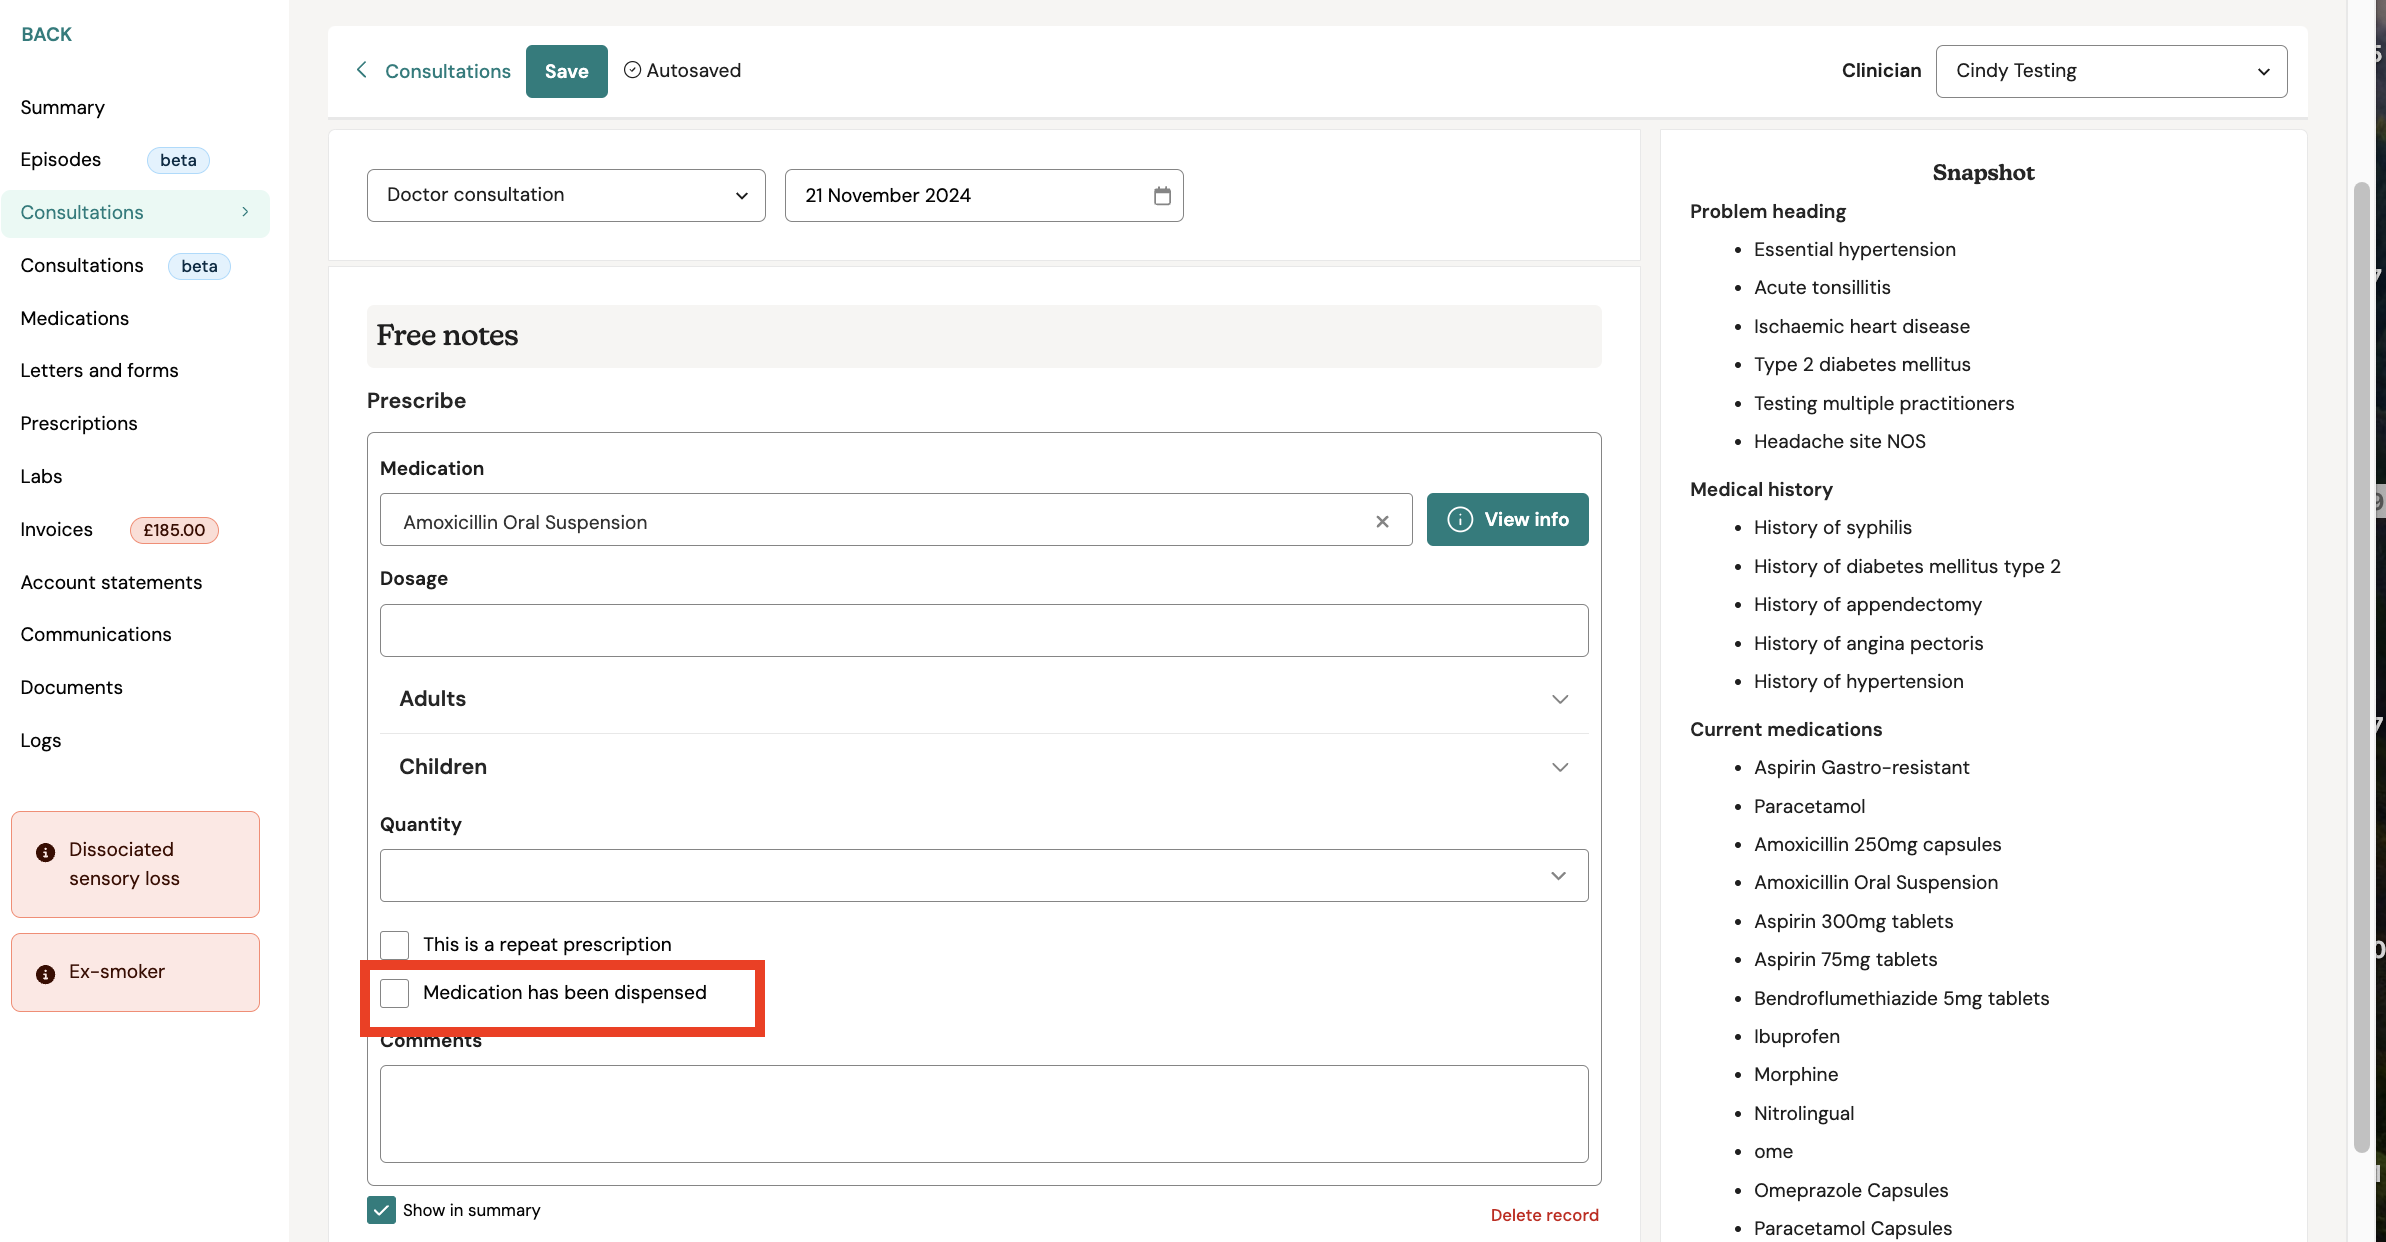
4. Enter the rest of the prescription details.
-
Dosage: Enter the dosage as indicated
-
Quantity: Enter a whole number. For example, if you want to prescribe one box, enter '1'
-
(Optional) Medication has been dispensed: Tick this box to enter the batch number and expiration details
-
(Optional) Comments: Type any additional comments you have for the patient
-
Show in summary: Choose whether you want this prescription to appear on the patient's record or not
5. (Optional) If this is a repeat prescription please follow the steps outlined here.
6. Click Save.
The prescription will appear in the Prescriptions tab in the patient record. You can now submit the prescription to one of the pharmacies we integrate with or share/email it to an external pharmacy.
Print a Prescription
1. Go to the Patient's File
2. Go to the 'Prescriptions' Section: In the patient's file, locate the "Prescriptions" tab and click on it to view the patient's prescription history.

3. Click on the relevant prescription
4. Click 'Print': Once the prescription is open, click on the "Print" button to print the prescription.
This will allow you to easily print prescriptions directly from the patient's record.
Create a Dispensed Medication Label
You can create your own dispensed medication label, from consultation notes:
1. Start creating a consultation note as you normally would.
2. Click the Medication tag at the bottom of the consultation notes.

3. Fill out the medication details as you normally would.
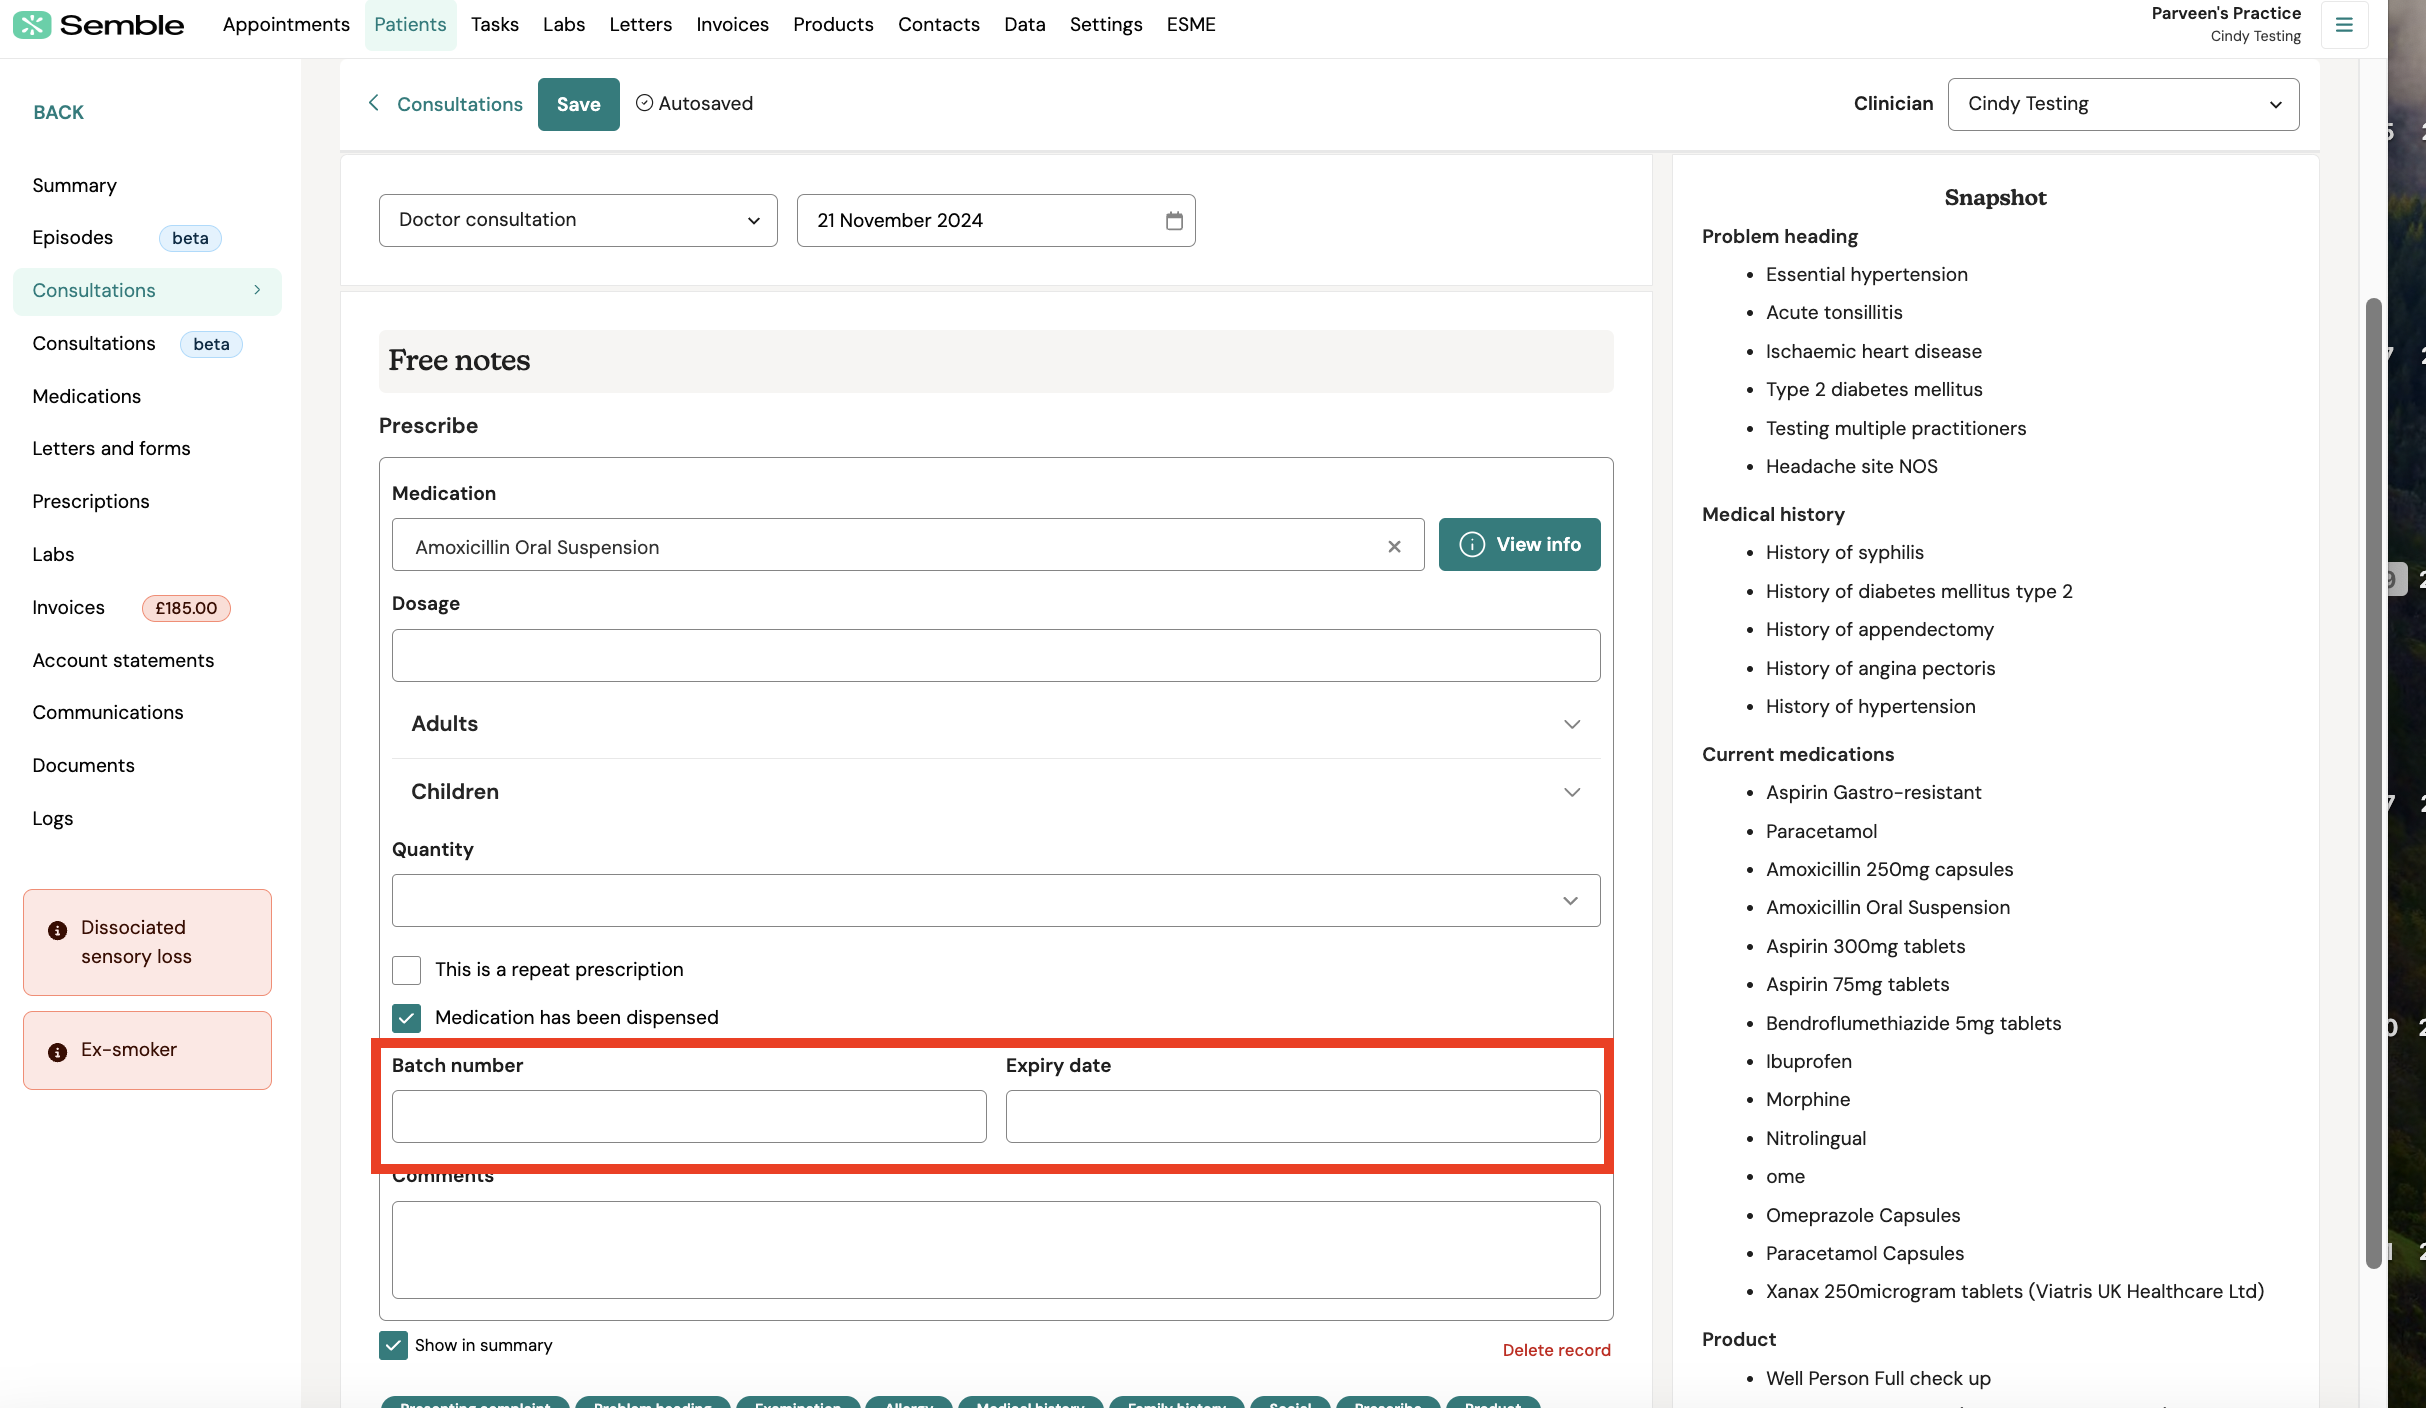
4. Tick the Medication has been dispensed box.

5. Enter a Batch number and Expiry date for the medication.

6. Click Save. The Consultations page refreshes and the new consultation note appears in the list.
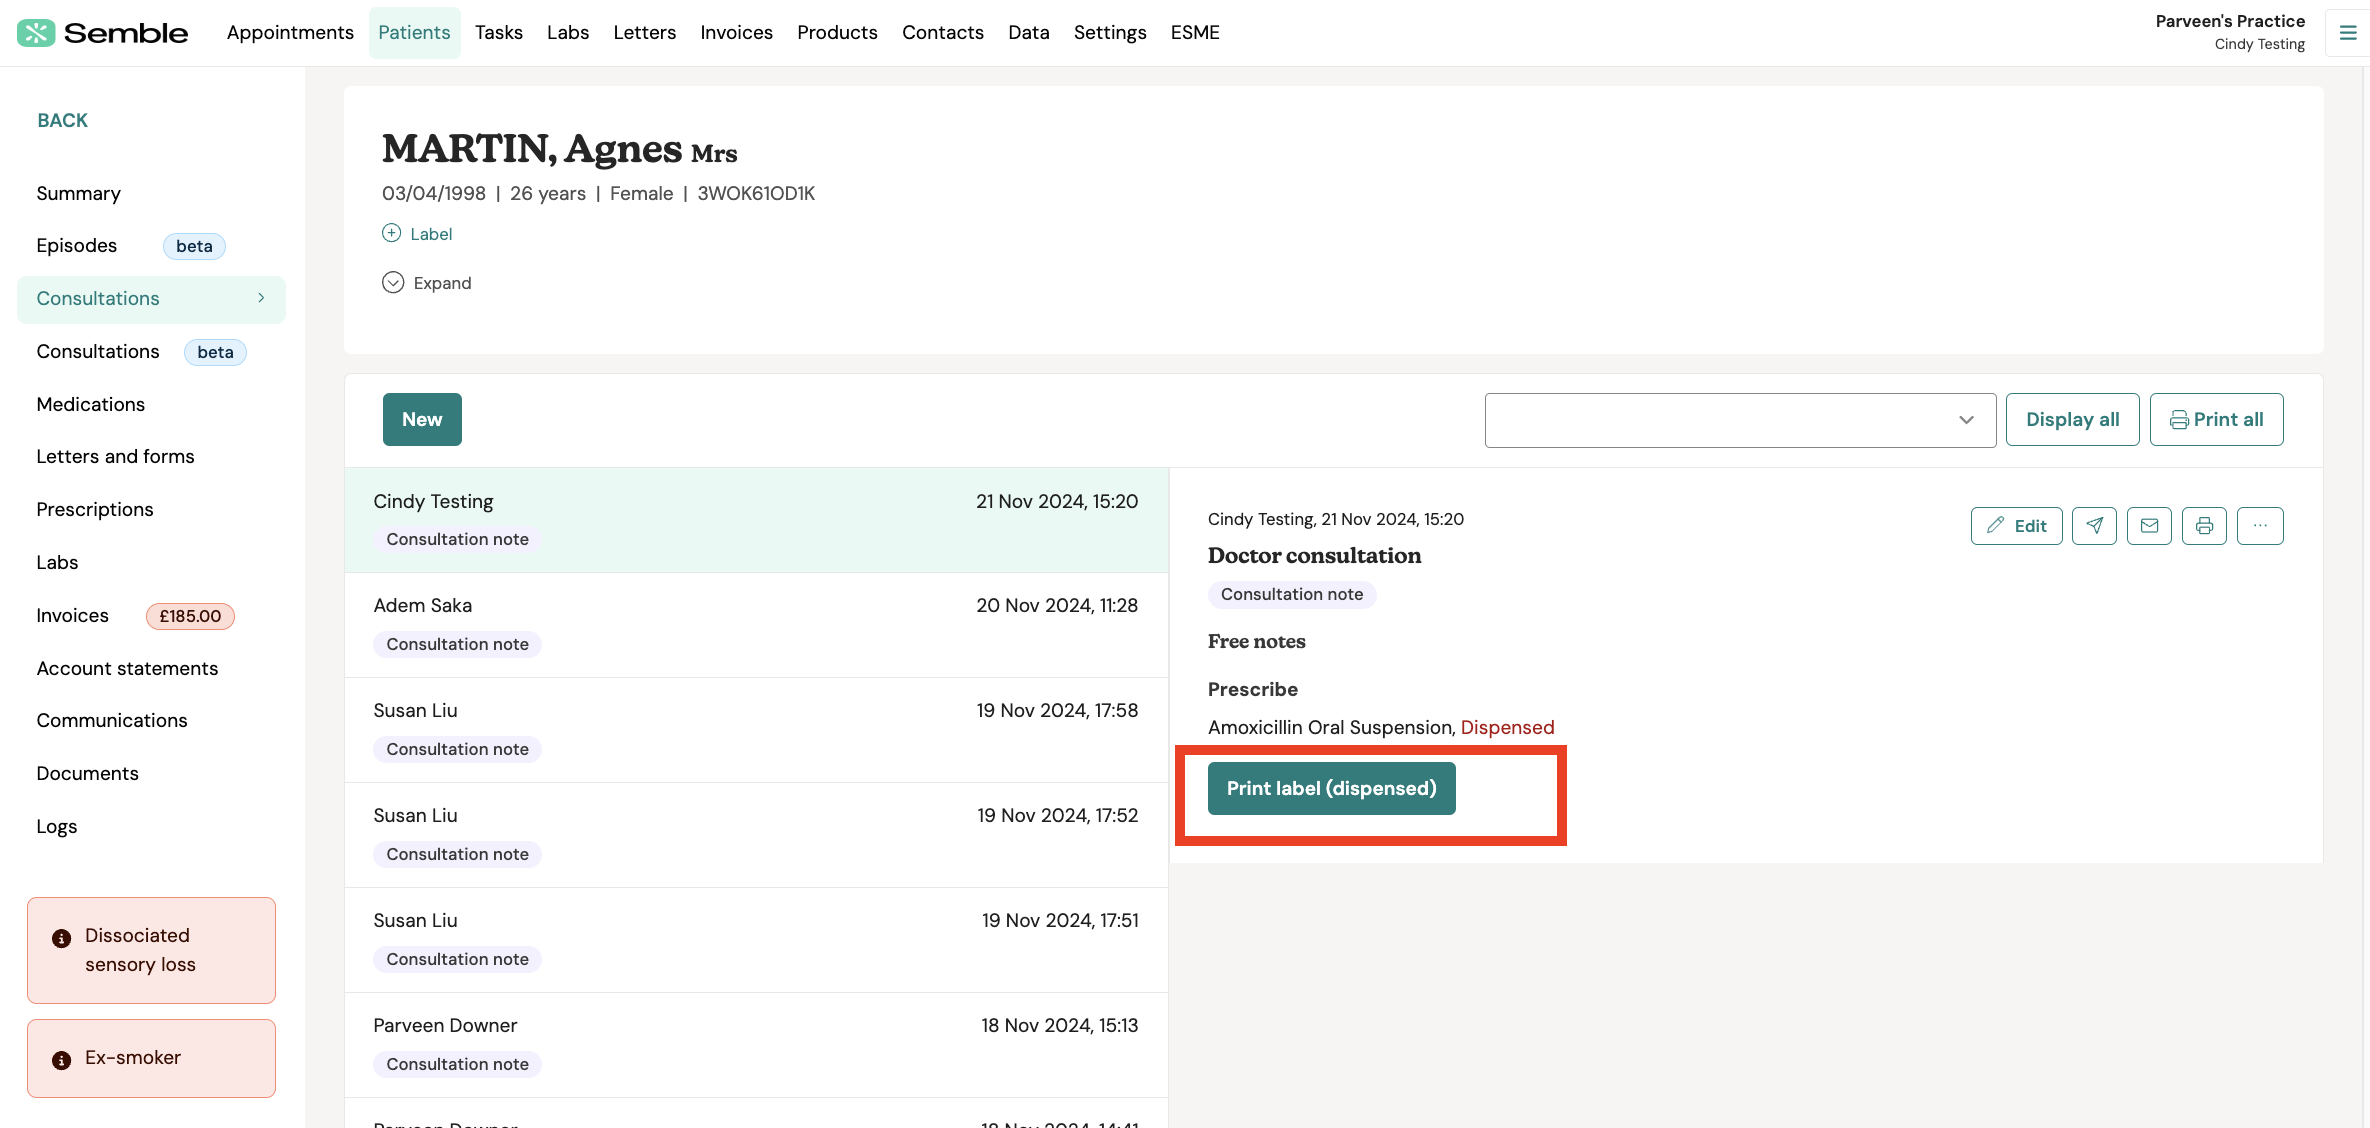
7. Make sure the consultation note that you've created is selected, then click the Print label (dispensed) button on the right-hand side:

A PDF opens in a new tab.
8. Download or print the PDF as you normally would.
Note: All labels are printed 7.061cm x 3.351cm.
The dispensing label now displays the patient name, medication quantity, dosage instructions, dispensing date and the medication name.

Edit your Practice's Prescription Label Footer
You can customise your practice's prescription label footer at any time, from the Settings page:
1. Go to the Medical settings tab.
2. Scroll down to the Prescriptions section.
3. Click Add footer.
4. Type what you want the footer to say in the text box.
5. Click the tick icon beneath the text box.
6. Click Save at the top of the page.
The footer is saved and applied across your entire practice. You can edit this footer at any time by going back to the Medical settings tab, and clicking on the Dispensing label footer text:
Create a Medication as a Product
This section is about how you can create medications as products if you have bespoke medications for your practice or if you cannot find a medication from one of our integrated pharmacies.
You can create a medication procedure at any time from the Products page:
1. Click New.
2. Open the Type dropdown menu and select Medication.
NOTE: To ensure that you are able to create prescriptions with this product, always select "Medication" as the "Type" when setting up a new medication. Selecting any other "Type" may prevent you from creating a prescription.

3. Fill in the compulsory details of the medication.
- Name
- Cost: How much is the pharmacy charging you for the medication
- Price: How much your practice will charge patients for the product
- Product Code: Needs to be provided by the pharmacy directly
- Supplier: Name of the pharmacy supplying the mediation

4. Fill in the other details of the lab, some field are optional. If you are integrated with a Lab please ensure Product Code and Supplier has been inputted
-
Serial number: Enter the serial number of the product
-
Stock level: Enter how many of the lab tests you have available
-
Tax: Choose a tax rate from the dropdown menu
-
Comments: Type any comments about the lab test into the box (eg. DMD code)
5. (Optional) Click Add contract pricing to set up alternate pricing with insurers. For more information, see here.
6. Click Save.
The medication will now appear on the Products page and can now be used to create a prescription.


