Link your Stripe account with Semble
Stripe is an online payment processor that provides financial services for any type of business. When this integration is set up, you can link Semble to your Stripe account to accept card payments from patients.
Note: To set up the Stripe integration, you must have a role assigned to you that gives you the relevant editing permissions.
In this article:
Integrating Stripe with Semble
Add a Card to a Patient's Record
Taking Card Payments with a Patient Card on File
Take Payment through Online Booking
Linked articles
Integrate Stripe with Semble
You can integrate your Stripe account with Semble from the Settings page:
1. Go to the Integrations tab.
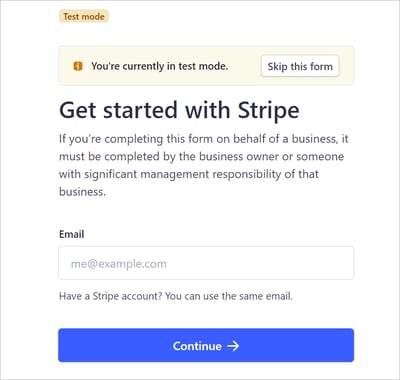
2. Scroll down to the Stripe section, then click Connect with Stripe. You are redirected to Stripe.

3. Create or login to your Stripe account.

When you have created or logged into your Stripe account, you are automatically redirected back to Semble, and the integration finishes setting up.
Add a Card to a Patient's Record
You can add a payment card to a patient's record at any time from the Patients page:
1. Select the patient who you want to add a card for.
2. Click the edit icon in the top right-hand corner.
3. Scroll down to the Card details section, and enter the patient's card details.
4. Click Save.
The card is now linked to the patient, and can be used to pay their invoices with.
Taking Card Payments with a Patient Card on File
You can directly take card payments for a patient's invoice.
1. Go to the Invoices page.
2. Click the Pay button next to the invoice that you want to pay.
3. Select the card from the Payment type dropdown.
4. Click Charge card.
The patient's card is charged, and the invoice is paid off.
Take Payment through Online Booking
You can configure products to require immediate payment for online bookings. For information on how to create an online booking form, see here.
1. Go to the Products page, and select the product that you want to edit.
2. Click the edit icon in the top right-hand corner.
3. Scroll down to the Booking options section, and tick the Enable pre-payment for online booking box.
4. Click Save at the top of the page.
Now, when that product is added to an online booking form, it will ask the patient to enter their card details.
The patient can tick Remember these card details to fast track paying for the product next time they book an appointment.
Patients do not have to tick the Remember these card details box however the option cannot be removed.
Add Payment Links to Invoices
To do this, firstly go to "Settings" then click "Invoice and Payment" then scroll down to "Invoice details" and tick "Enable payment links in invoice" as below:
Now every time you send an invoice to a patient, the payment link will be included as below:
When the patient clicks on the "Pay Now" button, the payment page will open in a new tab:
Once payment is completed, the patient will see the below confirmation page:
If you go back to the invoice in Semble you will see that now that transaction is complete, the invoice is now marked as "Paid" and a "Credit card payment" with the date will appear as below:
Refunds with Stripe
Currently, in-app refunds with Stripe are not possible through the integration.
In-app refunds can only be processed when integrated Semble Pay (learn more about integrating with Semble Pay here).
If you are using Stripe, you will need to process refunds directly in your Stripe account by following Stripe’s refund process.
To keep your records accurate, you can manually record the refund in Semble to reconcile the invoice:
-
Go to your Settings tab.
-
Navigate to the Invoices and Payment page.
-
Click Add New Payment Type.

-
Create a payment type named "Refund".

-
Once you've processed the refund in Stripe, go to the relevant invoice in Semble and click "Pay".
-
In the dropdown menu, choose the "Refund" payment type you created and select the relevant date.

The refund is now recorded in Semble for auditing purposes.


