How to manage your invoices and invoice settings
In this article:
Configure Invoice and Payment settings
Manage Payment Types
Linked articles:
View Invoices
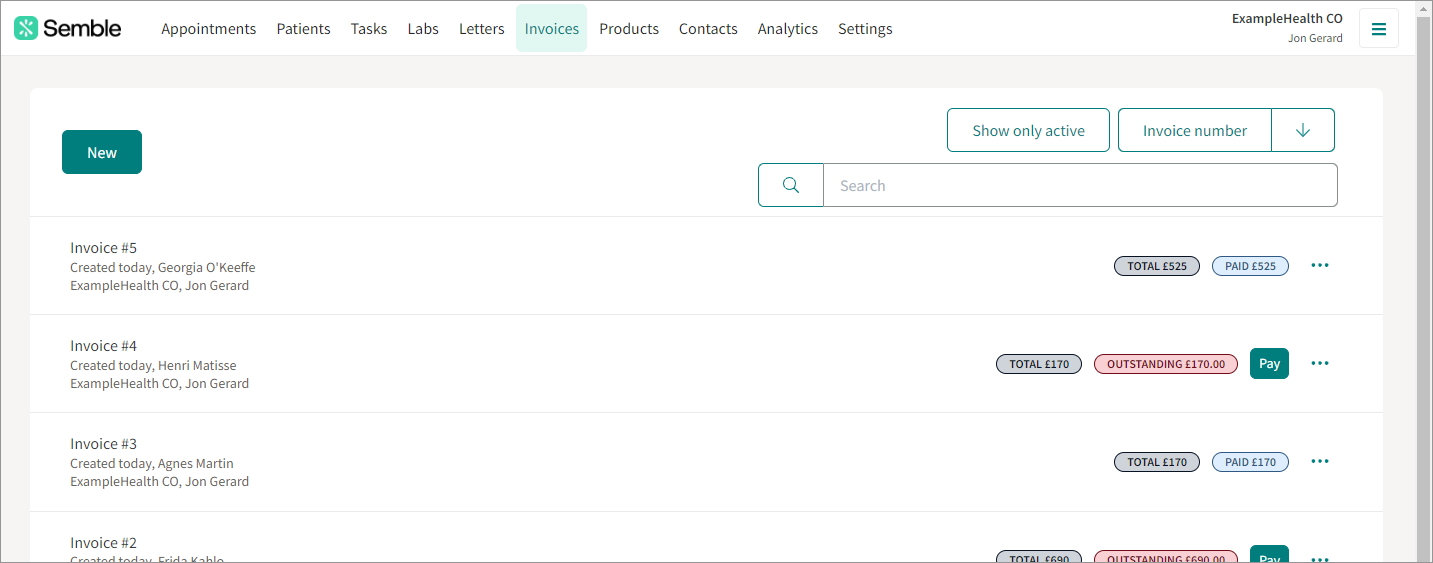
To view all your organisation's invoices, go to the Invoices tab:

With a specific invoice you can:
-
Click on the invoice number to view it
-
Pay: Record the payment of an invoice
-
More options: Click the three dots next to the Pay button to access more options
Organise your Invoices page with the buttons at the top:
- Show only active: Select which invoices this page displays
- Date created: Choose in what order you want the invoices displayed
- Search: Type the name or surname of a patient to find a specific invoice
Filter Invoices
Filter per status
You can now filter your invoices per status: Paid, Unpaid, Overpaid and Voided
Click on the invoice status you want to see:
Filter per type
You can now filter the section per type: Invoices, Credit Notes or Memberships:
Click on the type you want to see:
You can sort by date created, invoice number, location, patient, practitioner, status and total:
Configure Invoice and Payment settings
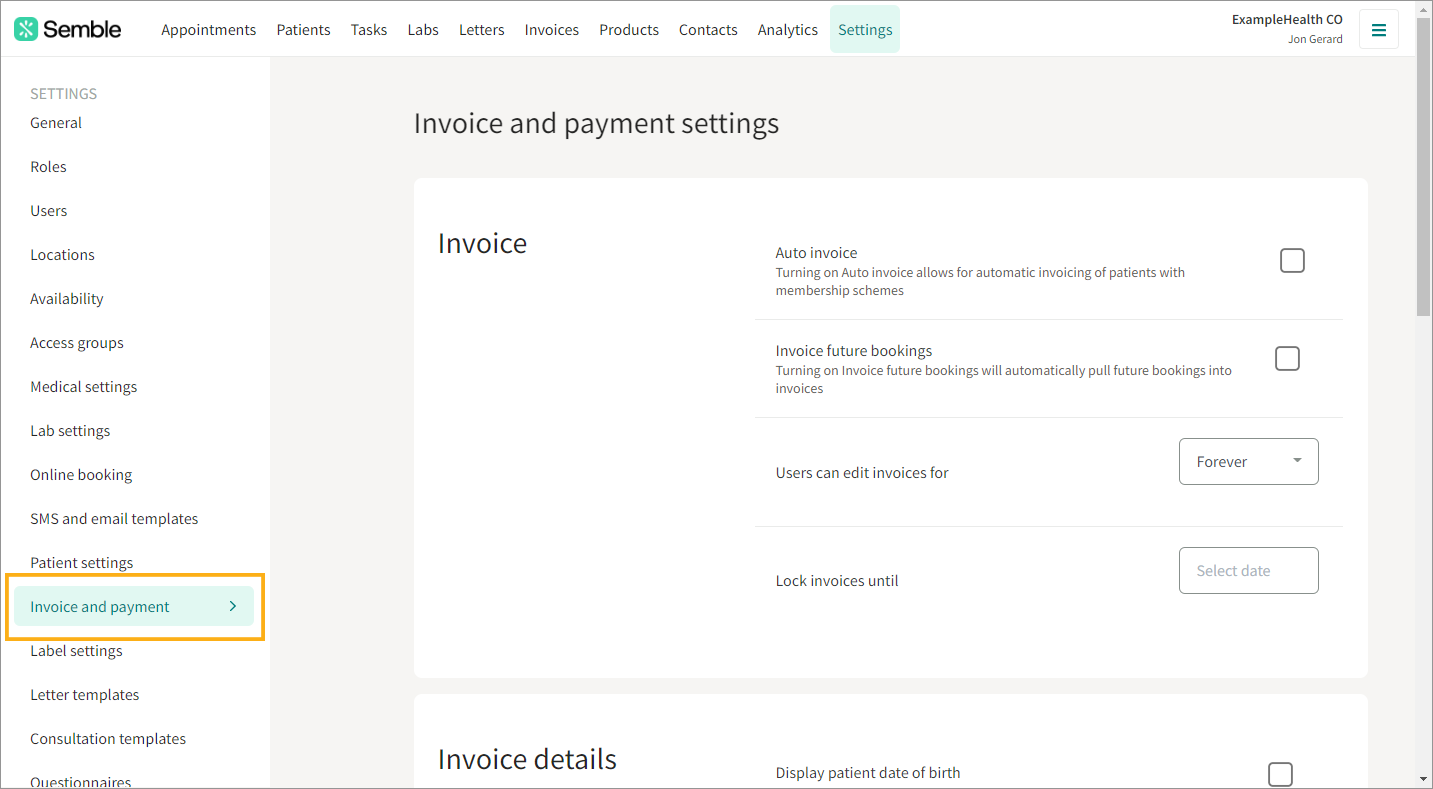
Go to the Settings page, then select the Invoice and payment tab.

From here, you can configure the following settings. Any changes you make are automatically saved.
Invoice
-
Auto invoice: Turning this on allows for automatic invoicing of patients with membership schemes
-
Invoice future bookings: Turning this on will automatically pull future bookings into invoices. Click here for more information on how to use this.
-
Users can edit invoices for: Set how long invoices are allowed to be edited for
-
Lock invoices until: Stop anyone in your organisation from voiding or editing invoices up to a chosen date. Payments can still be put through.
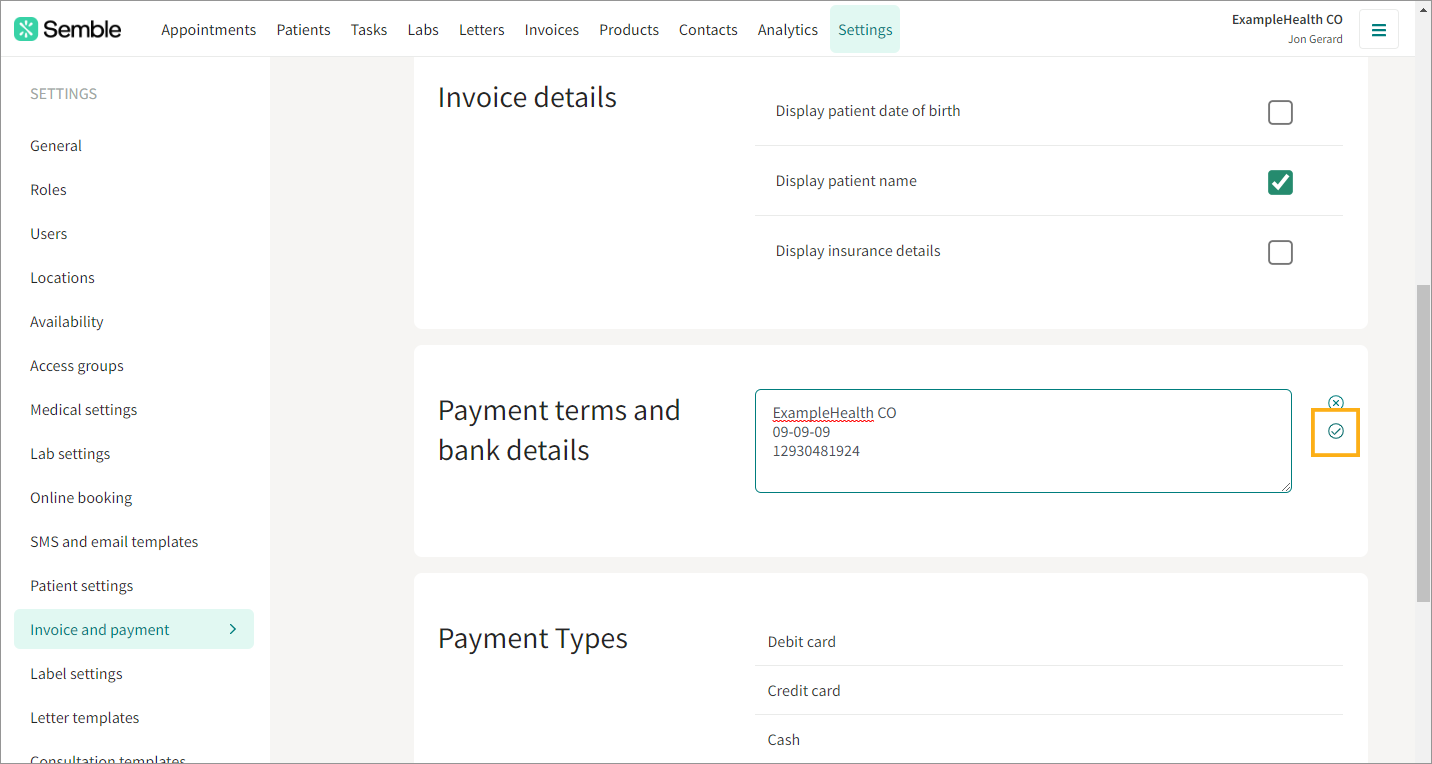
Invoice details
Choose which patient details appear on every invoice by ticking and unticking the boxes.
Payment terms and bank details
Type the payment details of your organisation as you want it to appear on all invoices.
Note: Remember to click the tick icon to save any changes you make. You can also click the cross icon to reject any changes.

Locking Invoices
You can lock your practice's invoices at any time from the Settings page.
Note: This action cannot be undone. Your users will not be able to edit any invoices that were made before the set date. It is recommended that you notify your practice of this invoice locking before you perform the following steps.
1. Go to the Invoices and payment tab.
2. Go to the Invoice section.
3. Select a date that you want to lock invoices up to, from the Lock invoices until date picker.
4. Click Confirm to confirm the lock date. Note: This action cannot be undone.
Invoices that were made before that date are now locked, and cannot be edited by anyone in your practice.
If you attempt to edit a locked invoice, you will see the following message:
Manage Payment Types
This is a list of all the different ways a patient or insurer can pay for an invoice.
You can click Add payment type at the bottom of the page to add a custom payment type.

Once added, click on the tick to save the new payment type.

You will now be able to record payments with this method.
Currently you cannot delete any of the system payment types.


