How to add and manage documents for a patient's record
With Semble, you can add external documents (such as PDFs, and images) to a patient's record.
Note: To add documents to a patient's record, you must have a role assigned to you that gives you editing permissions for Patients.
In this article:
Linked Articles:
Receiving Documents from Patients
View a Patient's Documents
You can view a patient's uploaded documents at any time from the Patients page.
1. Select the patient who you want to view documents for.
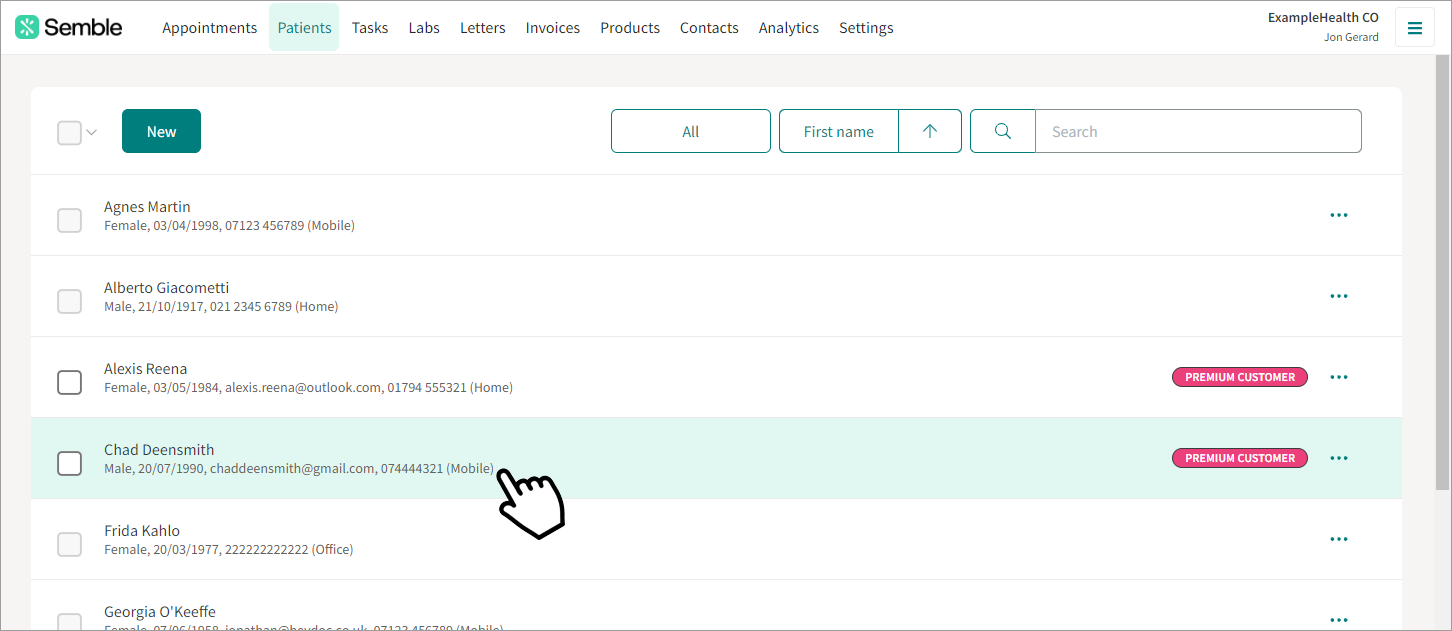
2. Go to the Documents tab on the left-hand side.
3. Select the document that you want to view or download.
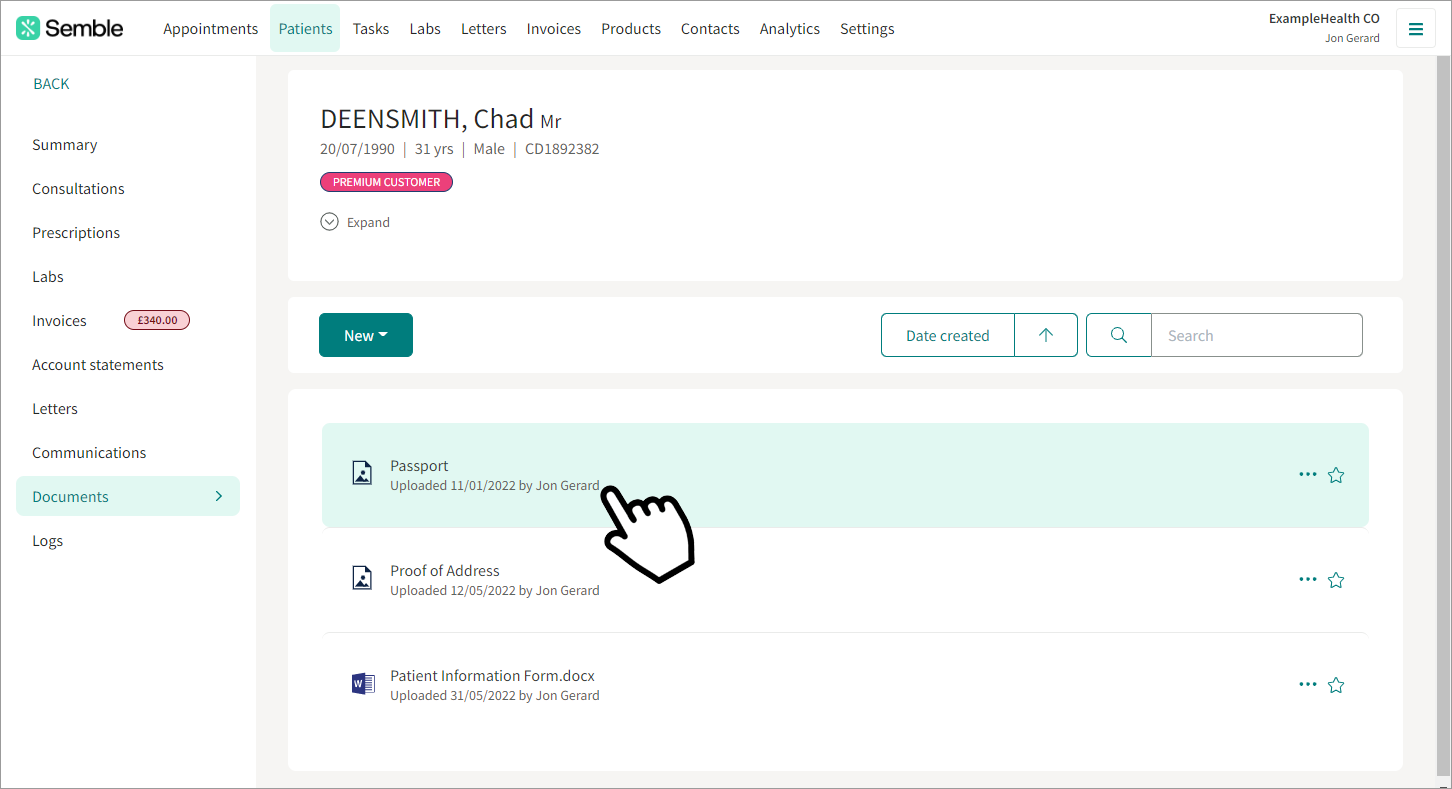
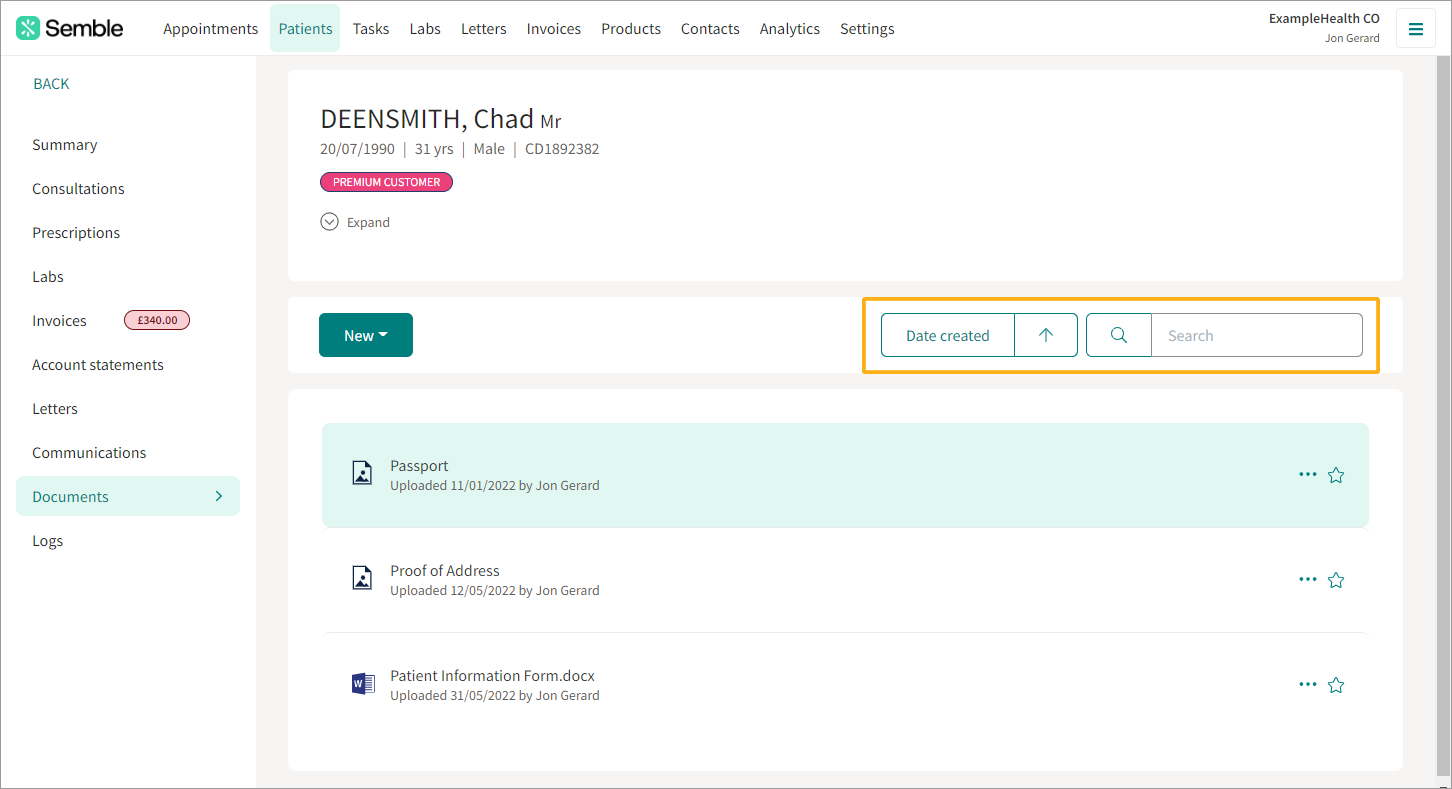
You can sort and search for specific documents by using the buttons on the right:
Add Documents
You can add a document to a patient's record at any time, from the Patients page:
1. Go to the patient's Documents tab in their record. For information on how to do this, see above.
2. Click New.
3. Select Upload file.
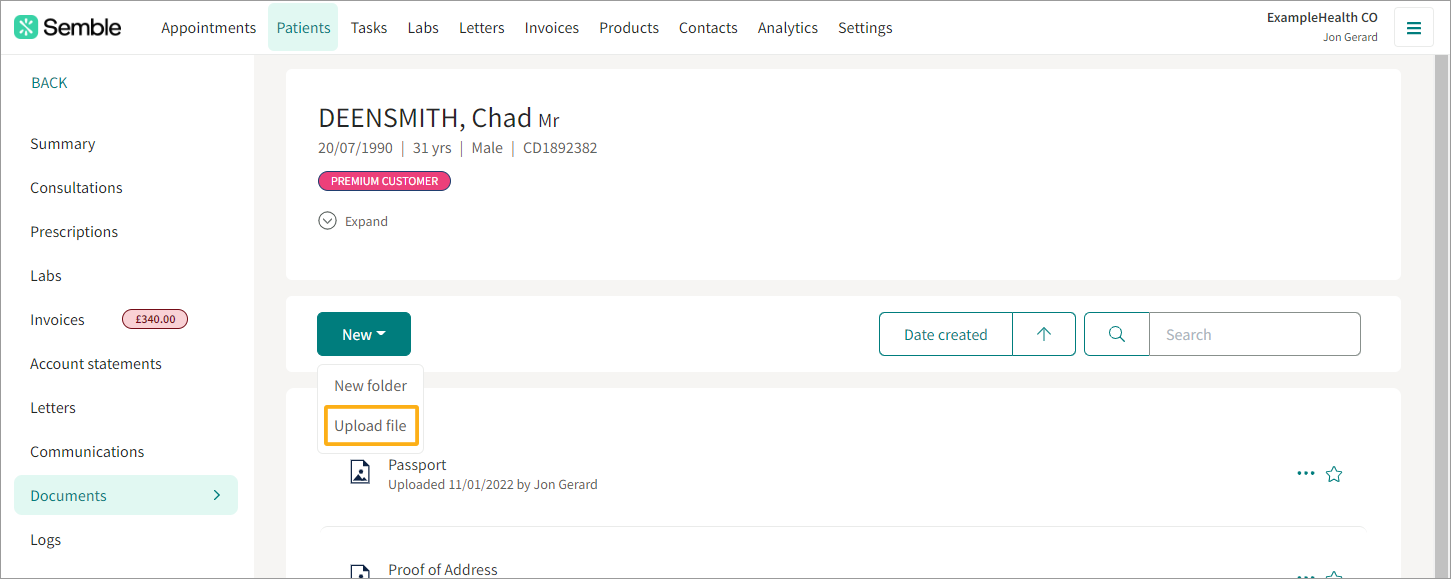
Your device's file explorer opens.
4. Select and open the document that you want to upload.
The document is automatically uploaded to Semble, and appears in the Documents tab.
Rename a Document
You can rename a patient document at any time from the Patients page.
1. Go to the patient's Documents tab in their record. For information on how to do this, see above.
2. Click the more options icon next to the document that you want to rename.
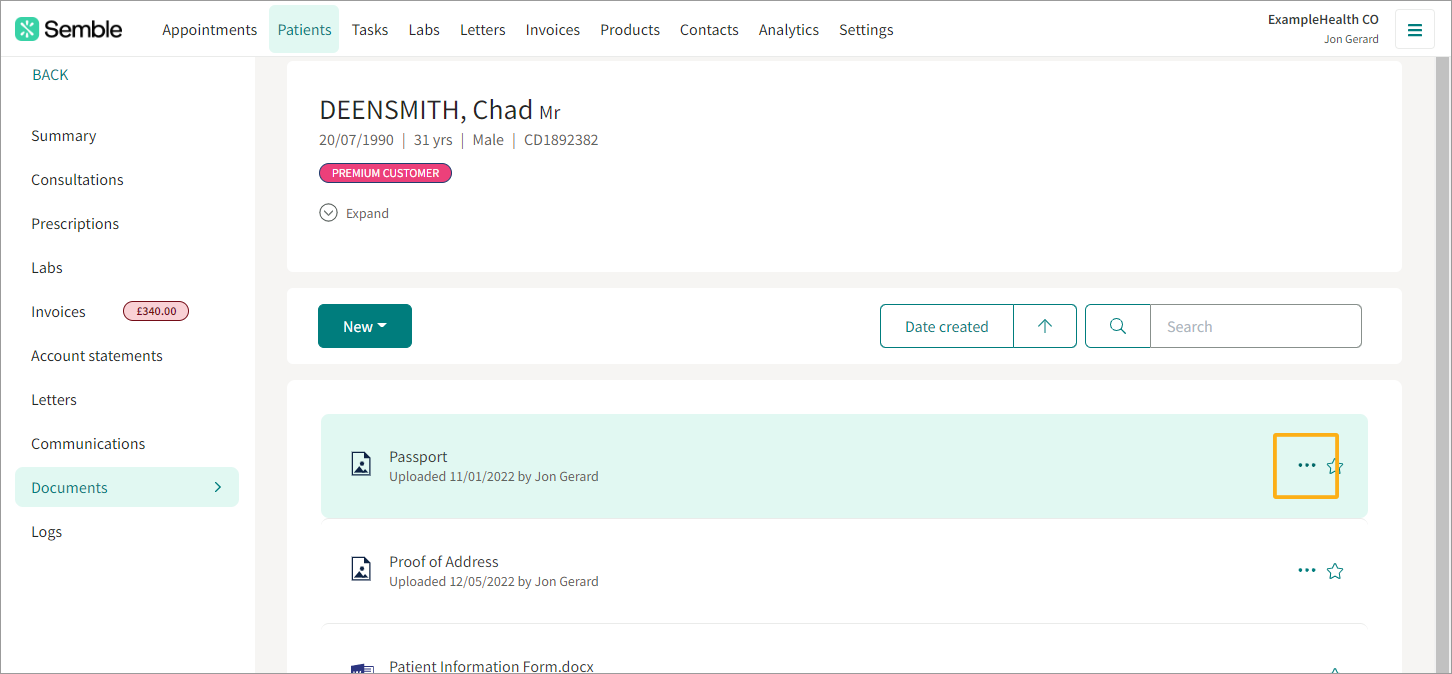
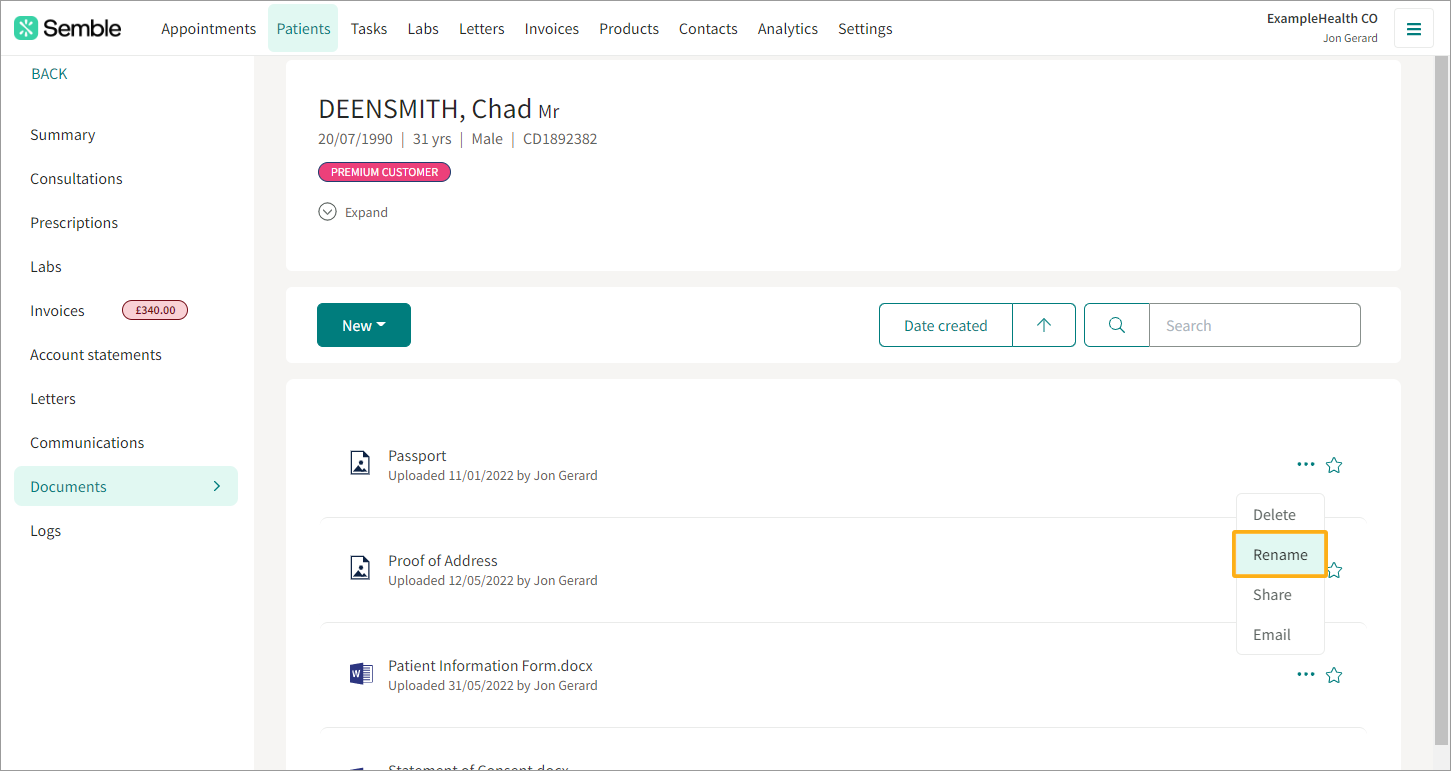
3. Select Rename.
4. Type the new name of the document.
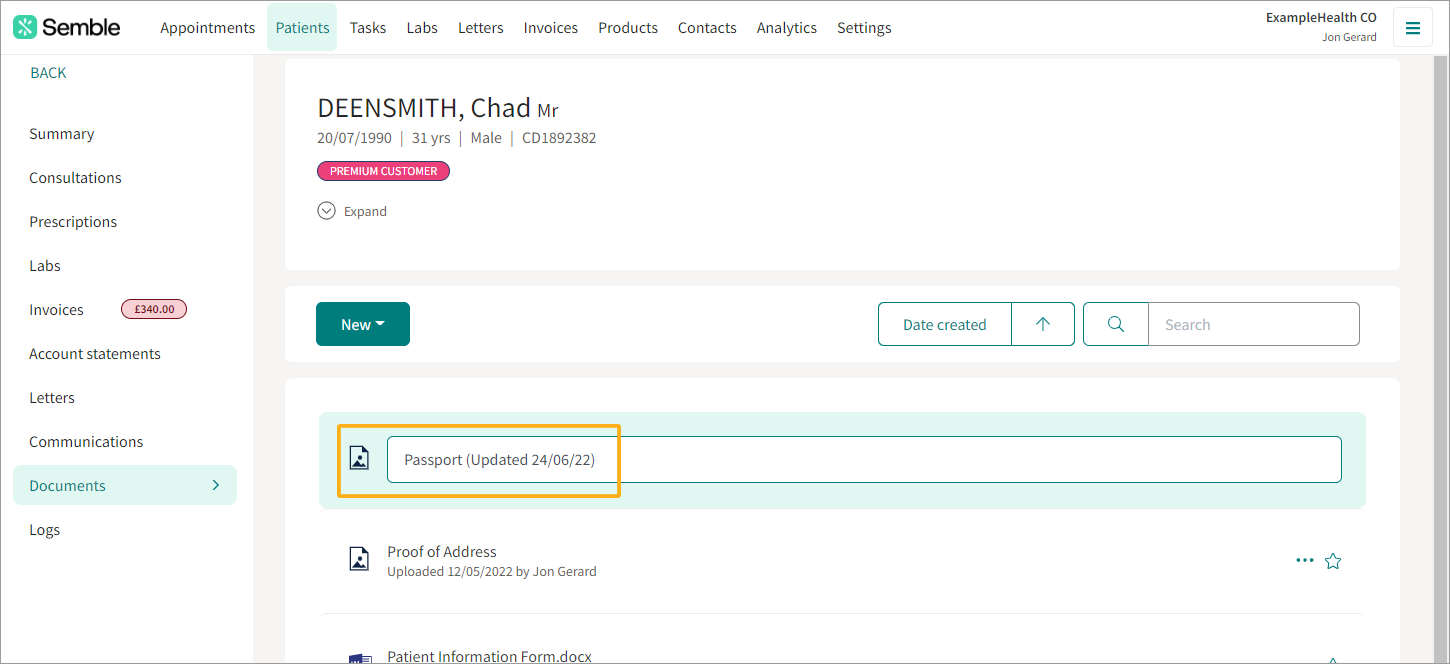
5. Press the Enter key on your keyboard.
The document's name is updated.
Delete a Document
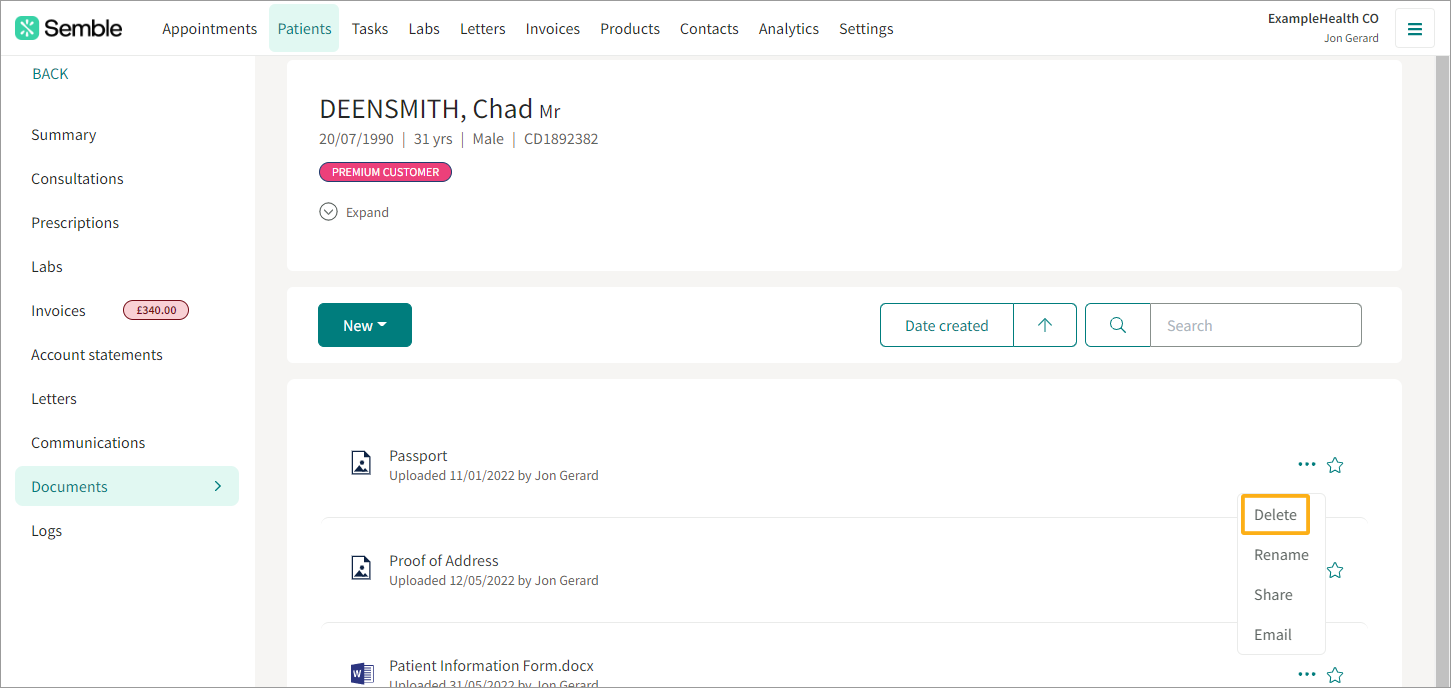
You can delete a document from a patient record at any time, from the Patients page:
1. Go to the patient's Documents tab in their record. For information on how to do this, see above.
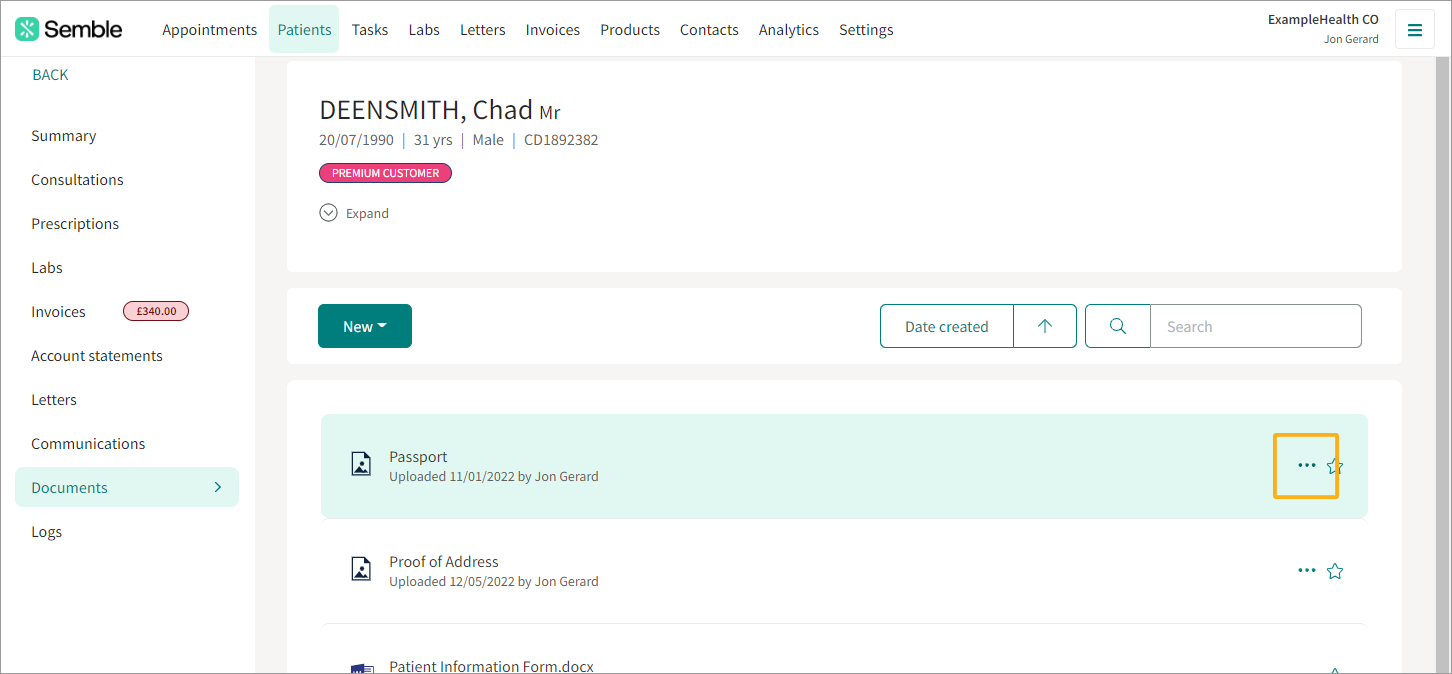
2. Click the more options icon next to the document that you want to delete.
3. Select Delete.
4. Click Delete to confirm the deletion.
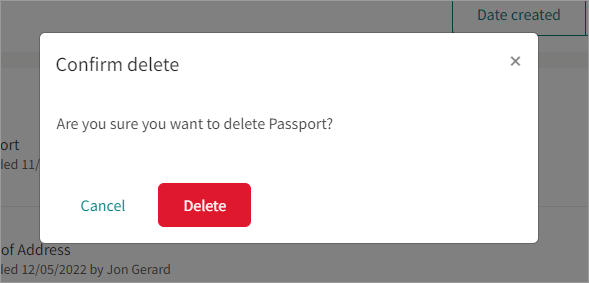
The document is removed from the patient's record.