View and manage patient letters
This article is about how you can create, view, edit, share, and print existing patient letters.
Note: To manage patient letters you must have a role that gives you editing permissions for Letters and Patient settings.
In this article:
Delete a Letter
Linked articles:
Create a Letter
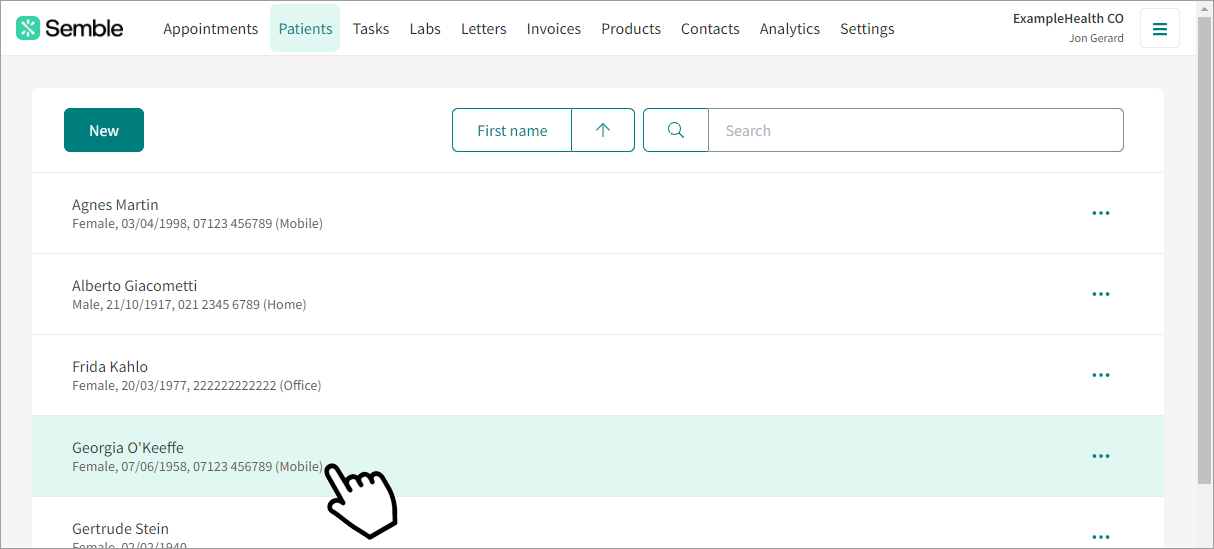
You can create a letter from the Patients page:
1. Select the patient who you want to create a letter for.
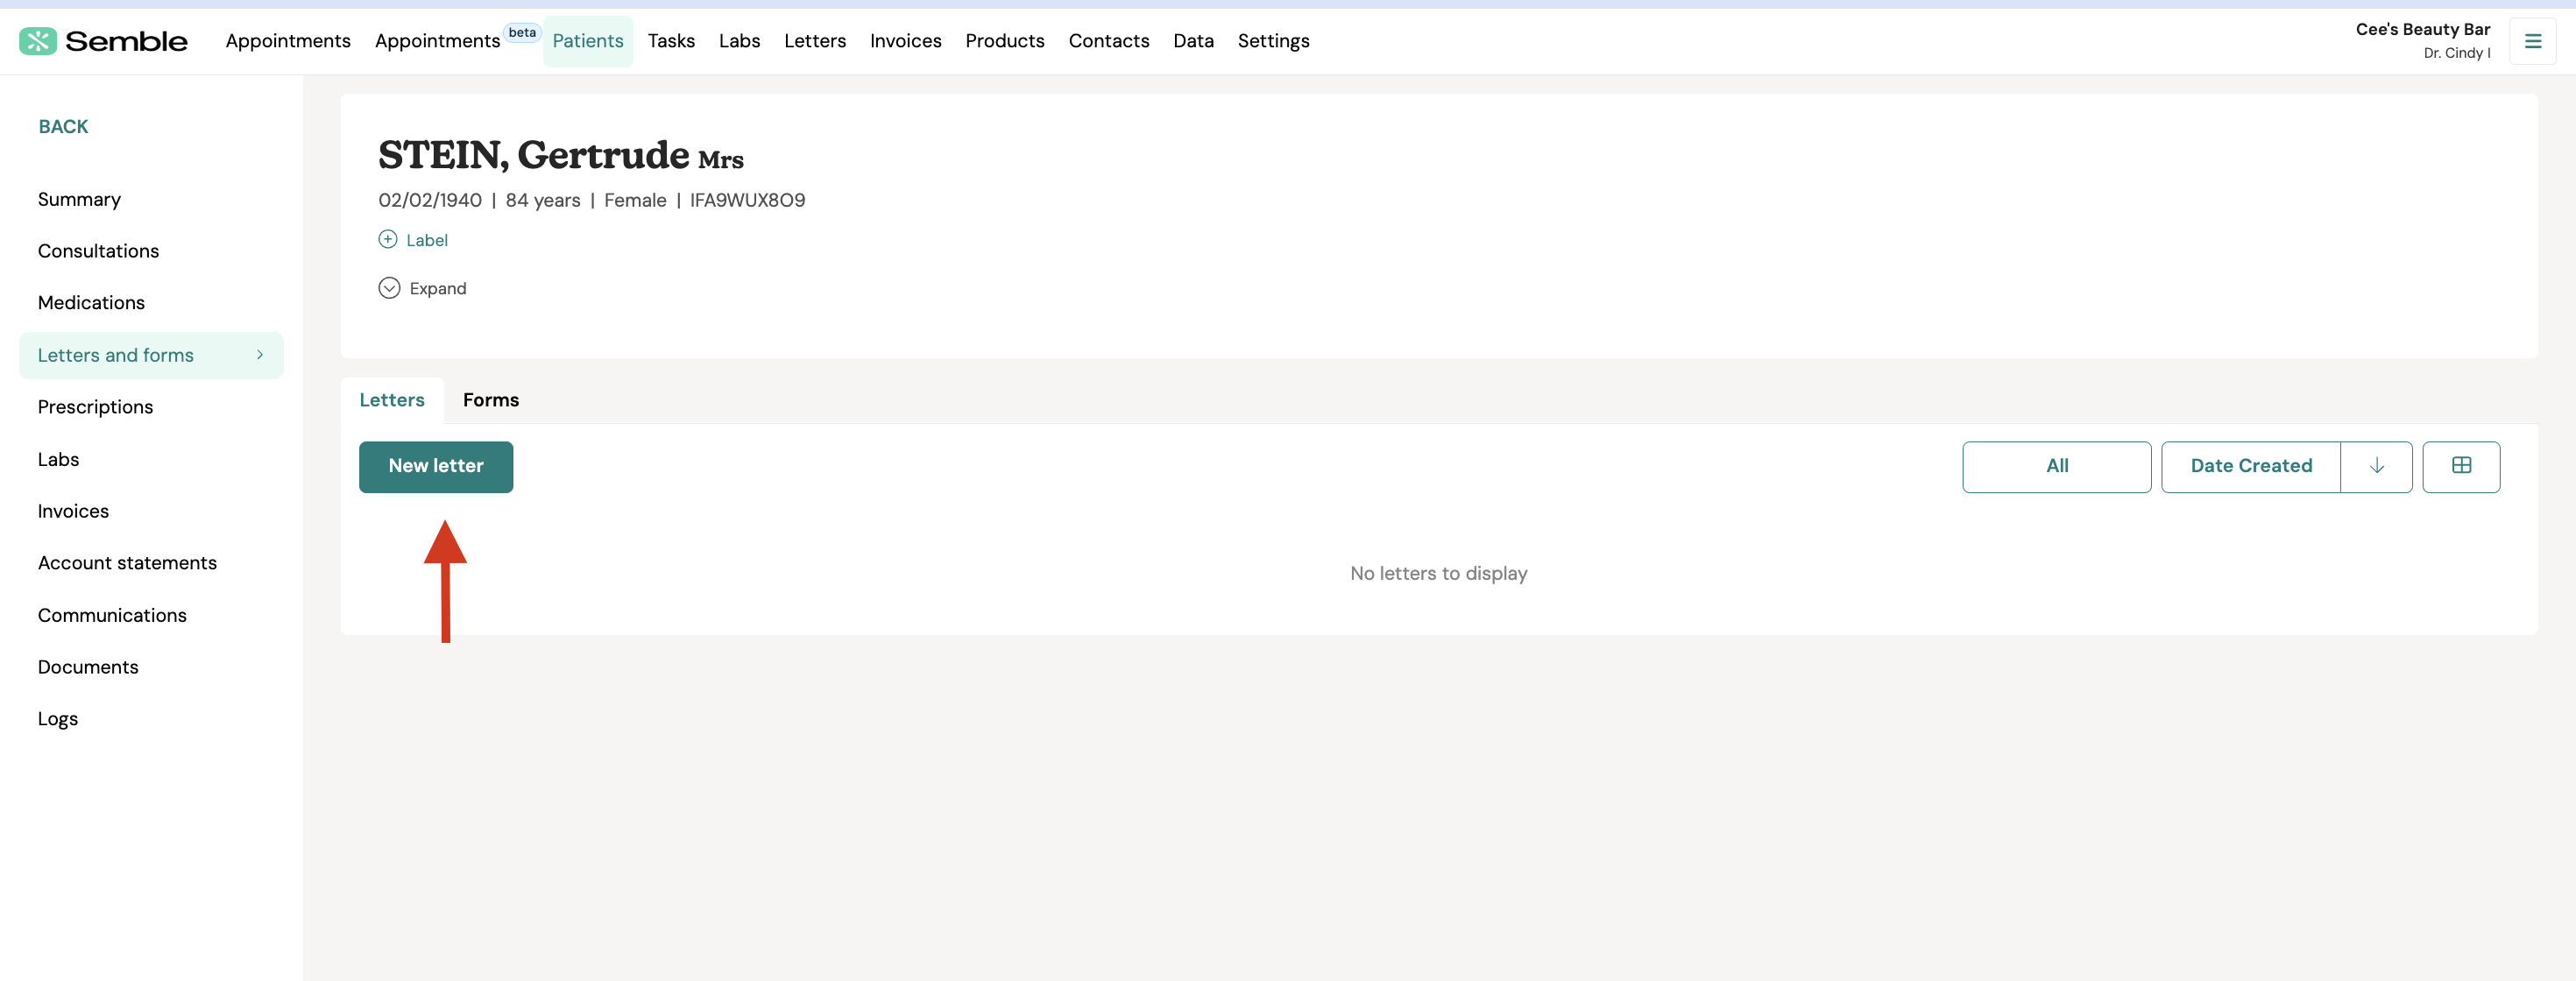
2. Go to the Letters and forms tab.
3. Click New letter.
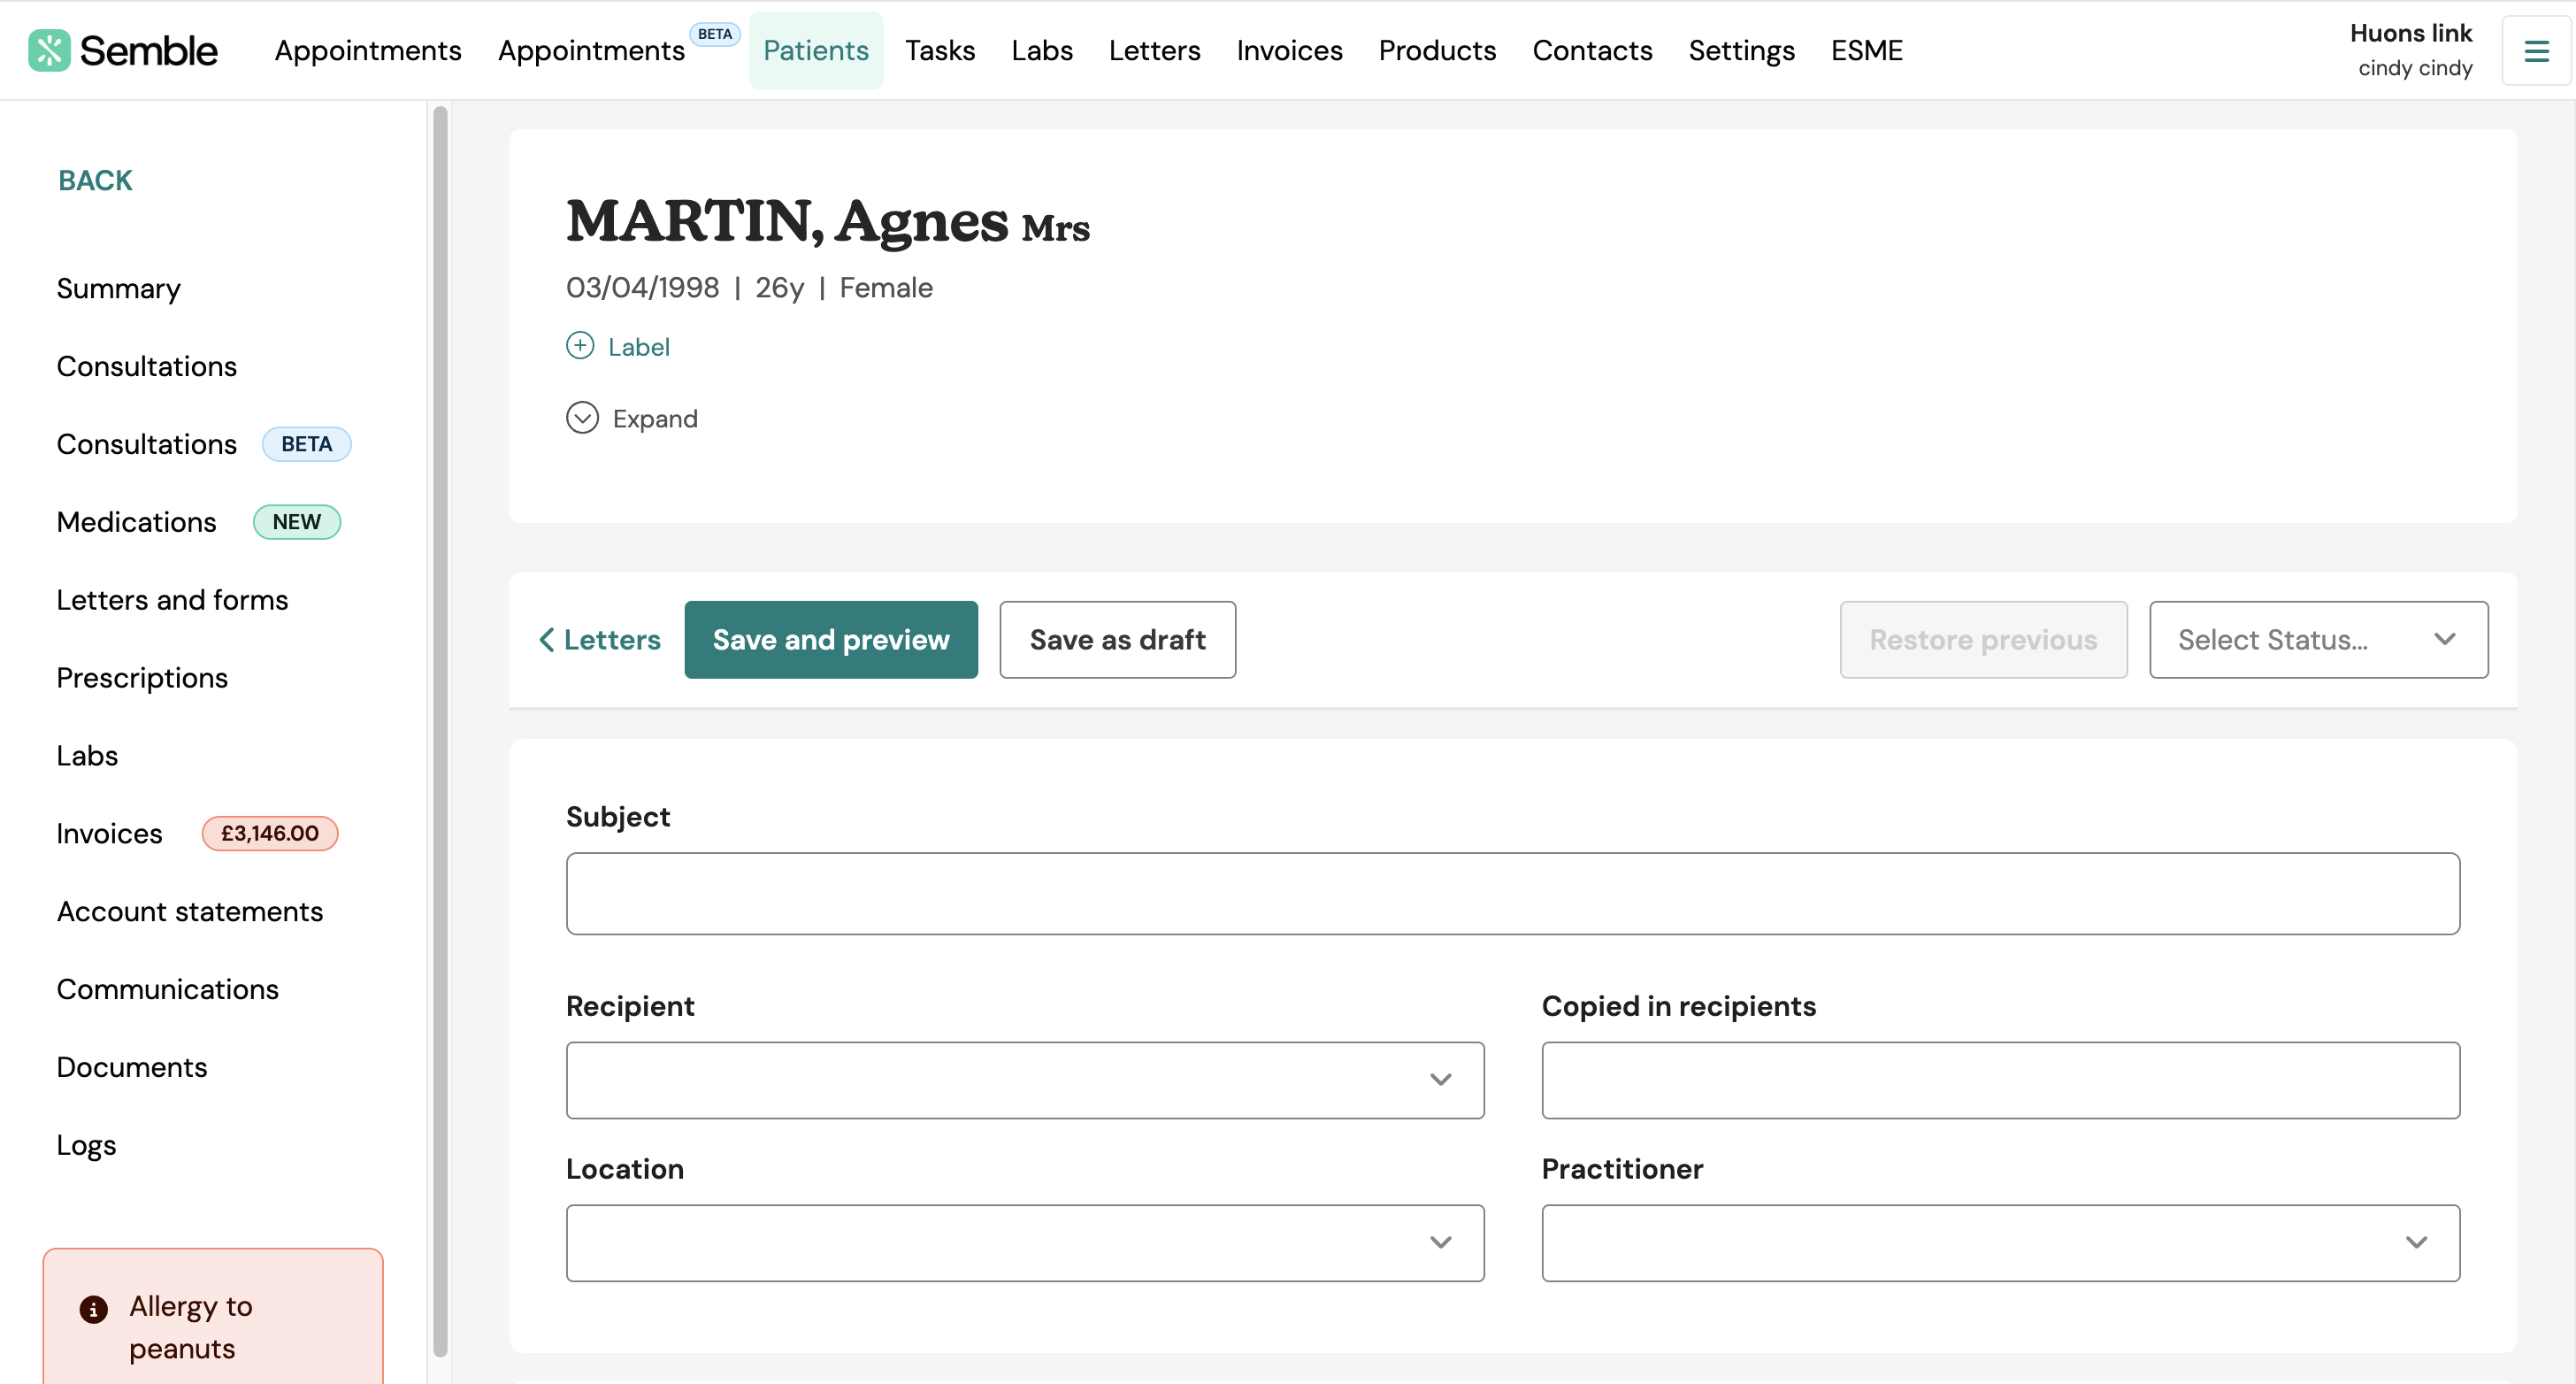
4. Enter the basic details of the letter:
-
Status (optional): Choose the draft status of the letter
-
Subject: The title of the email
-
Recipient (optional): Choose whether to send the email to an external contact
-
Copied in recipients (optional): Add the automated details of other recipients to a letter.
-
Location (optional): Include the origin location of the letter. This will not appear on the actual letter
-
Practitioner (optional): Include the practitioner associated with the letter. This will not appear on the actual letter
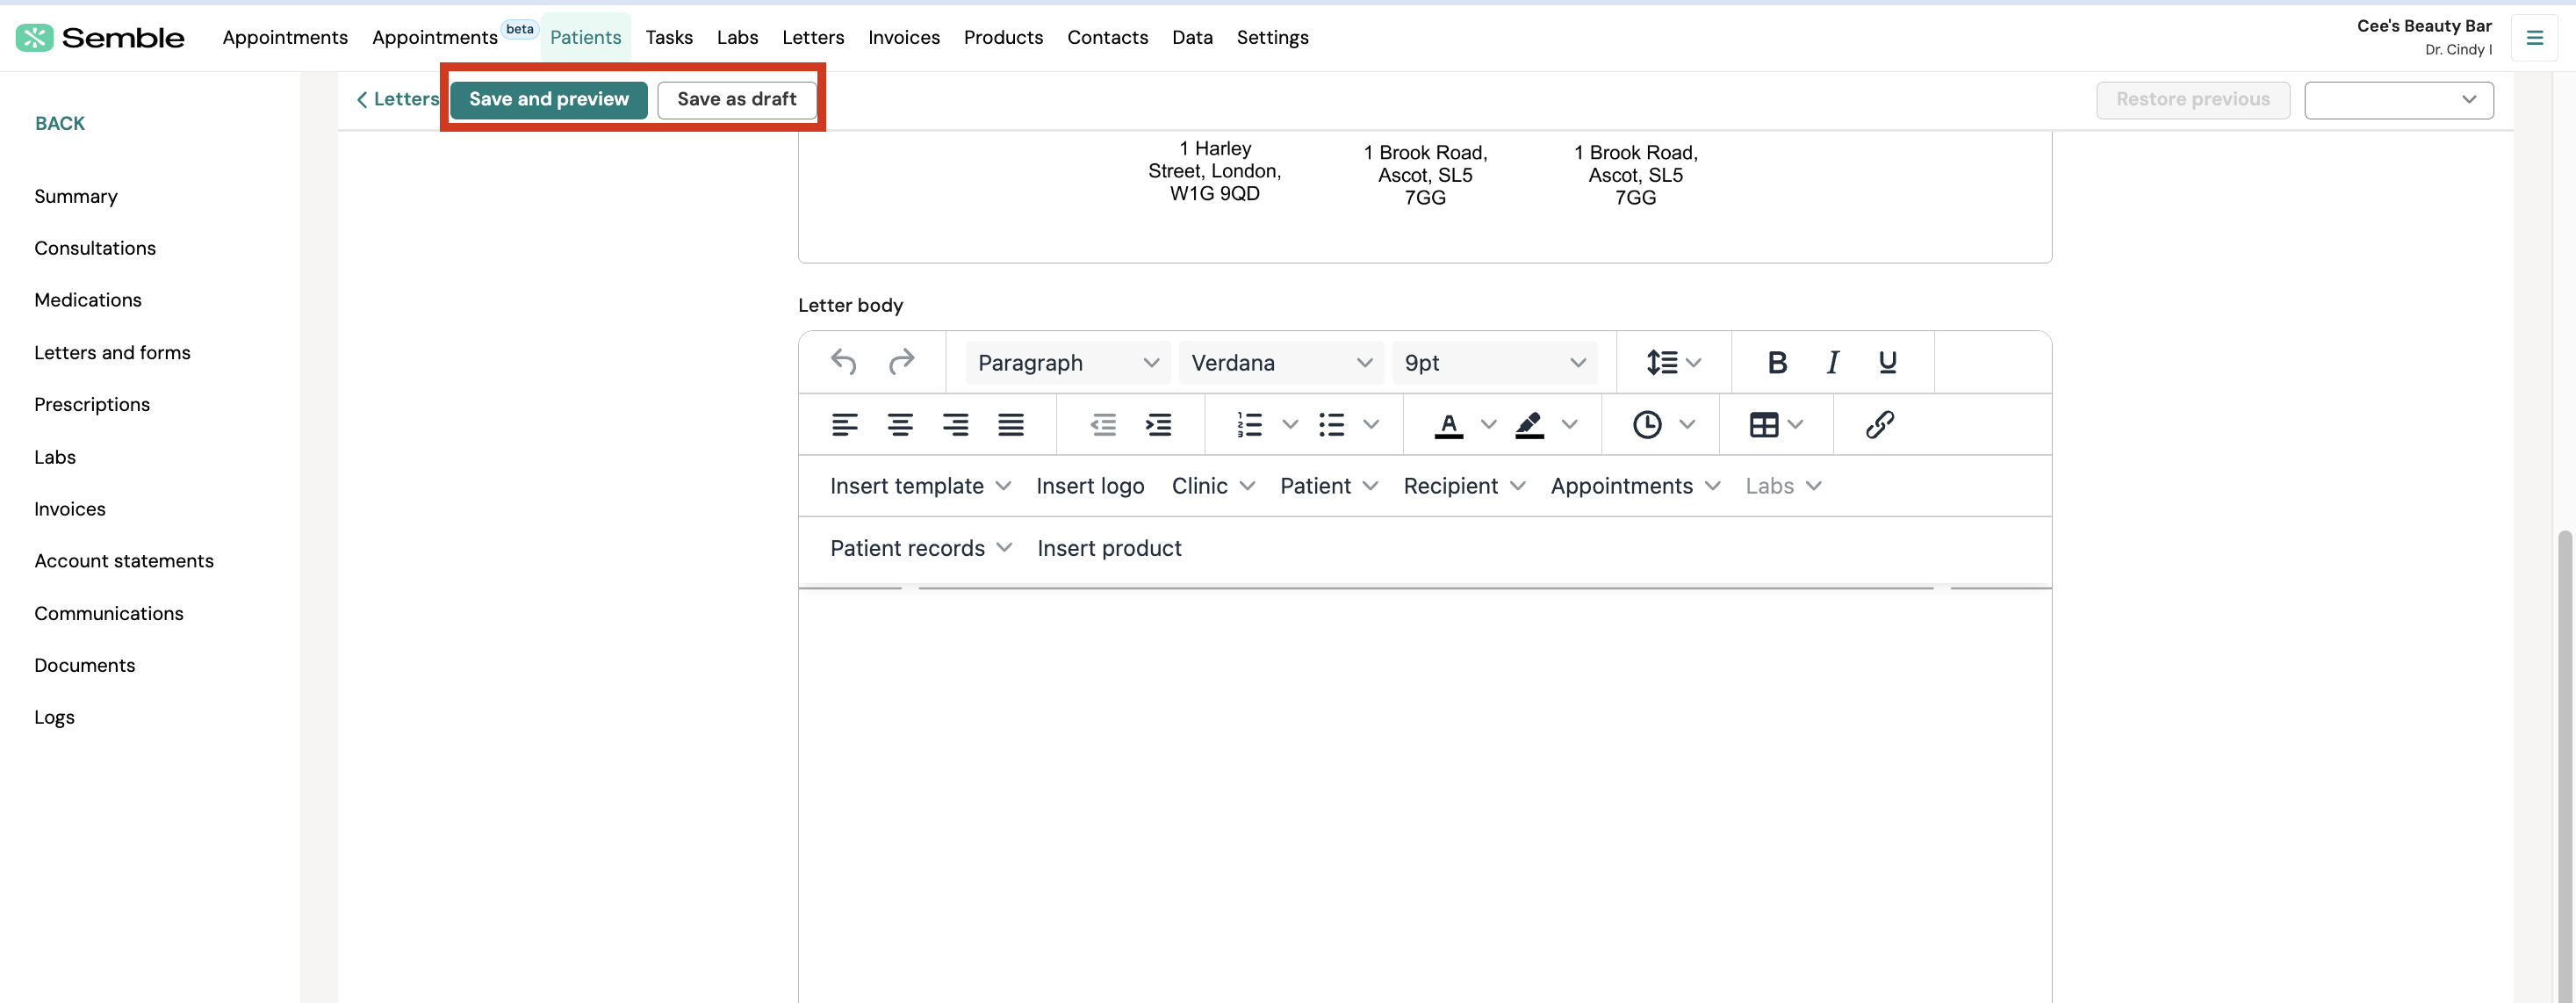
5. Choose whether you want to use a letter template, using the Insert template dropdown in the text editor.
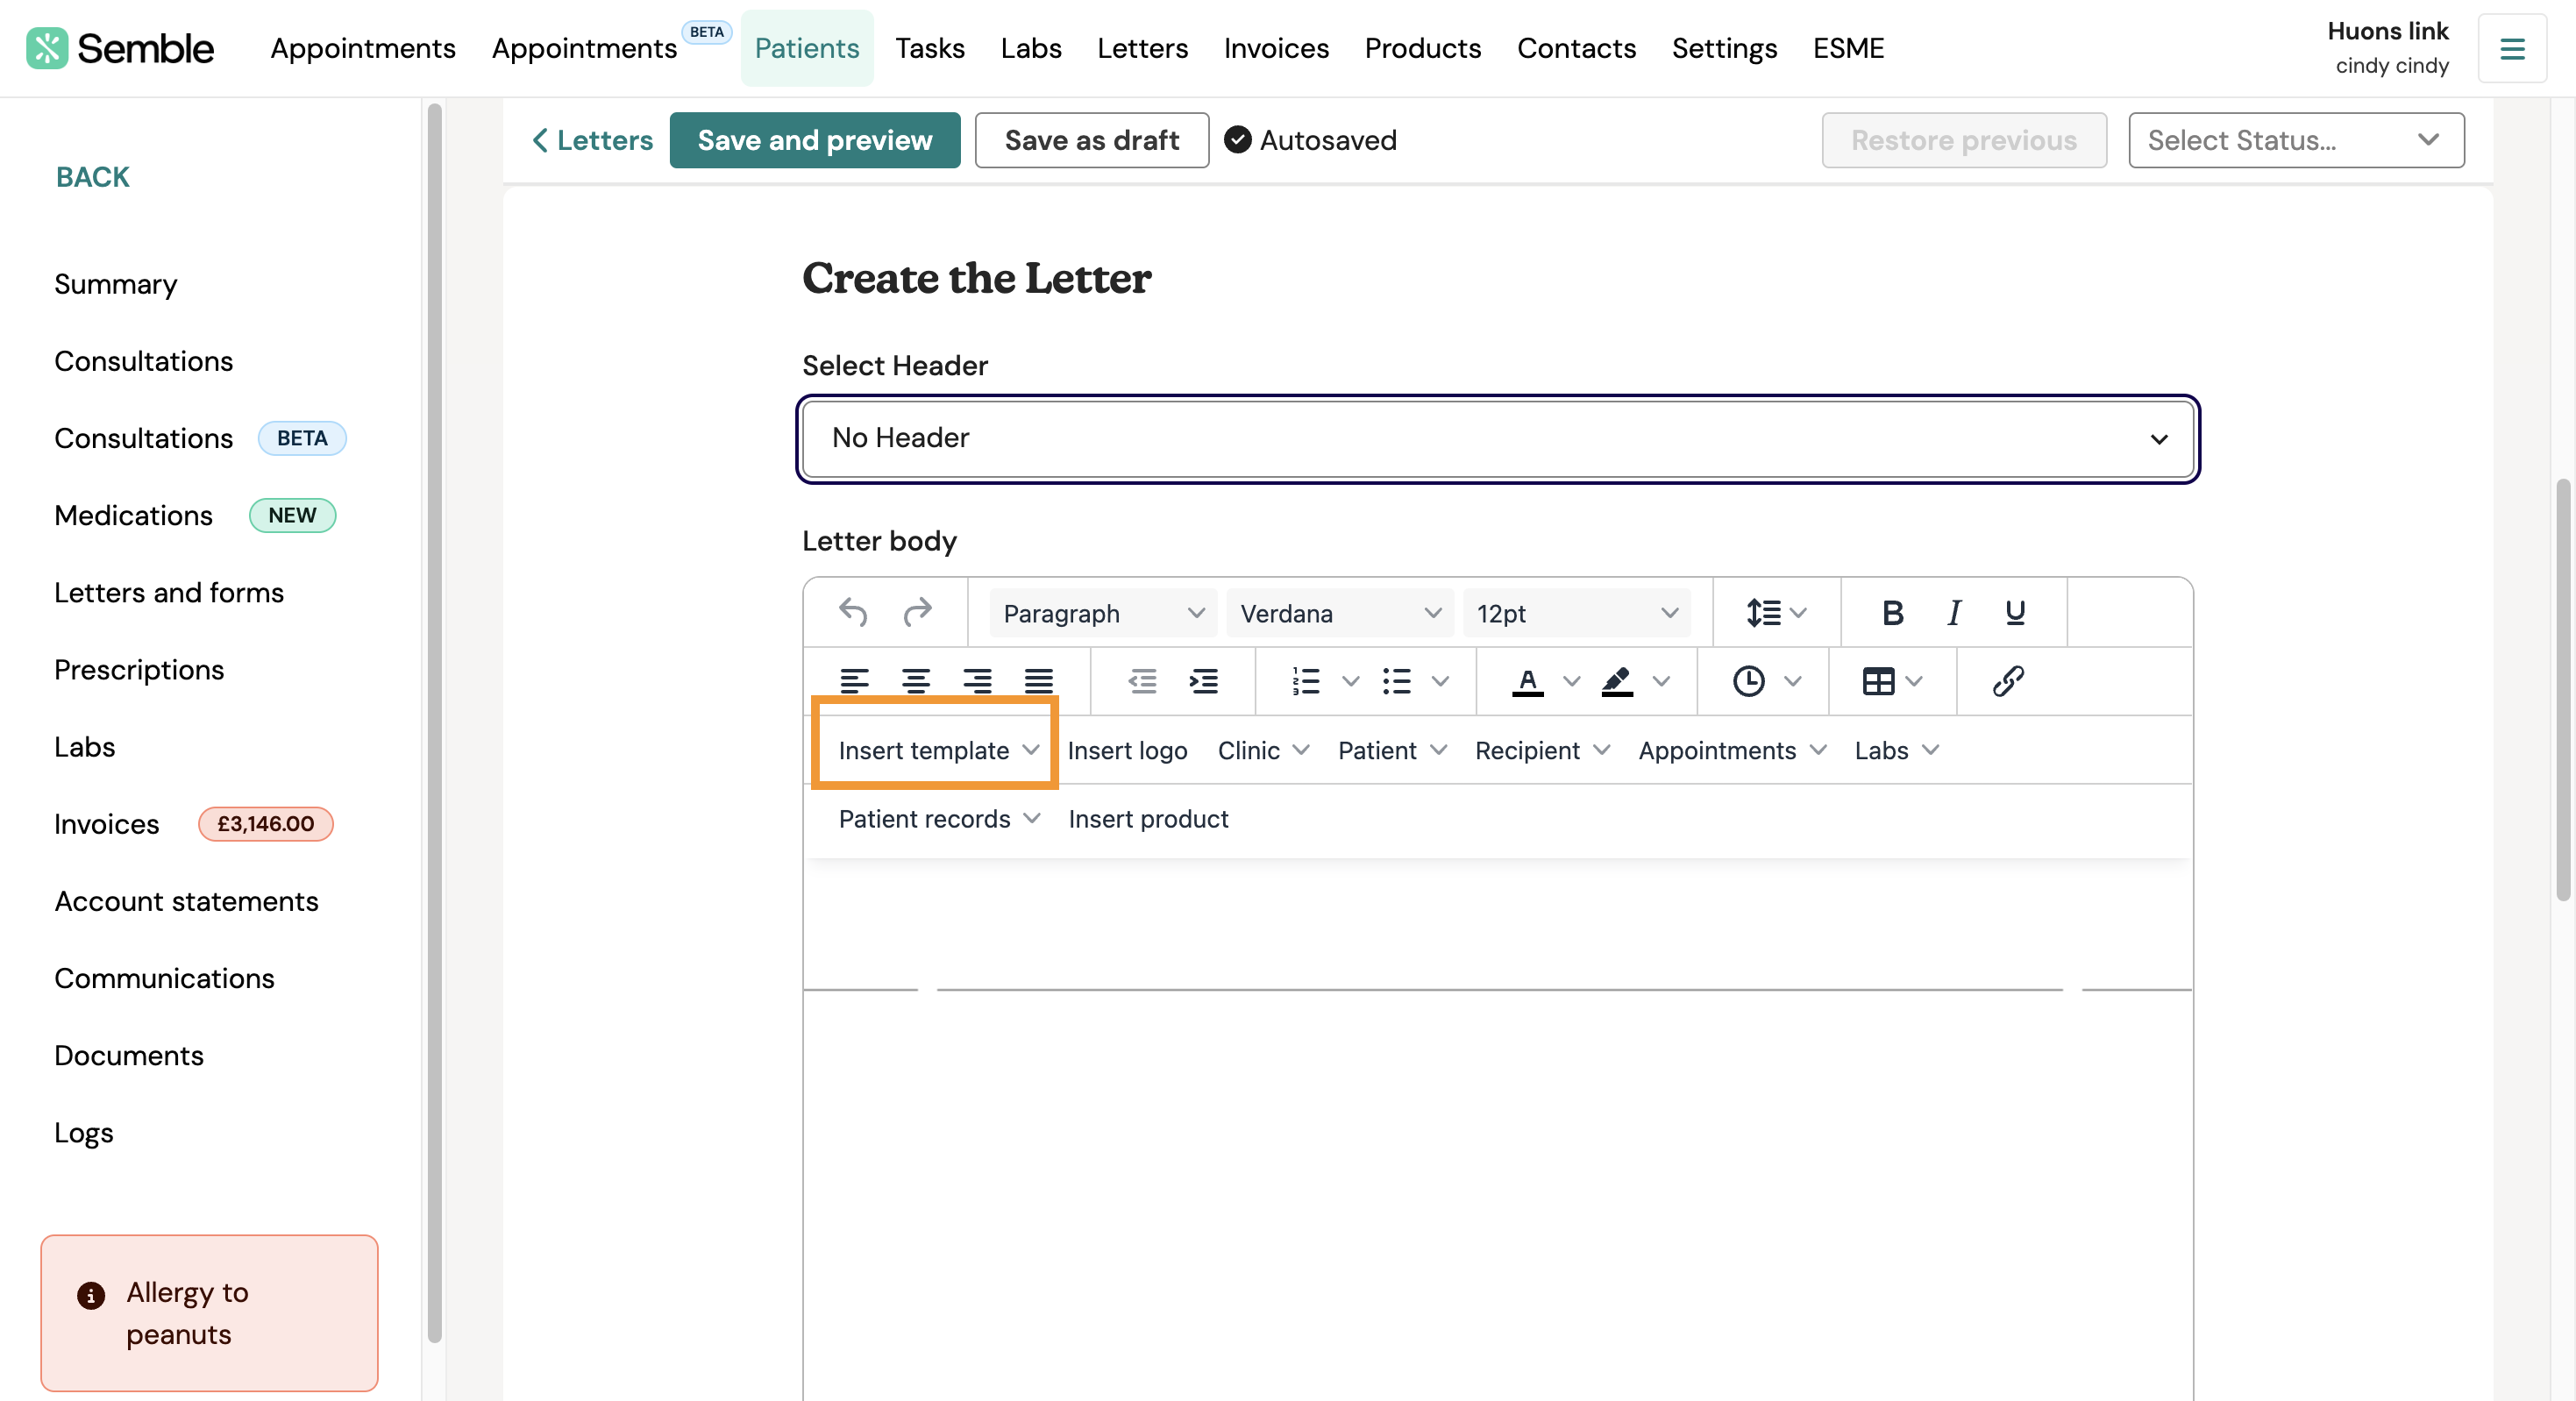
6. Write the letter by typing into the text editor. You can also insert automatic tags (such as the patient's name, and your practice's logo) by clicking the buttons at the top of the text editor.
7. Click Save and preview to preview your letter or save as a draft.
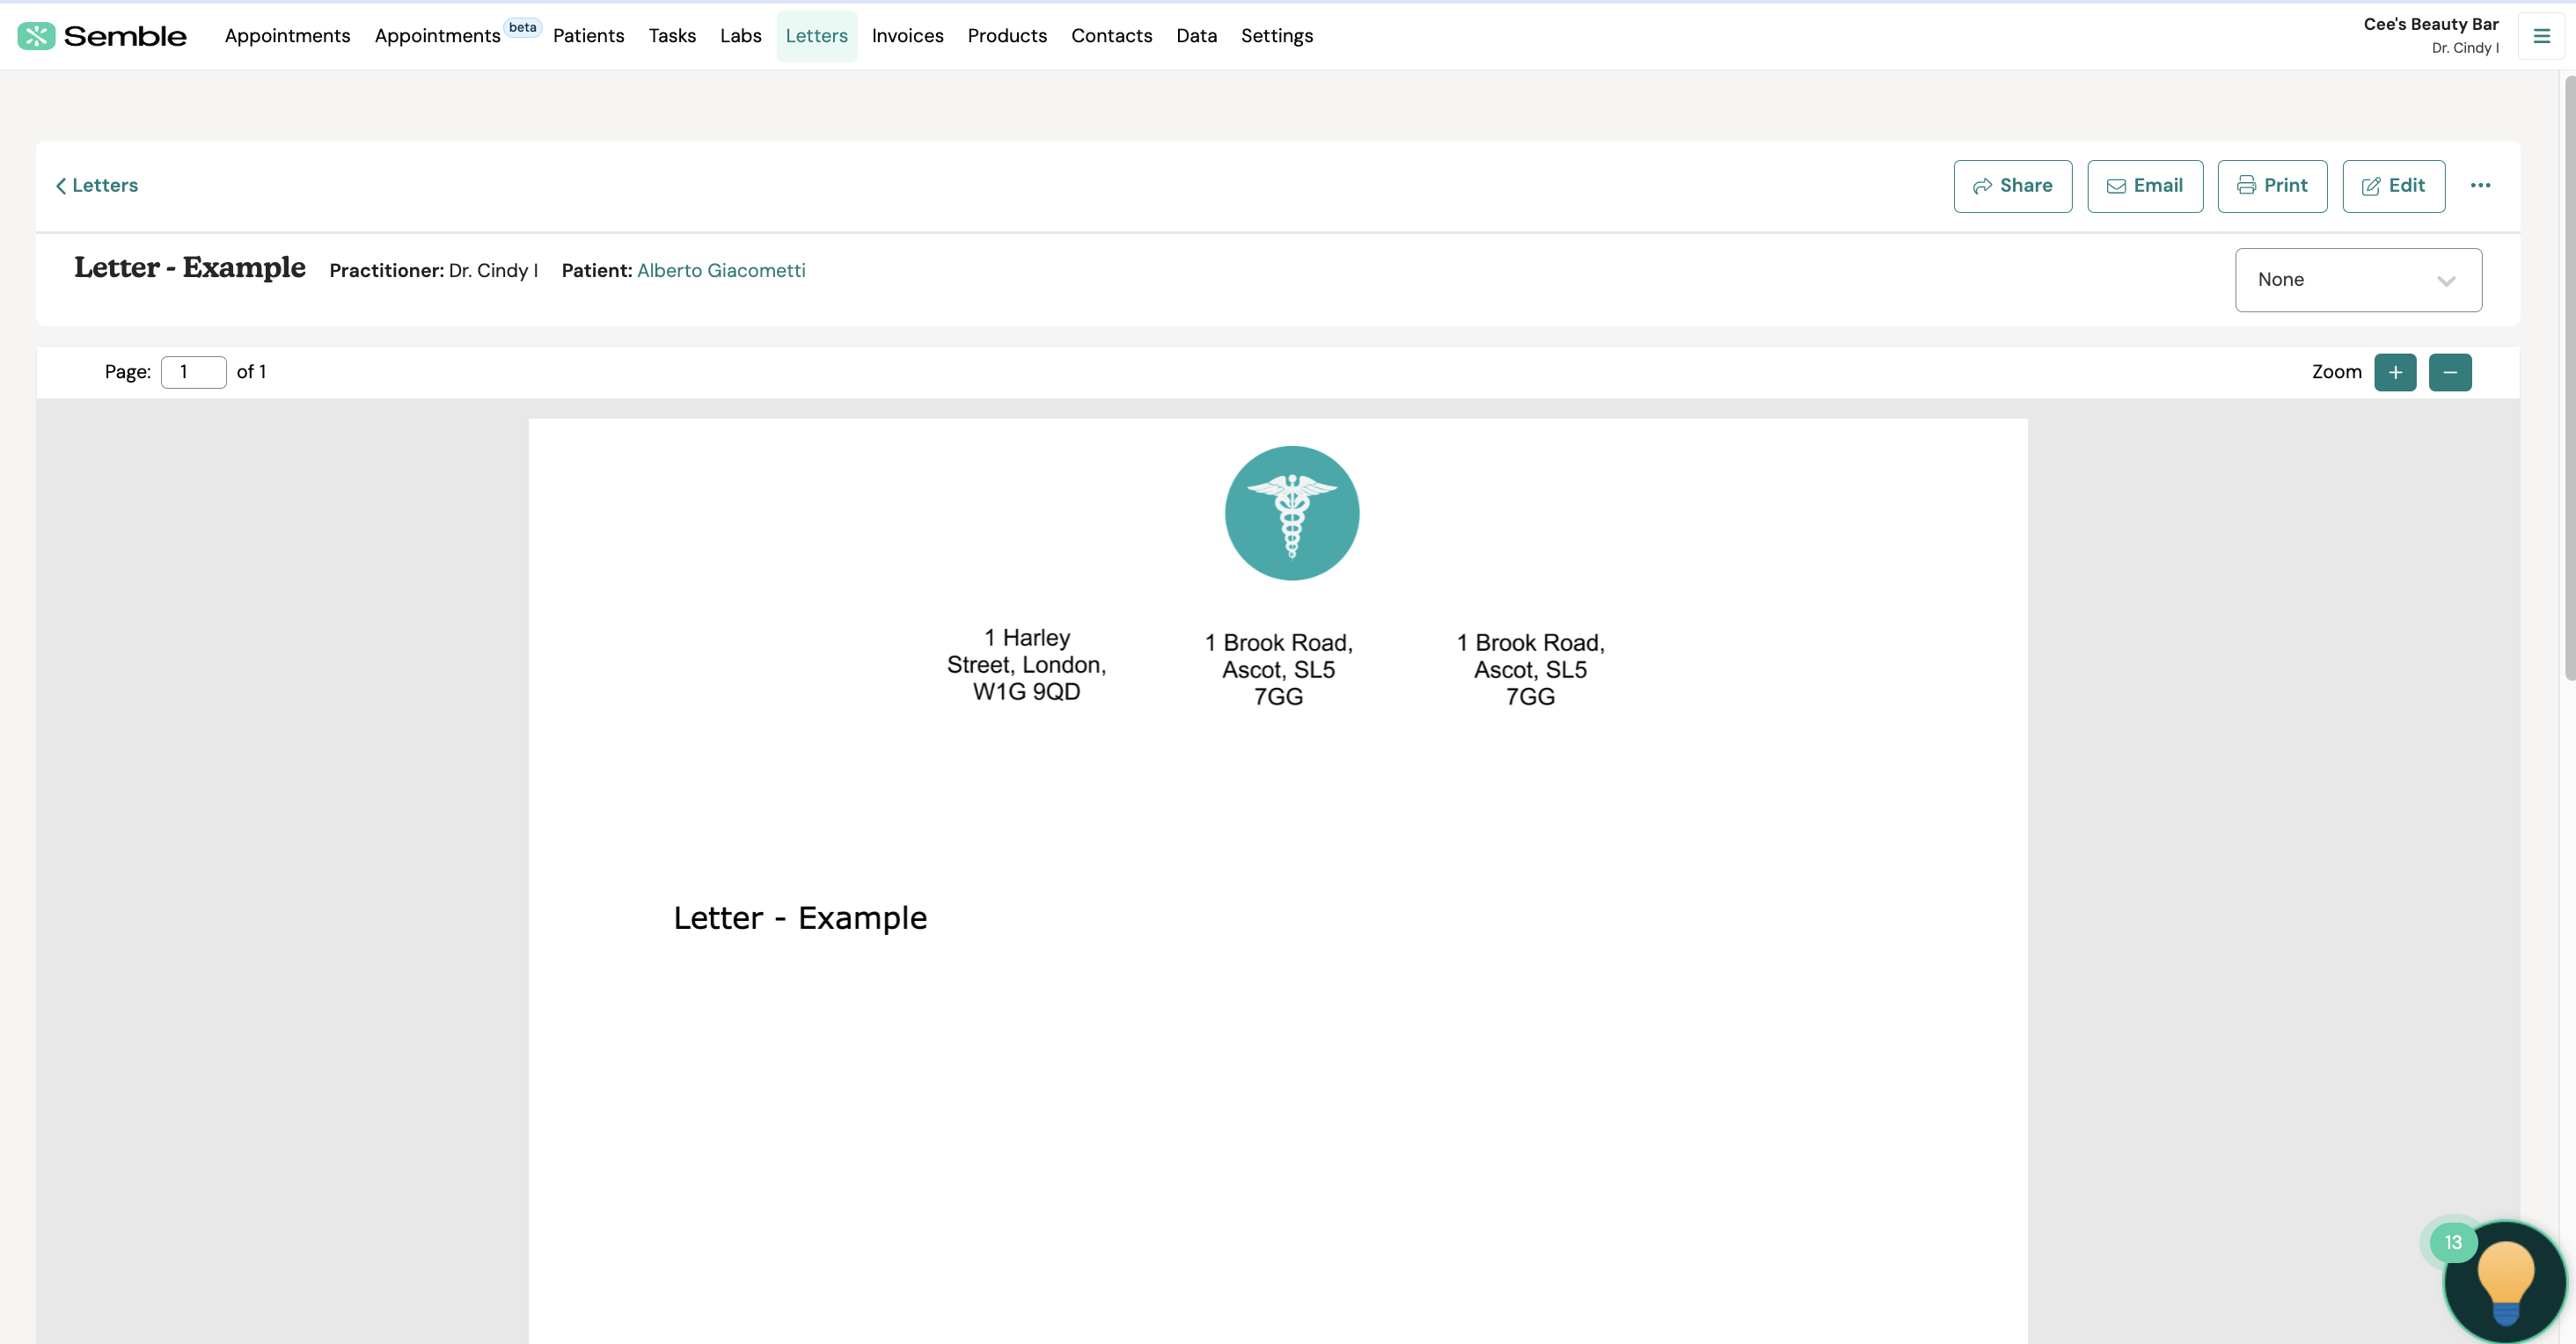
The letter now appears in the Letters tab in a patient's record, and on the main Letters page in Semble.
Edit a Letter
You can edit a letter at any time from the Letters page.
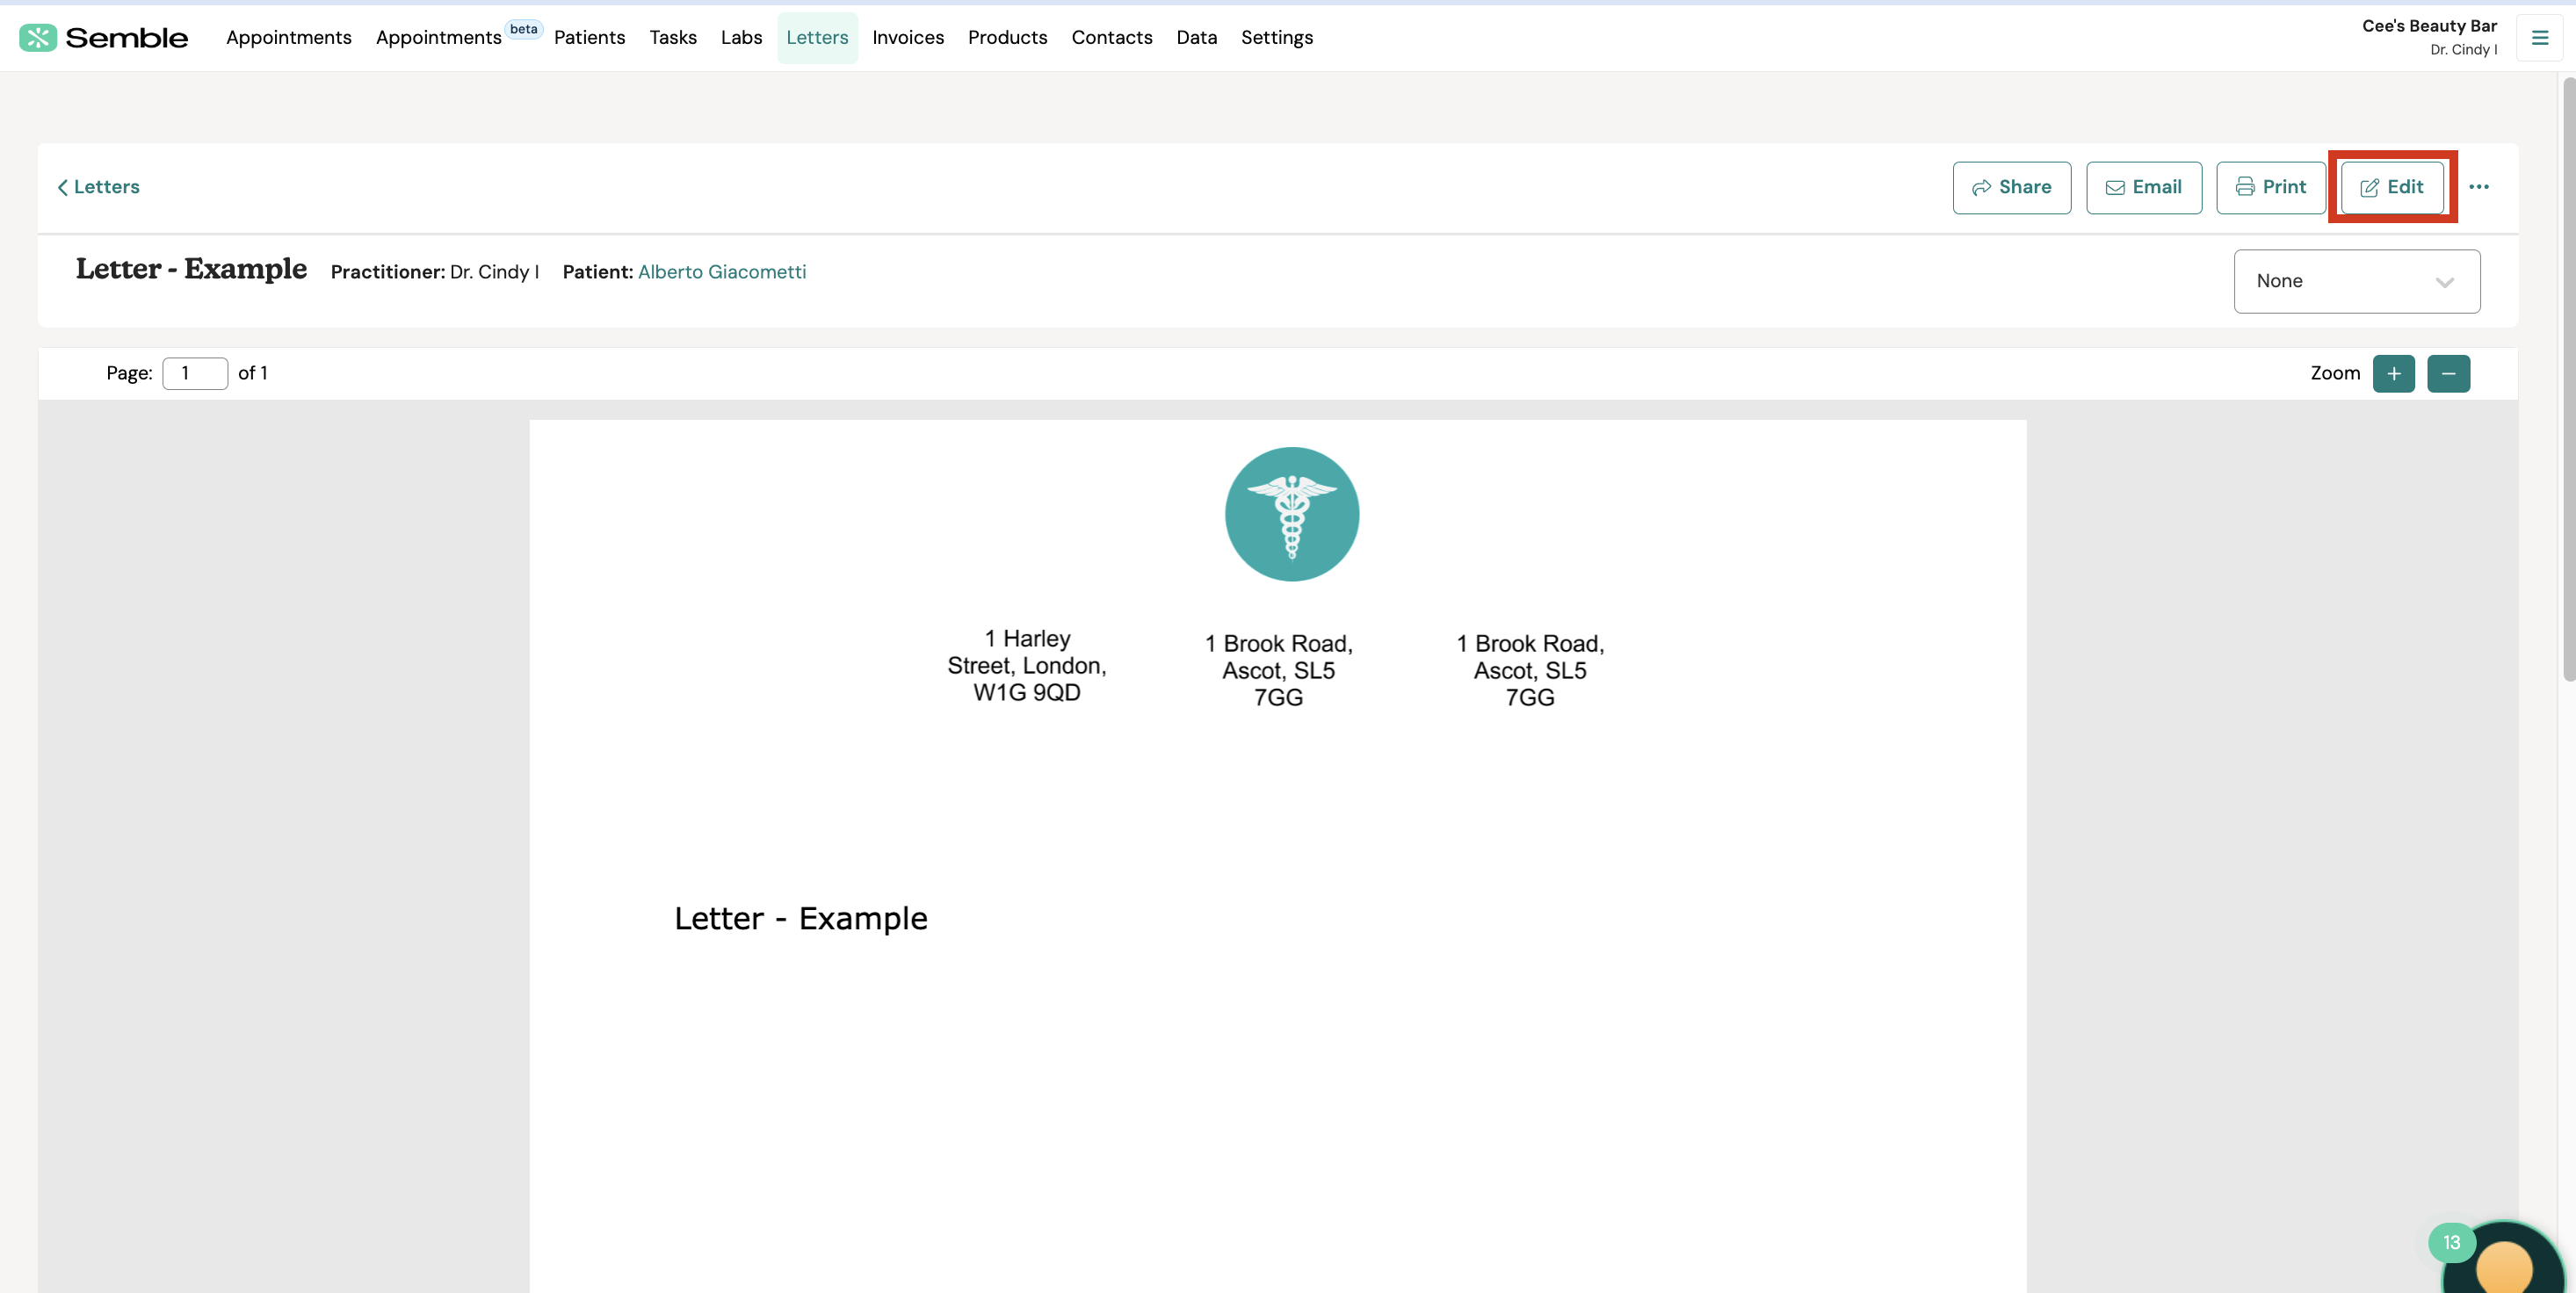
1. Select the letter that you want to edit.

2. Click the Edit button in the top right-hand corner.
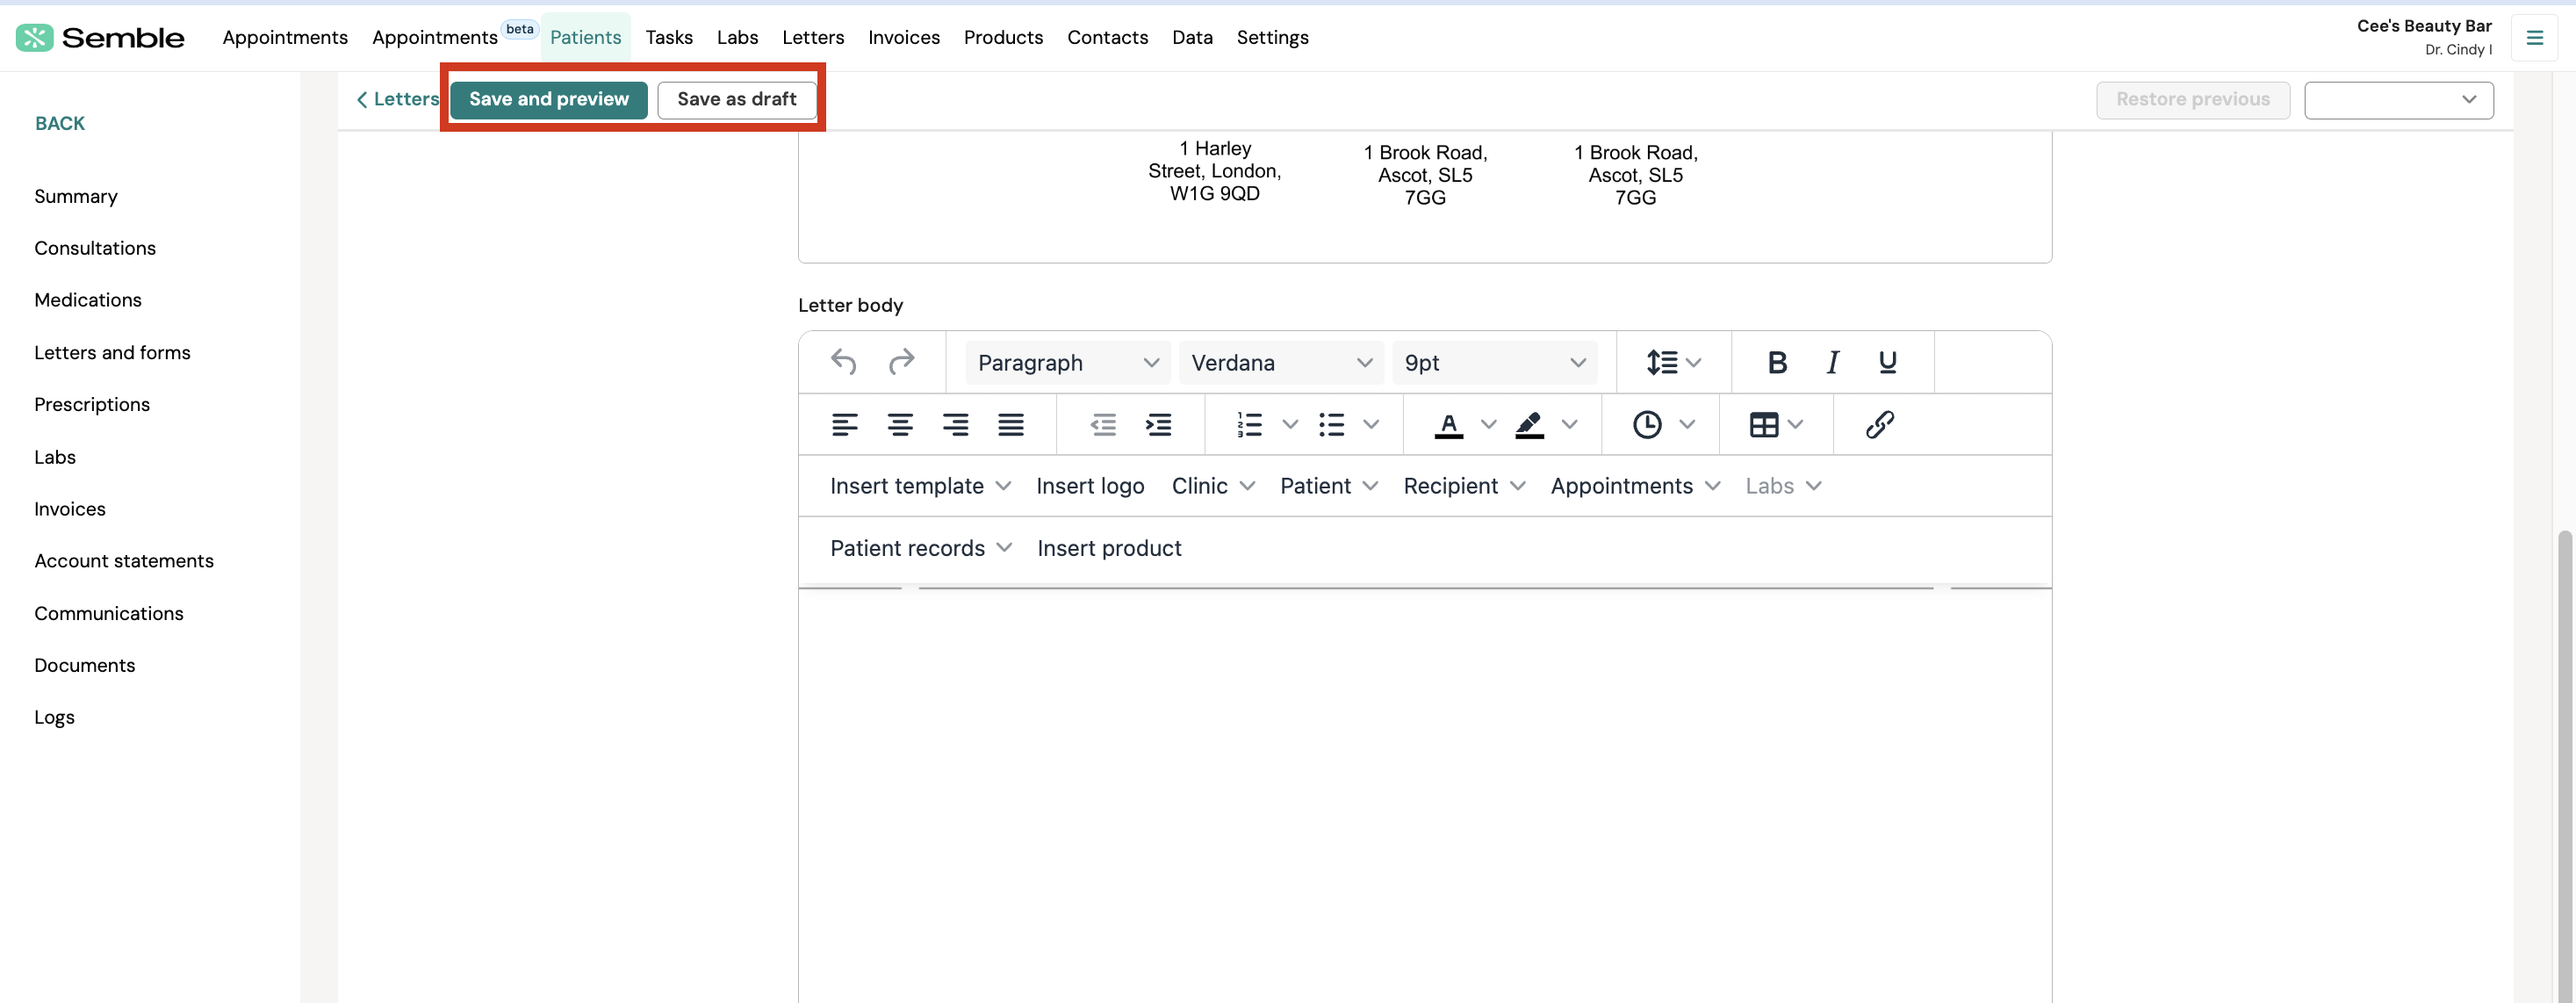
3. Make the edits you want.
4. Click Save and preview to preview your letter or save as a draft.
Share a Letter
You can share a letter at any time from the Letters page:
-
Go to the Patient's file and navigate to the document or letter you wish to share within the patient's profile (eg: Invoices, Documents, Prescriptions, Letters and Forms). Click on the "Share" Button located at the top of the document page.
2. Tick the checkboxes next to the documents you want to share. You can use the search bar to filter documents by type (e.g., letter), document name, or date to find what you need quickly.
You will see the most recent viewed documents for this patient however you can click on "More documents" to see all documents for this patient.
3. Select the recipients you want to share the documents with. You can choose multiple recipients.
You can only share documents with recipients linked to a patient’s relationships and emergency contact list or contacts stored within your practice. They must have a valid email. You are no longer able to free type email addresses. This setup ensures secure sharing of sensitive information.
4. Decide whether to share the documents via a secure link or as an email attachment.
5. Preview the content (optional)
Click the “pop out” button to view the sharing panel and document side by side. This lets you easily scan through documents and drag and drop what you want to share.
Note: Ensure that your clinic has emailing/sharing enabled in your general settings.
Print a Letter
You can print a letter at any time from the Letters page:
1. Select the letter that you want to print.

2. Click the print button in the top right-hand corner.
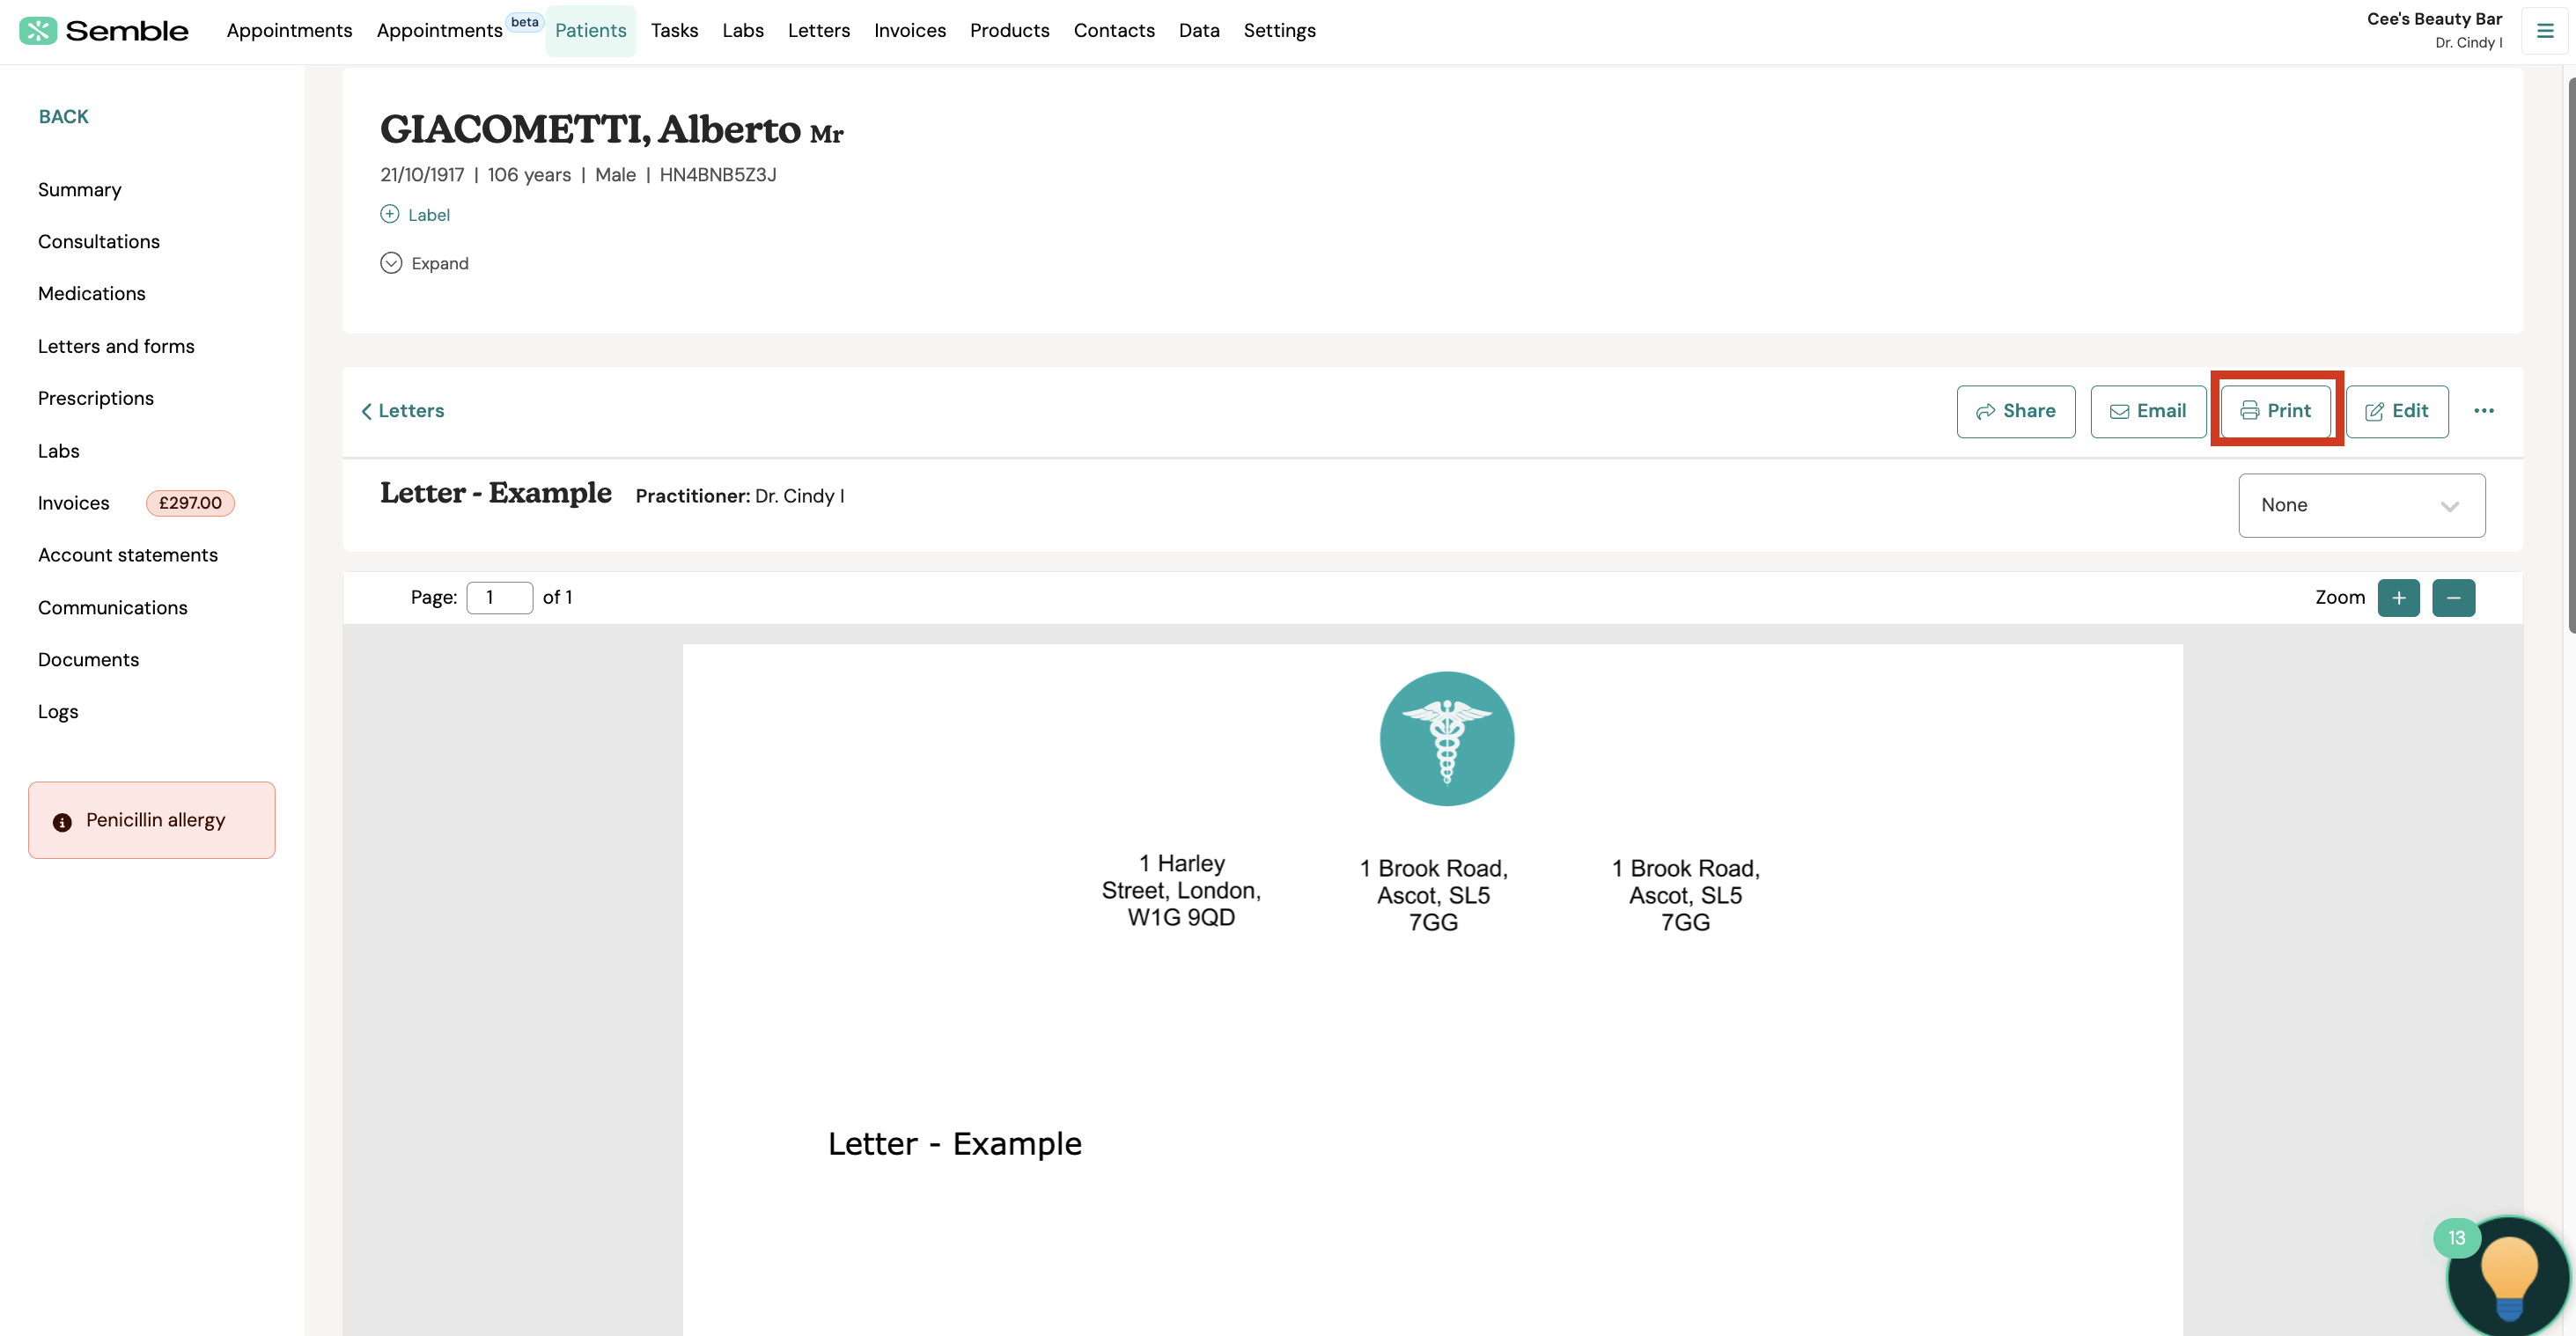
A new tab opens the letter as a PDF.
3. Print the PDF as you normally would.
Delete a Letter
You can delete a letter from any time from the Letters page:
1. Click the more options icon next to the letter that you want to delete.

2. Select Delete.
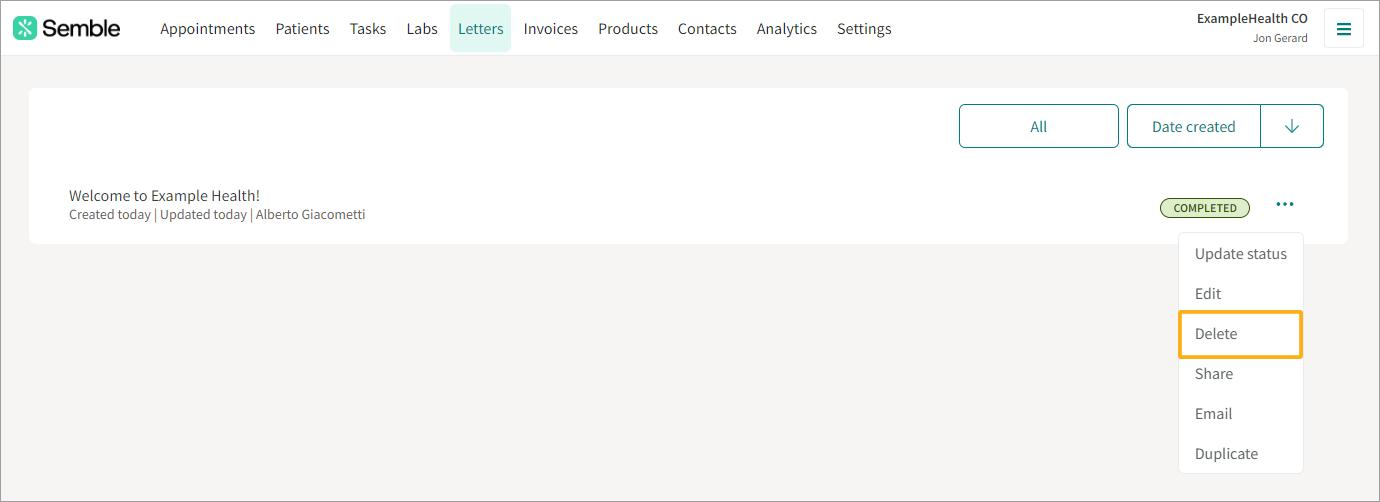
3. Click Delete to confirm.
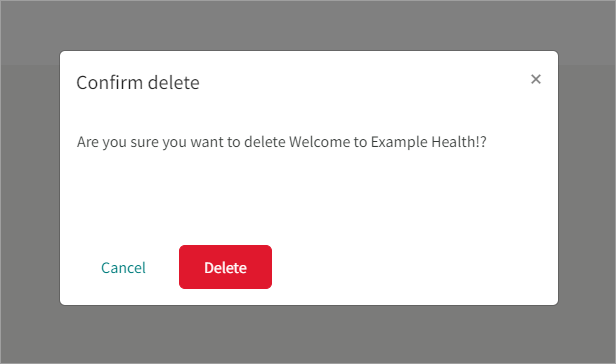
The letter is deleted from Semble.


