
This article describes how to manage the patients in your practice.

Note: To create, edit, or delete a patient, you must have a role assigned to you that gives you editing permissions for Patients.
In this article:
Print Patient Labels or Summary
Managing Patient Reproductive Health
Linked articles:
Overview of Patient Questionnaires
Overview of Consultation Notes
Create a Patient
You can create a patient at any time from the Patients page:
1. Click New.

2. Fill in the basic details of the patient, such as name and date of birth.

3. Enter the contact details of the patient.

Note: It is recommended that you add an email address for the patient as many other features (such as confirmations and reminders) rely on a patient having an email linked to their record.
4. (Optional) Fill in any additional information such as occupation or religion under the More details section.
5. (Optional) Click Add relationship to link an external contact or insurer to the patient.

6. Select the communication preferences of the patient, and whether they have accepted your practice's privacy policy or not.

7. (Optional) Fill in any billing and card details the patient has.

8. (Optional) Enter any additional ID numbers for the patient under the ID numbers section.
9. Click Save.
The new patient appears in the Patients page.
If you'd like to add any field to the patient's form, you will need to create a Custom Patient ID. For more information click here.
Edit a Patient
You can edit a patient's details at any time from the Patients page:
1. Select a patient.

2. Click the edit icon in the top right-hand corner.

3. Make the edits you want.
4. Click Save.
Delete a Patient
You can delete a patient from your practice at any time from the Patients page:
1. Select the patient you want to delete.

2. Click the more options icon in the top right-hand corner.

3. Select Delete.

4. Type the full name of the patient.
Note: Make sure to include any capital letters, spaces, and special characters. If you are unsure, copy and paste instead of manually writing.

5. Click Delete to confirm.
The patient and all their documents are permanently deleted from Semble.
The patient will be permanently removed from your Semble system. If the deletion was accidental, you can still generate a Patient report to retrieve a list of all patients (existing and deleted) and manually recreate the deleted profile.
Archive a patient
Currently, it is not possible to archive patients on Semble. However, as an alternative, you can create and assign labels such as Discharged, Archived, or Inactive to help manage patient records.
For more information on how to create and use labels, please see our guide here: Overview of Patient Labels.
Mark a Patient as Deceased
If you need to mark a patient as deceased in Semble, follow these steps:
1. Go to the relevant patient's file.
2.Click on the Edit button to edit the patient's file.

3. Scroll down to the "More Details" section and tick the box labeled "Deceased".
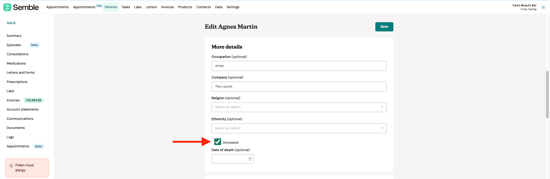
4. Once you tick the box, you will be prompted to enter the date of death.

5. After entering the date, you will see that the patient is marked as deceased when accessing their file.

Note: Marking a patient as deceased does not stop you from performing any other actions in Semble related to that patient.

Blocking a patient will prevent users from booking appointments for them via the Appointments page. However, please note that this will not stop the patient from booking online.
Print Patient Labels or Summary
You may wish to print a label for your patient with some basic personal details or their summary, to do this kindly follow the below steps.
Kindly click into the patient file that you wish to print a label for then click the printer button in the top right hand corner and select "Label or Summary":

Then select the details that you wish to have on your label and click "Print"

You will then be able to see the below window open which will allow you to print your label:


Export Full Patient Data
To do this, you will first need to make sure that your role allows you to do this, if you do not have access to do this, kindly speak to a manager at your clinic:

Once this is done, kindly go to a patient file and click on the ellipsis and then the "Export patient data" button as shown below:

You will then see a yellow notification in the top right hand corner as below:

Click "Documents" then navigate to the ellipsis on the file you wish to send:

Click the ellipsis and then either "Share" or "Email" as you prefer with the patient or the third party:

They will receive a file which will contain all the data in that patient file which looks similar to the below, the contents of the file cannot be customised:

Please note the file will not contain:
-
Prescriptions- the only record of a patient's prescriptions can be found within the consultation notes. If recorded within a consultation note.
-
Logs
-
Patient communications
-
Hospital booking forms
Add Patient Relationships
The Relationships feature allows you to link any relevant third-party account to a patient. These relationships can include parents, emergency contacts, insurance providers, general practitioners (GPs), external pharmacies, and more.
Once a relationship is added, you can perform tasks like sending letters to these third parties or billing them on behalf of the patient (for insurance providers and paying account relationships only).
1. Select the patient who you want to add the relationship to.

2. Click the edit icon in the top right-hand corner.

3. Scroll down to the Relationships and emergency contacts section.
4. Click Add relationship.

5. Open the Relationship type dropdown, and select the relevant relationship (eg. Insurance Provider)

6. Open the Patient or contact name dropdown if they have been added as a contact, and add any relevant information.
If the relationship was not added as a contact you can still create it from this page.
7. (Optional) Enter the policy number and authorisation code for the patient.

8. Click Add relationship. The insurer appears in the Relationships and emergency contacts section.

9. Click Save at the top of the page.
The insurer is linked to the patient. You can now bill the insurer for the patient's invoices.
Add Patient Allergy
To add an allergy to a patient’s file, follow these steps:
1. Go to the patient’s file
2. Click on Consultations – Create a new consultation note by clicking on "New"

3. Click on the "Allergy Bubble" – Locate and select the allergy section within the consultation view.

4. Enter the Allergy – Input the specific allergy details and save.

Onset Date: The date when the patient first experienced an allergic reaction.
Status: Indicates whether the allergy is Current (currently affecting the patient) or Past (no longer a concern).
Severity: Describes the intensity of the allergic reaction, such as Mild, Medium, or High.
5. Once saved, the allergy will appear on the patient’s file, ensuring it is clearly visible for future reference.

Clicking on "More Information" under the allergy will show additional details about the allergy, such as the severity and any comments added when the allergy was recorded.
You will also be able to edit the consultation note linked to the allergy (e.g., if the allergy's severity changes).

To delete the allergie, you can delete the consultation note.
Managing Patient's Vitals
In your patients' files, you can record their vital information such as Height, Weight, and GFR (Glomerular Filtration Rate). This section helps you track important health metrics over time.
How to Record or Edit Vitals:
1. Click the pen icon ✏️ next to the section you want to edit.

2. A window will open on the right-hand side of the screen.
3. Click "Add [X]" (e.g., Add Height, Add Weight, or Add GFR) to enter the patient’s information.

4. Enter the information and save.

You’ll be able to see a history of each vital you record — useful for monitoring things like weight loss or gain over time.
To make changes to a previous entry:
1. Click the pen icon ✏️ next to the section you want to edit.

2. Click "Add [X]" (e.g., Add Height, Add Weight, or Add GFR)

3. Enter the new information and save.

4. This allows you to edit the last recorded entry.
Note: The initial entry won’t be deleted from the history — it will remain stored. However, only the latest entry will be visible on the patient’s main file.

Managing Patient Reproductive Health
The Reproductive Health section is available only for patients whose sex at birth is recorded as "Female" in their patient file.
You’ll have two options to manage: Pregnancy and Breastfeeding.
Note: If the sex at birth is left blank or set to anything other than "Female", this section will not appear. You will need to edit the patient's file.
Record Pregnancy or Breastfeeding Information:
1. Click the pen icon ✏️ next to the section you want to edit.

2. A window will open on the right-hand side of the screen.
3. Click "Add entry" to record the patient’s information.

Note: If the patient has never been pregnant or breastfeeding, do not add an entry. The default status is "No" unless otherwise recorded.
4. Fill in the relevant information:
Note:
Yes = The patient is currently pregnant and/or currently breastfeeding.
No = The patient has been pregnant or breastfeeding in the past, but is not anymore (e.g. pregnancy ended, breastfeeding stopped, pregnancy loss, etc.).

5. Click "Save" to confirm.
To make changes to an existing entry:
1. Click the pen icon ✏️ next to the entry you want to edit.

2. Click "Edit"

3. Edit the entry (e.g. update the last day of period or register the end of a pregnancy) and save.

Note: To track new pregnancies, record the end of one before adding a new one — this ensures all appear in the history.