This article is about how to create and manage letter templates.
Note: To create letter templates you must have a role assigned to you that gives you editing permissions for Letter templates.
In this article:
Placeholders available for templates
Insert Recipient Block Details into a Letter
Add a Recipient Block to a Letter Template
Add a Clinician's Signature to a Letter Template
Add Multiple Recipient Details to a Letter
Linked articles:
Create a Letter Template
You can create a letter template from the Settings page:
1. Go to the Letter templates tab.
2. Click New in the top right-hand corner.

3. Select Body on the top right hand side

4. Give the template a name.

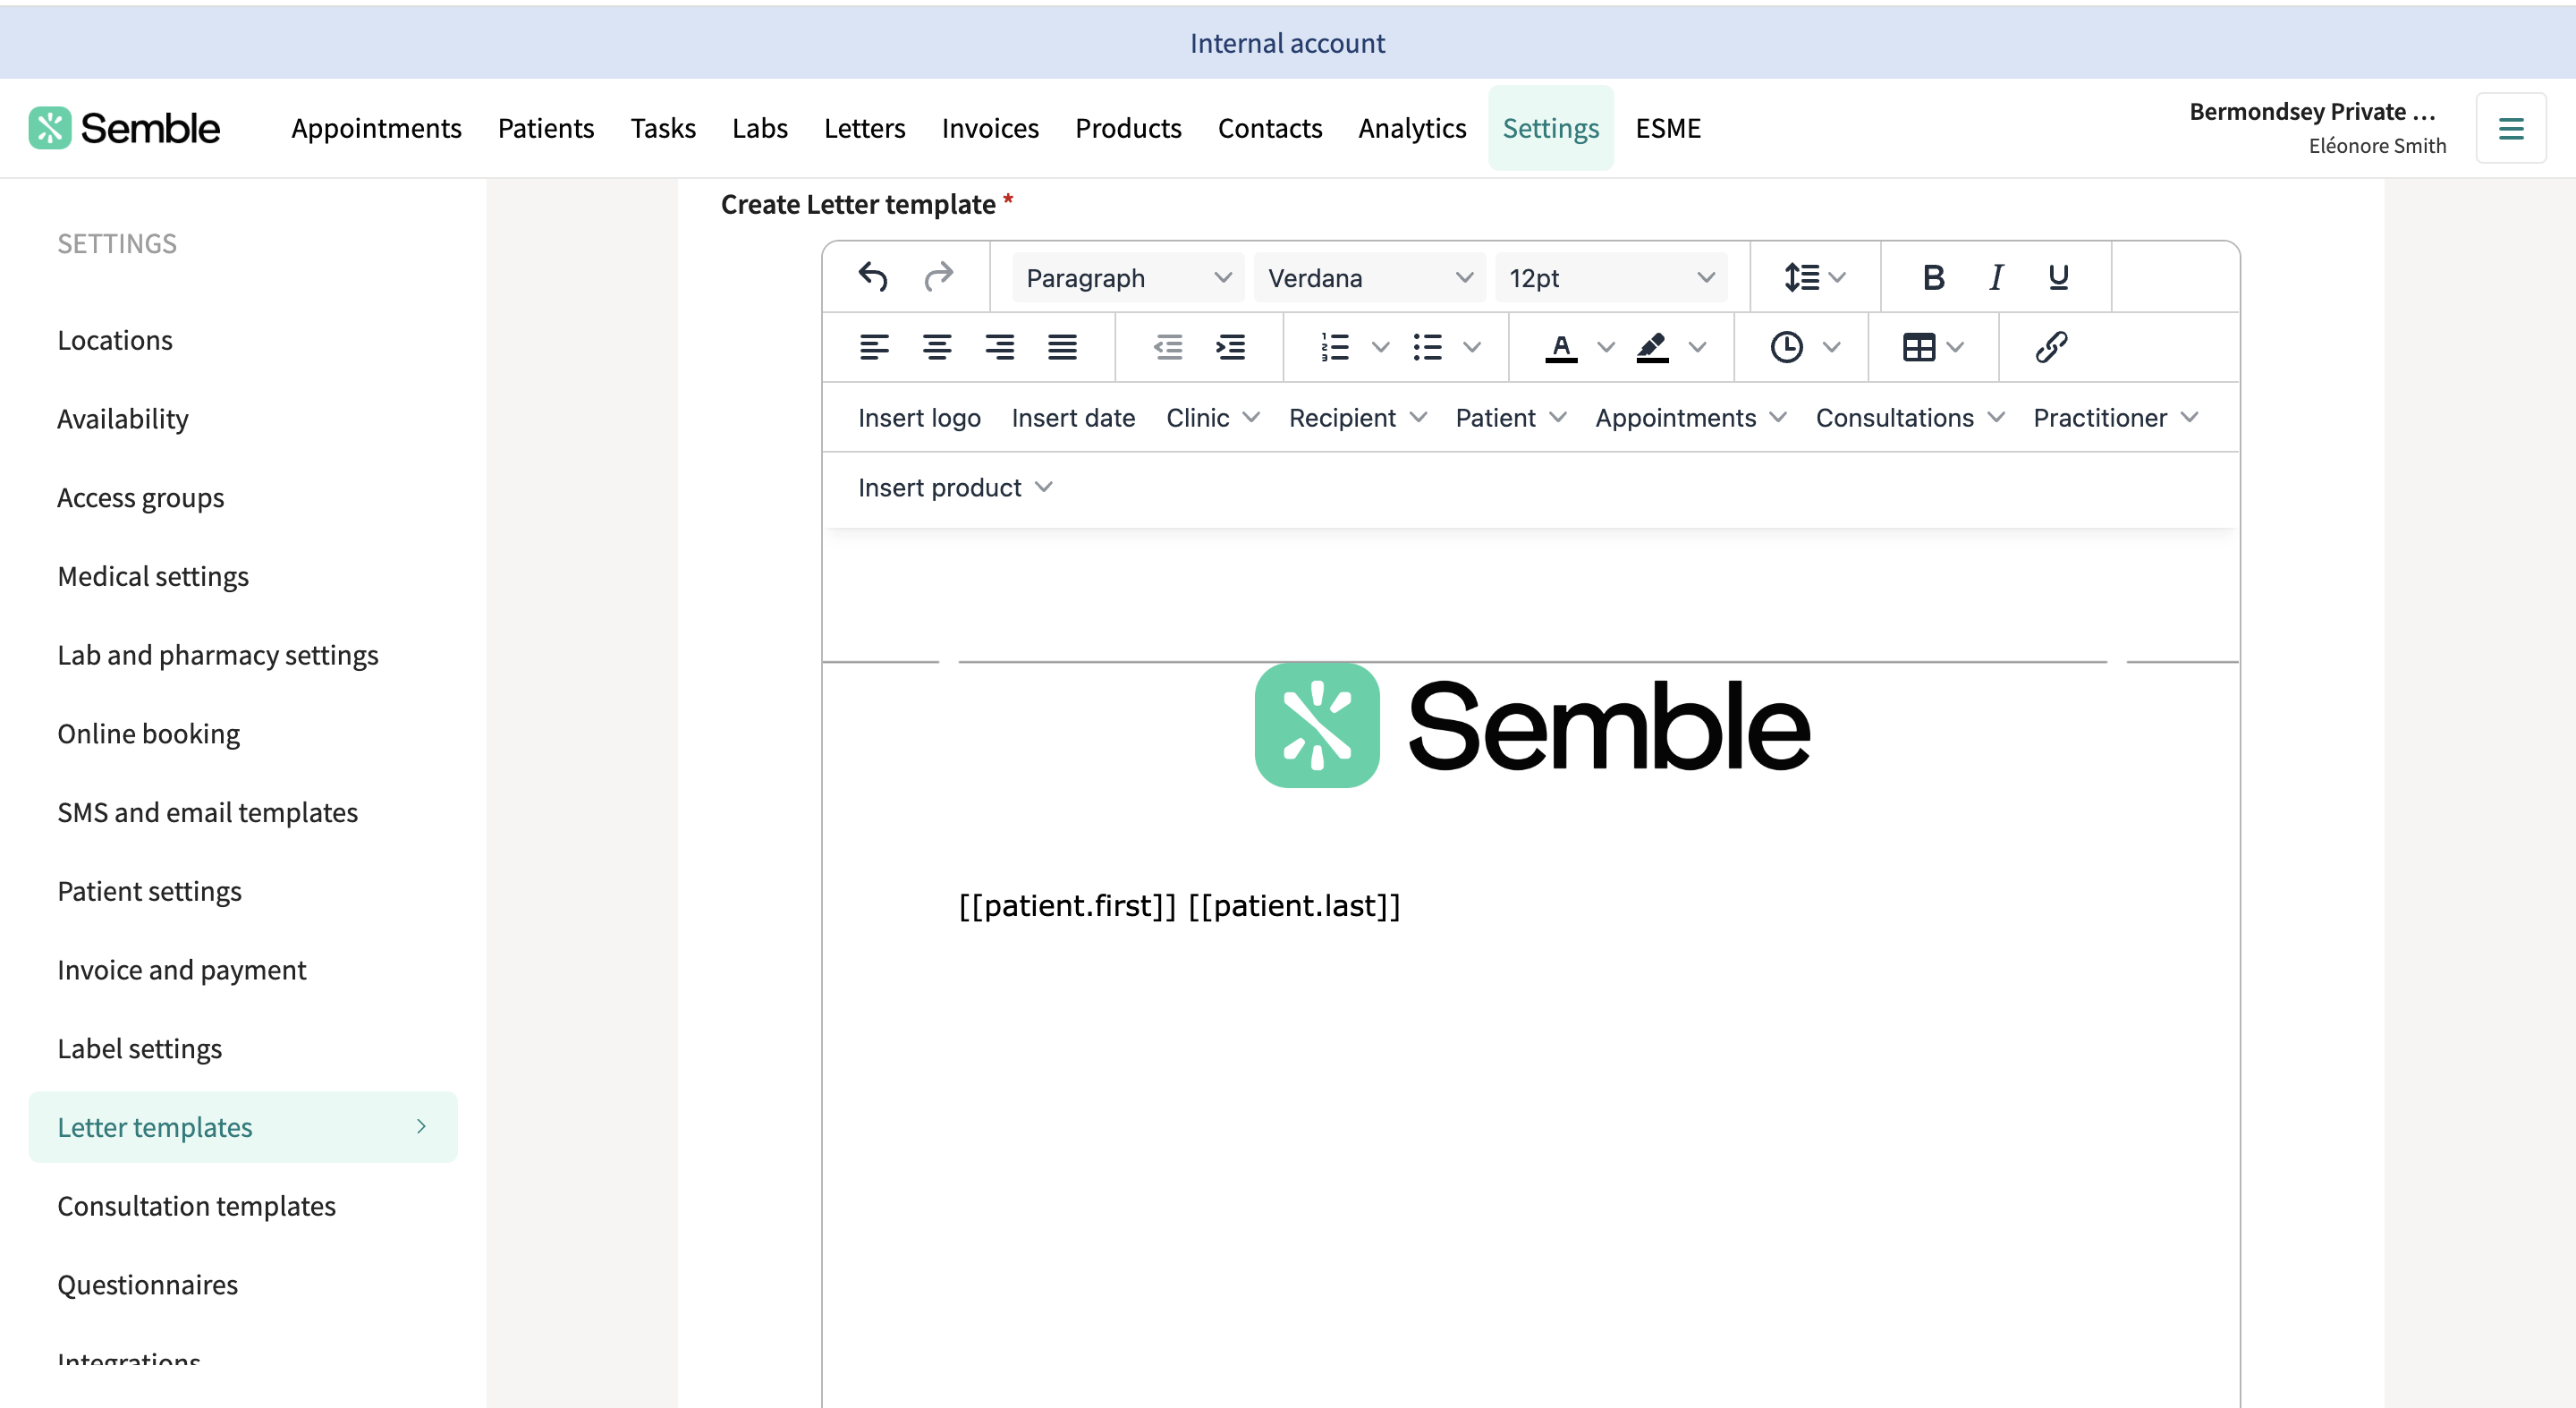
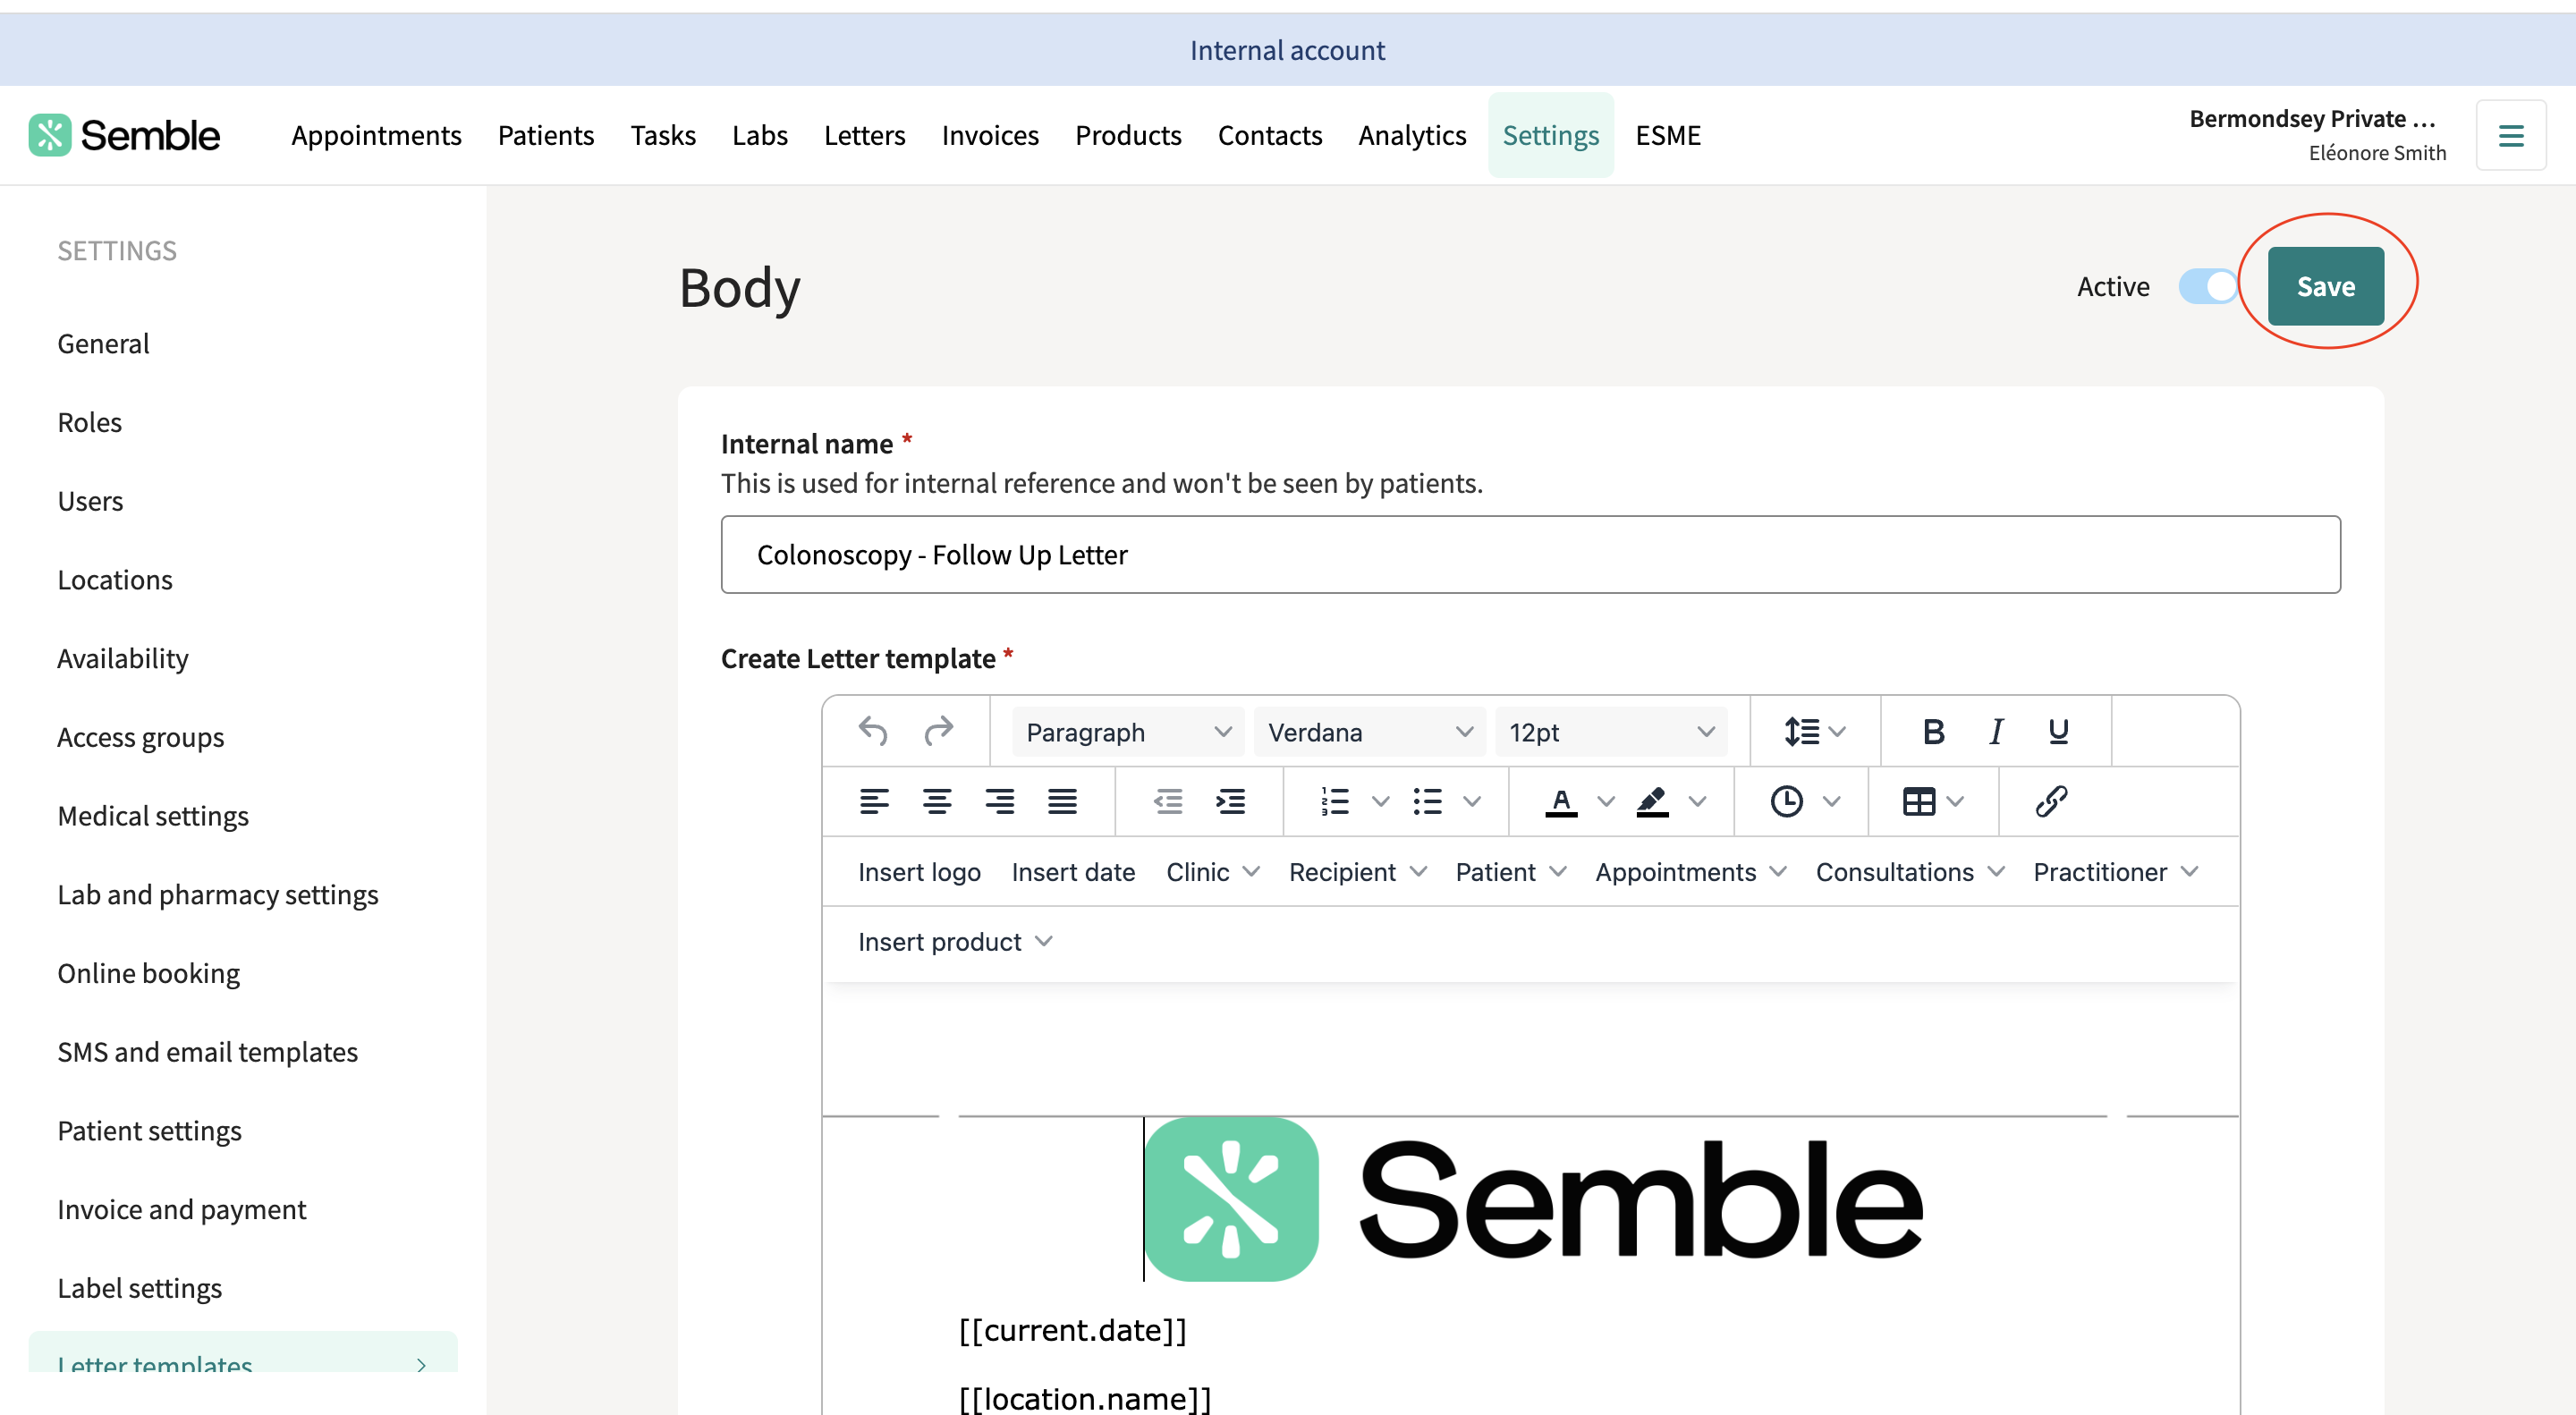
5. Enter the content of the letter template using the text editor. Use the dropdown menus to insert automated tags and fields into the template.
In the example below I have clicked "Insert logo" and am I clicked "Patients" to start using the patient placeholders e.g. "First name".

Use free text and the placeholders to create the letter template you would like, eventually you should have something that looks like this, a combination of placeholders and free text:
6. Click Save.
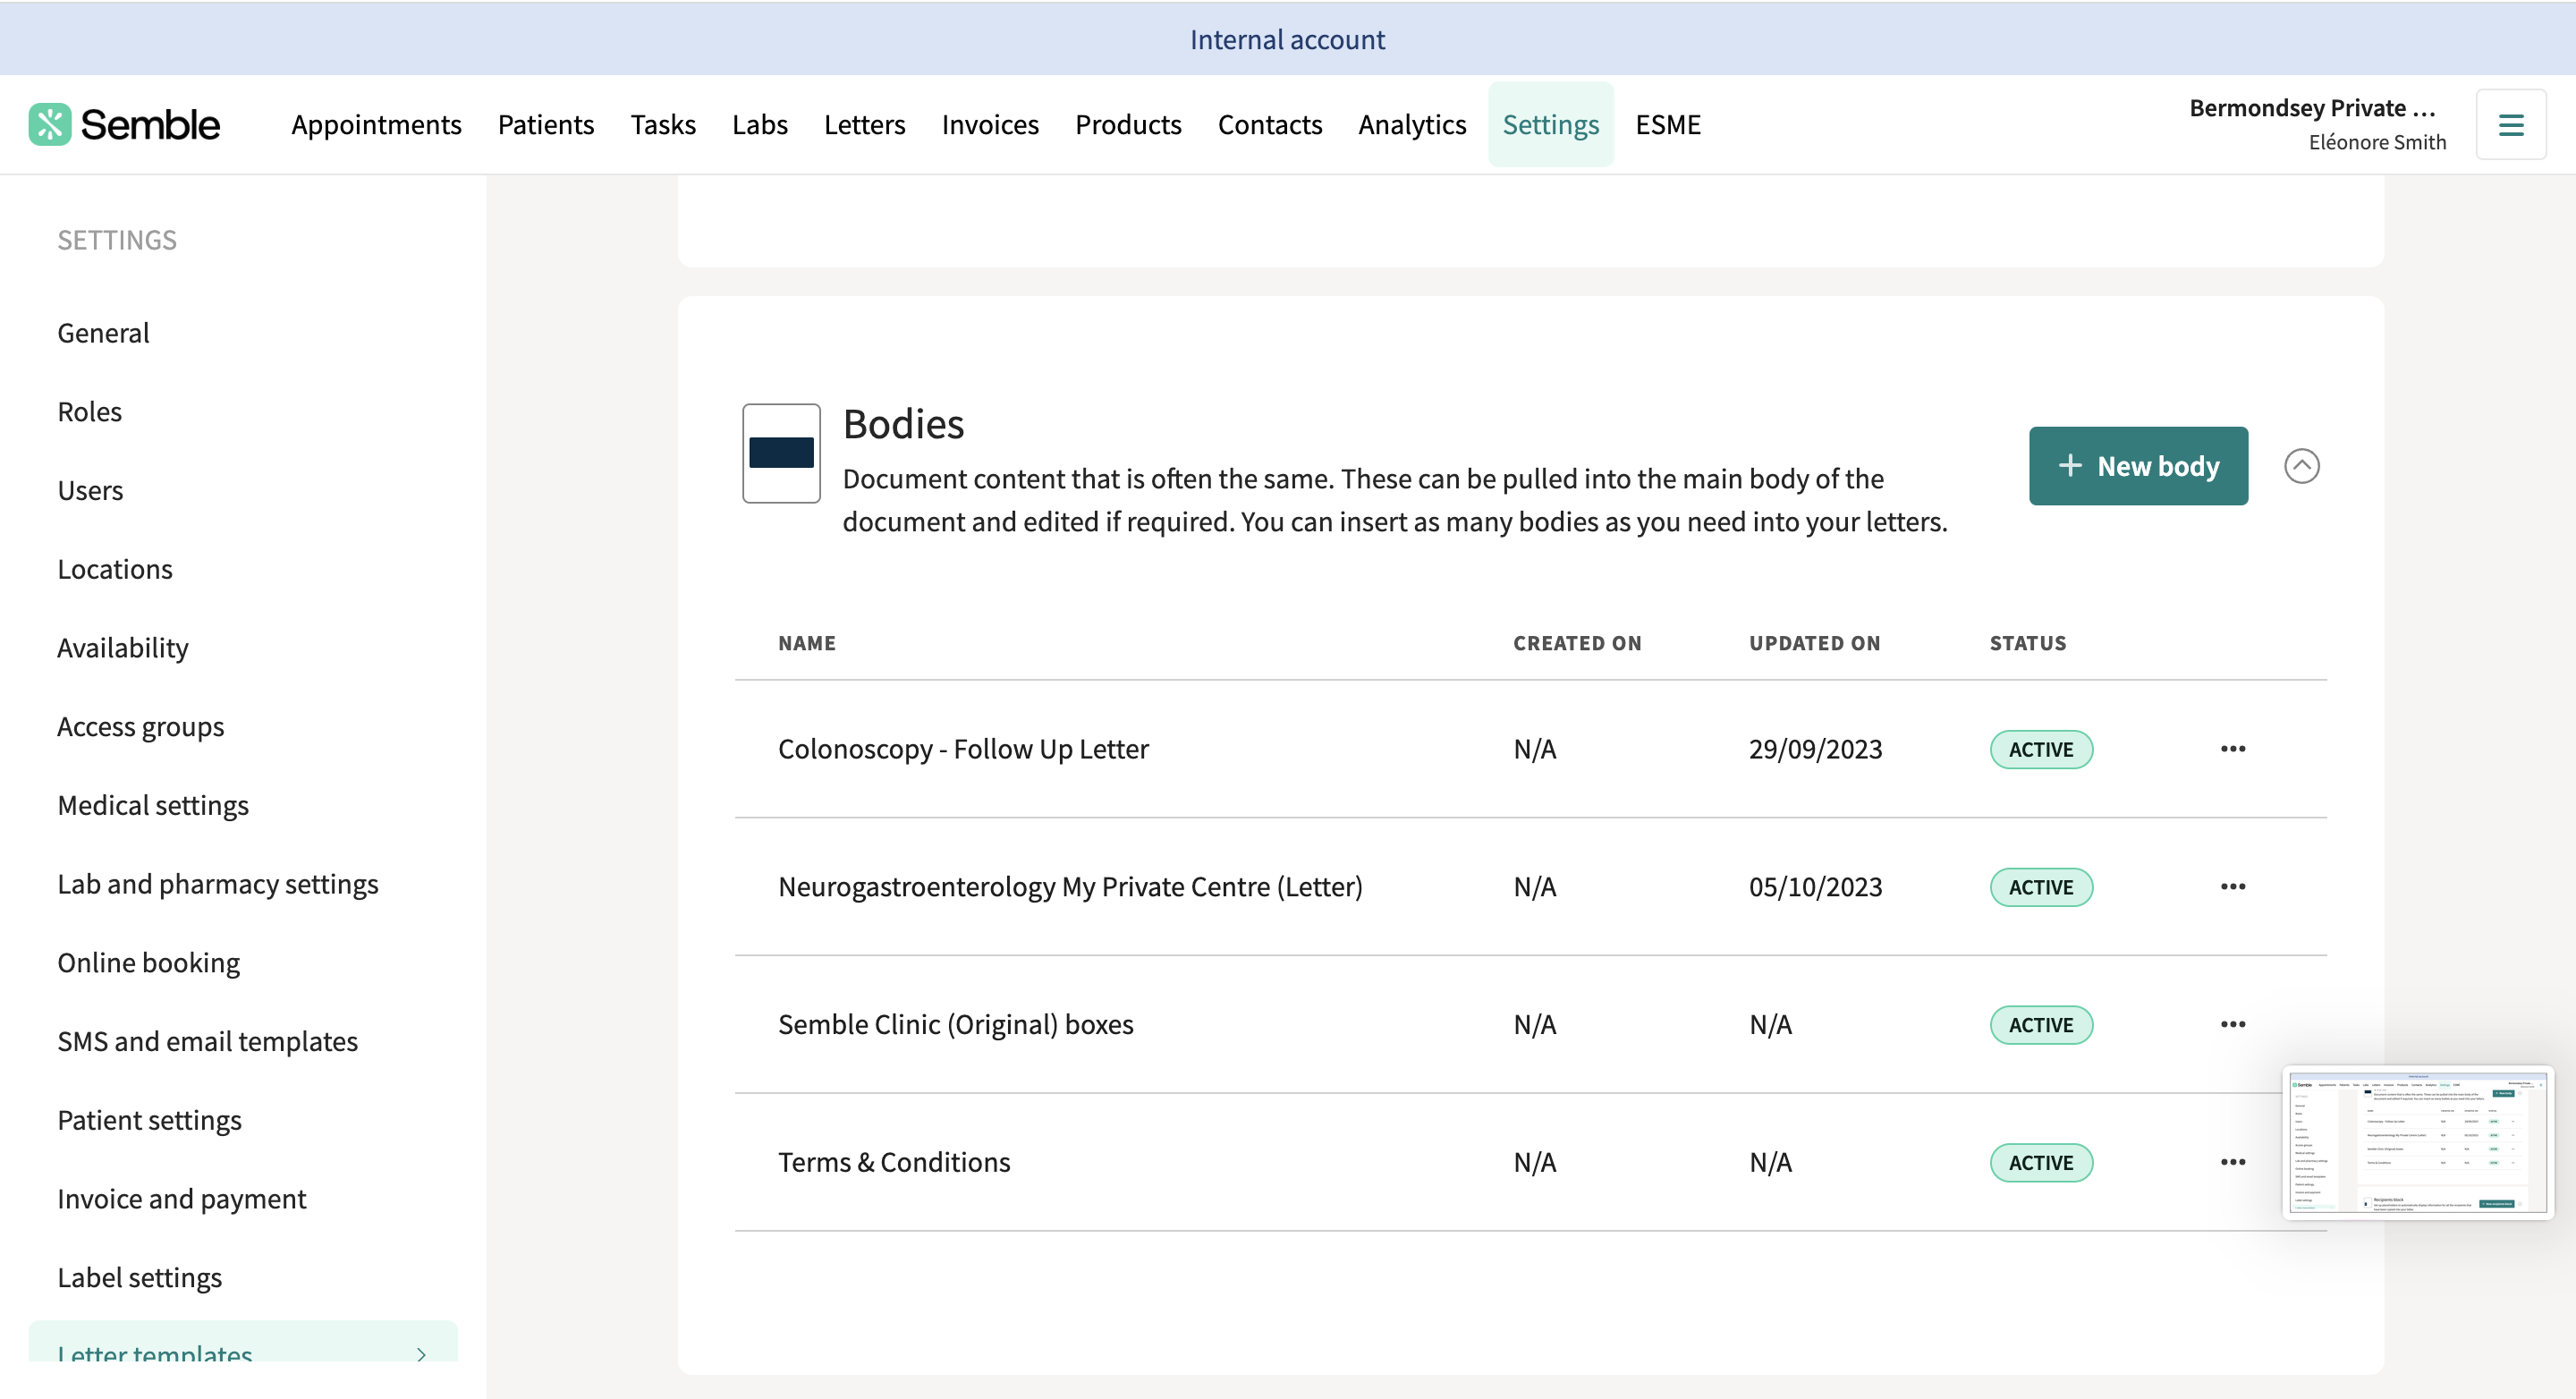
Your template appears in the Letter templates tab under Bodies.
Spacing
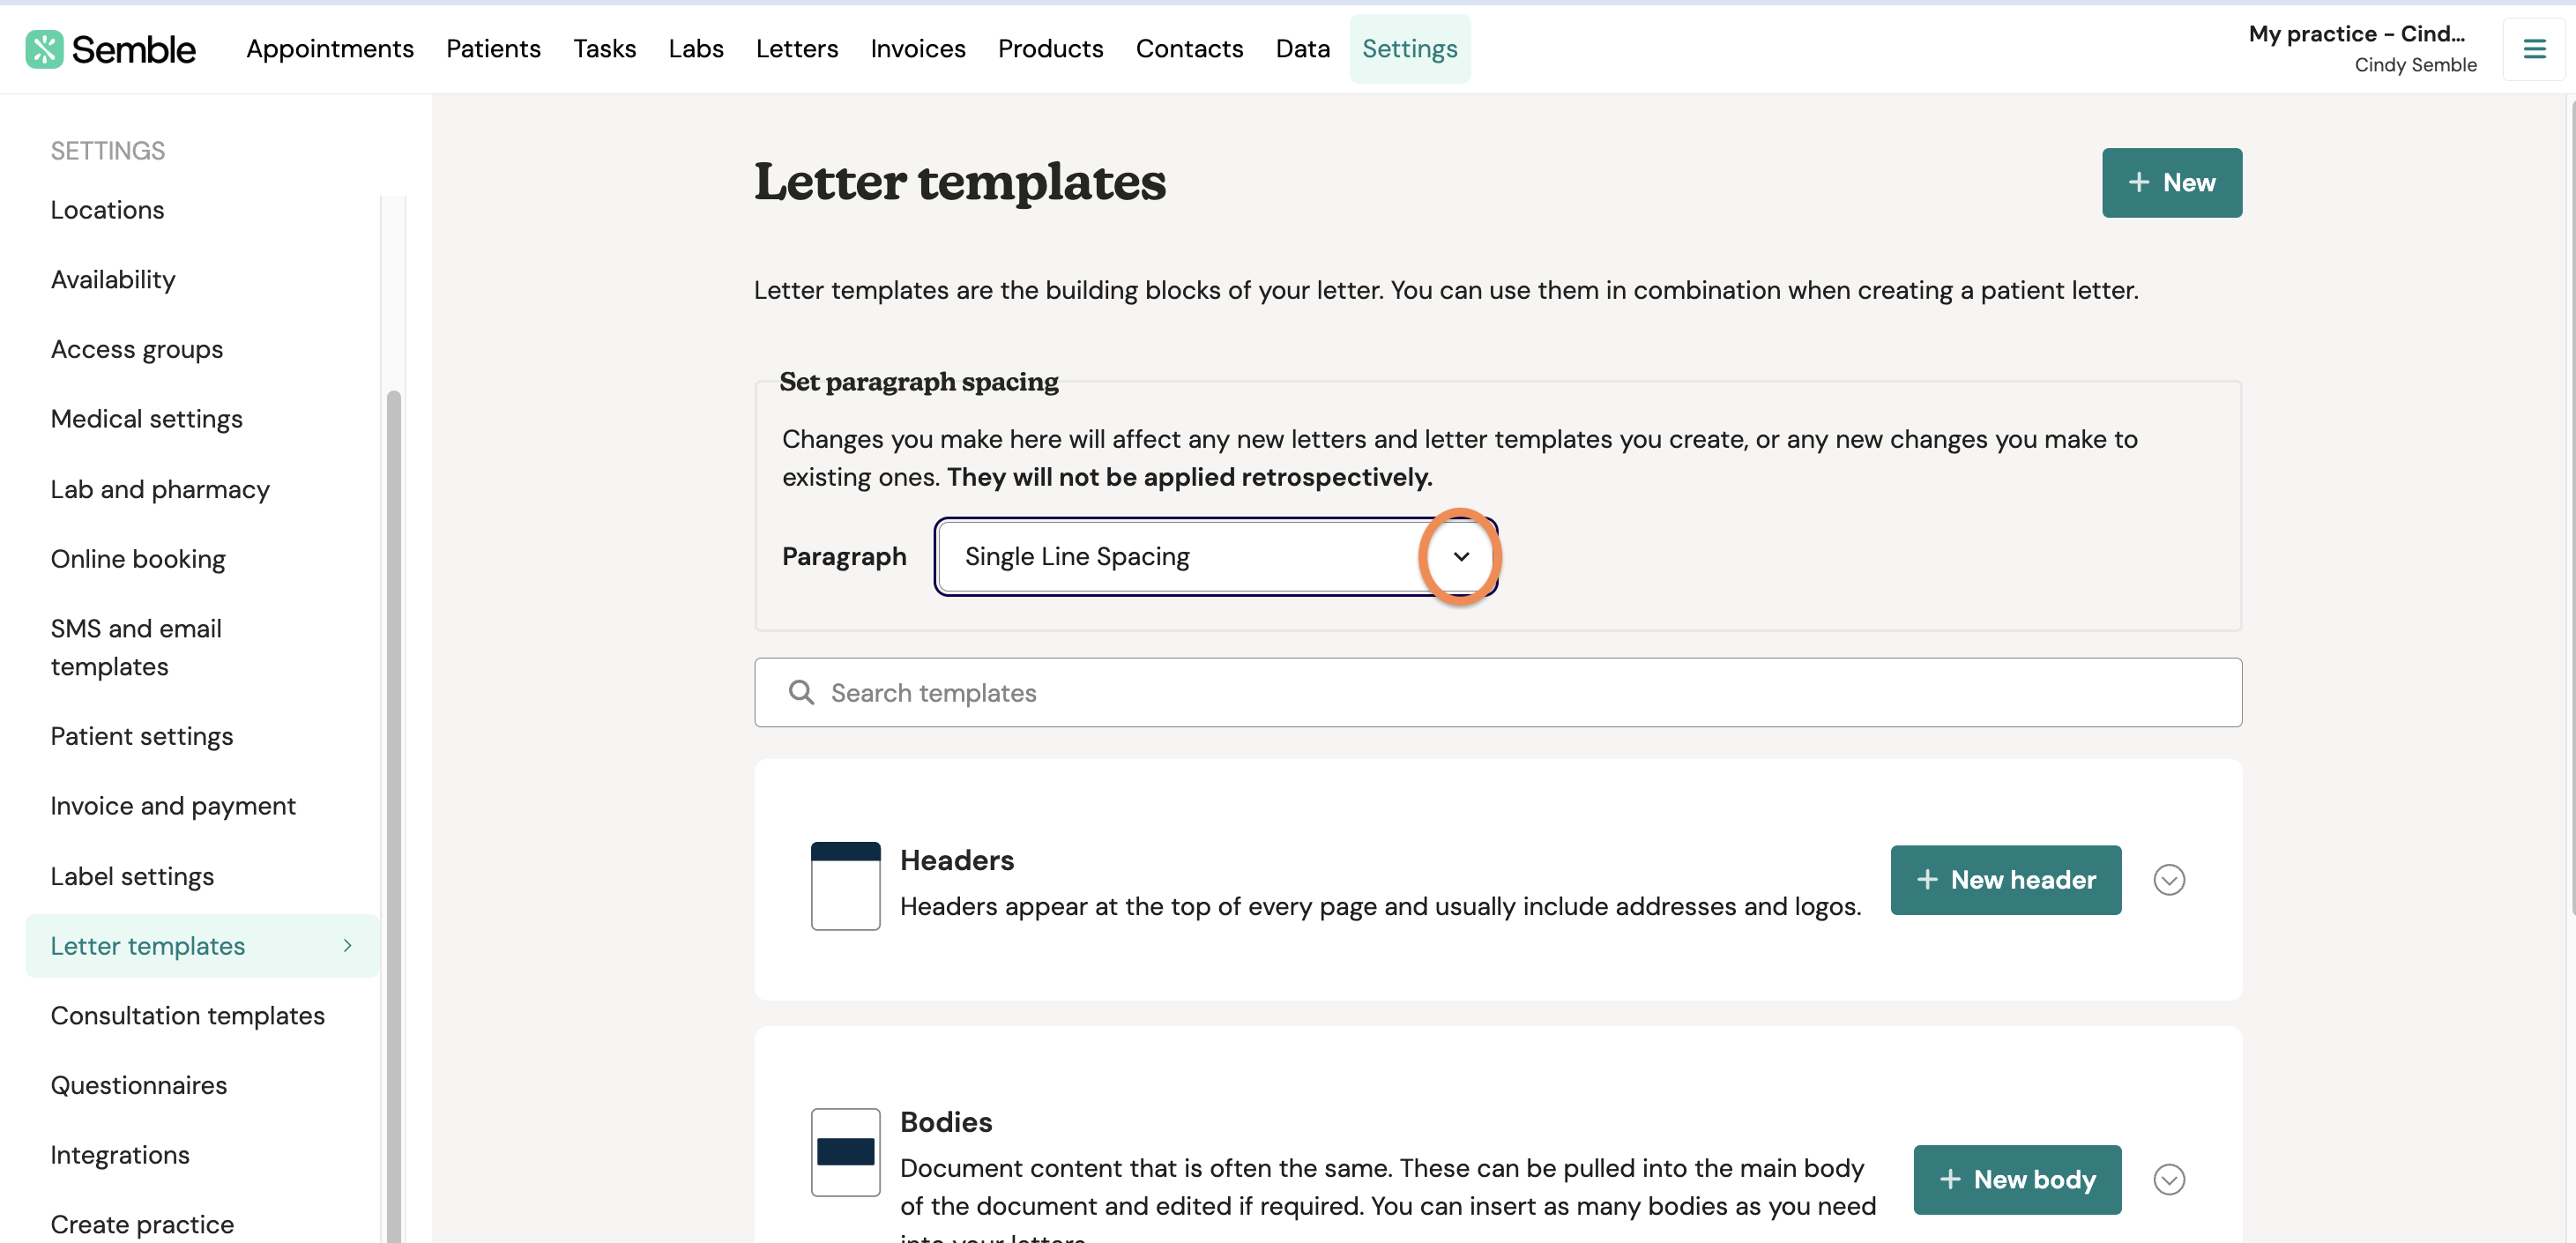
Before creating your template you may click on this drop down which will allow you which type of spacing you require between each line:
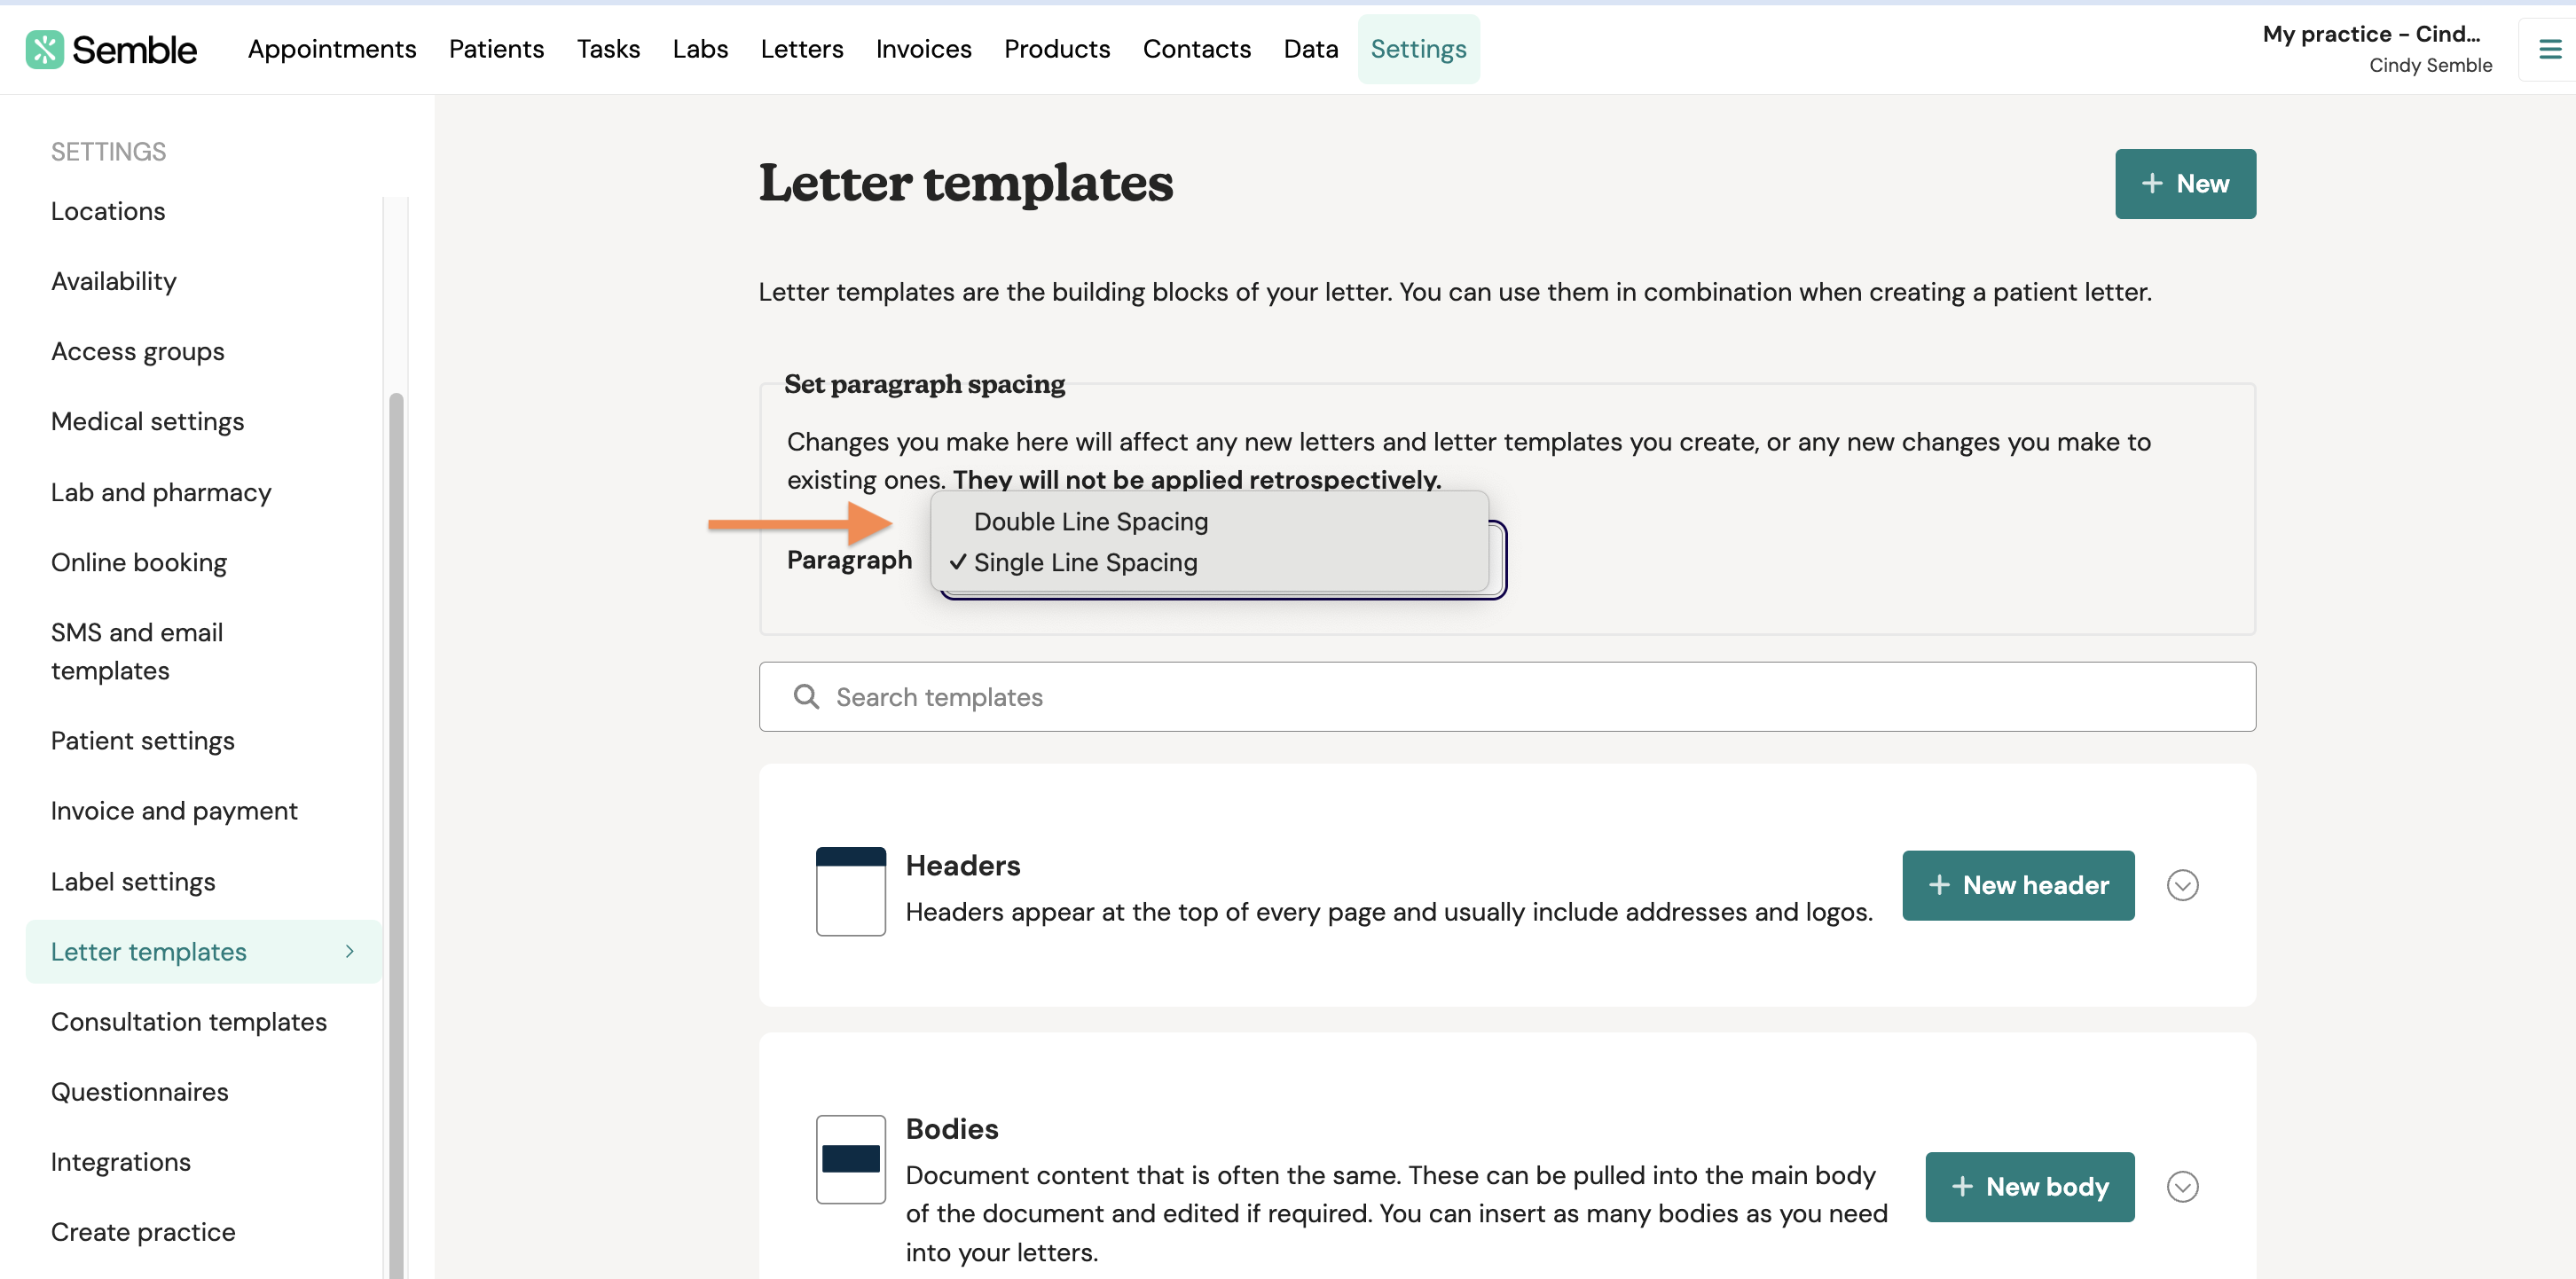
You will have the choice between Double Line Spacing and Single Line Spacing, you may click on the type of spacing you would like for your letter.
Note: changes you make here will affect any new letters and letter templates you create, or any new changes you make to existing ones, it will not be applied to previously created templates.
Single Line Spacing:

Double Line Spacing:

You can also manually use two different line spaces to create gaps in your text.
Press Enter on your keyboard for a double line:
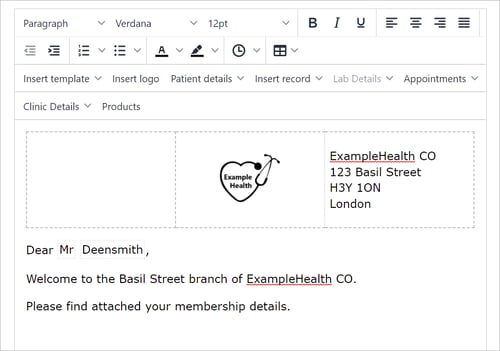
Or press Shift + Enter for a single line:
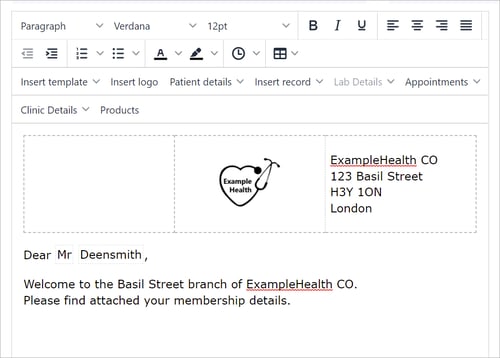
Edit a Letter Template
You can edit a letter template at any time from the Settings page:
1. Go to the Letter templates tab and scroll to 'Bodies' and click 'Expand' button.

2. Select the letter template that you want to edit and click the ellipsis as circled below then "Edit":

3. Make the edits you want.
4. Click Save in the top right-hand corner.

Delete a Letter Template
You can delete a letter template at any time from the Settings page:
1. Go to the Letter templates tab and scroll to 'Bodies' and click 'Expand' button.
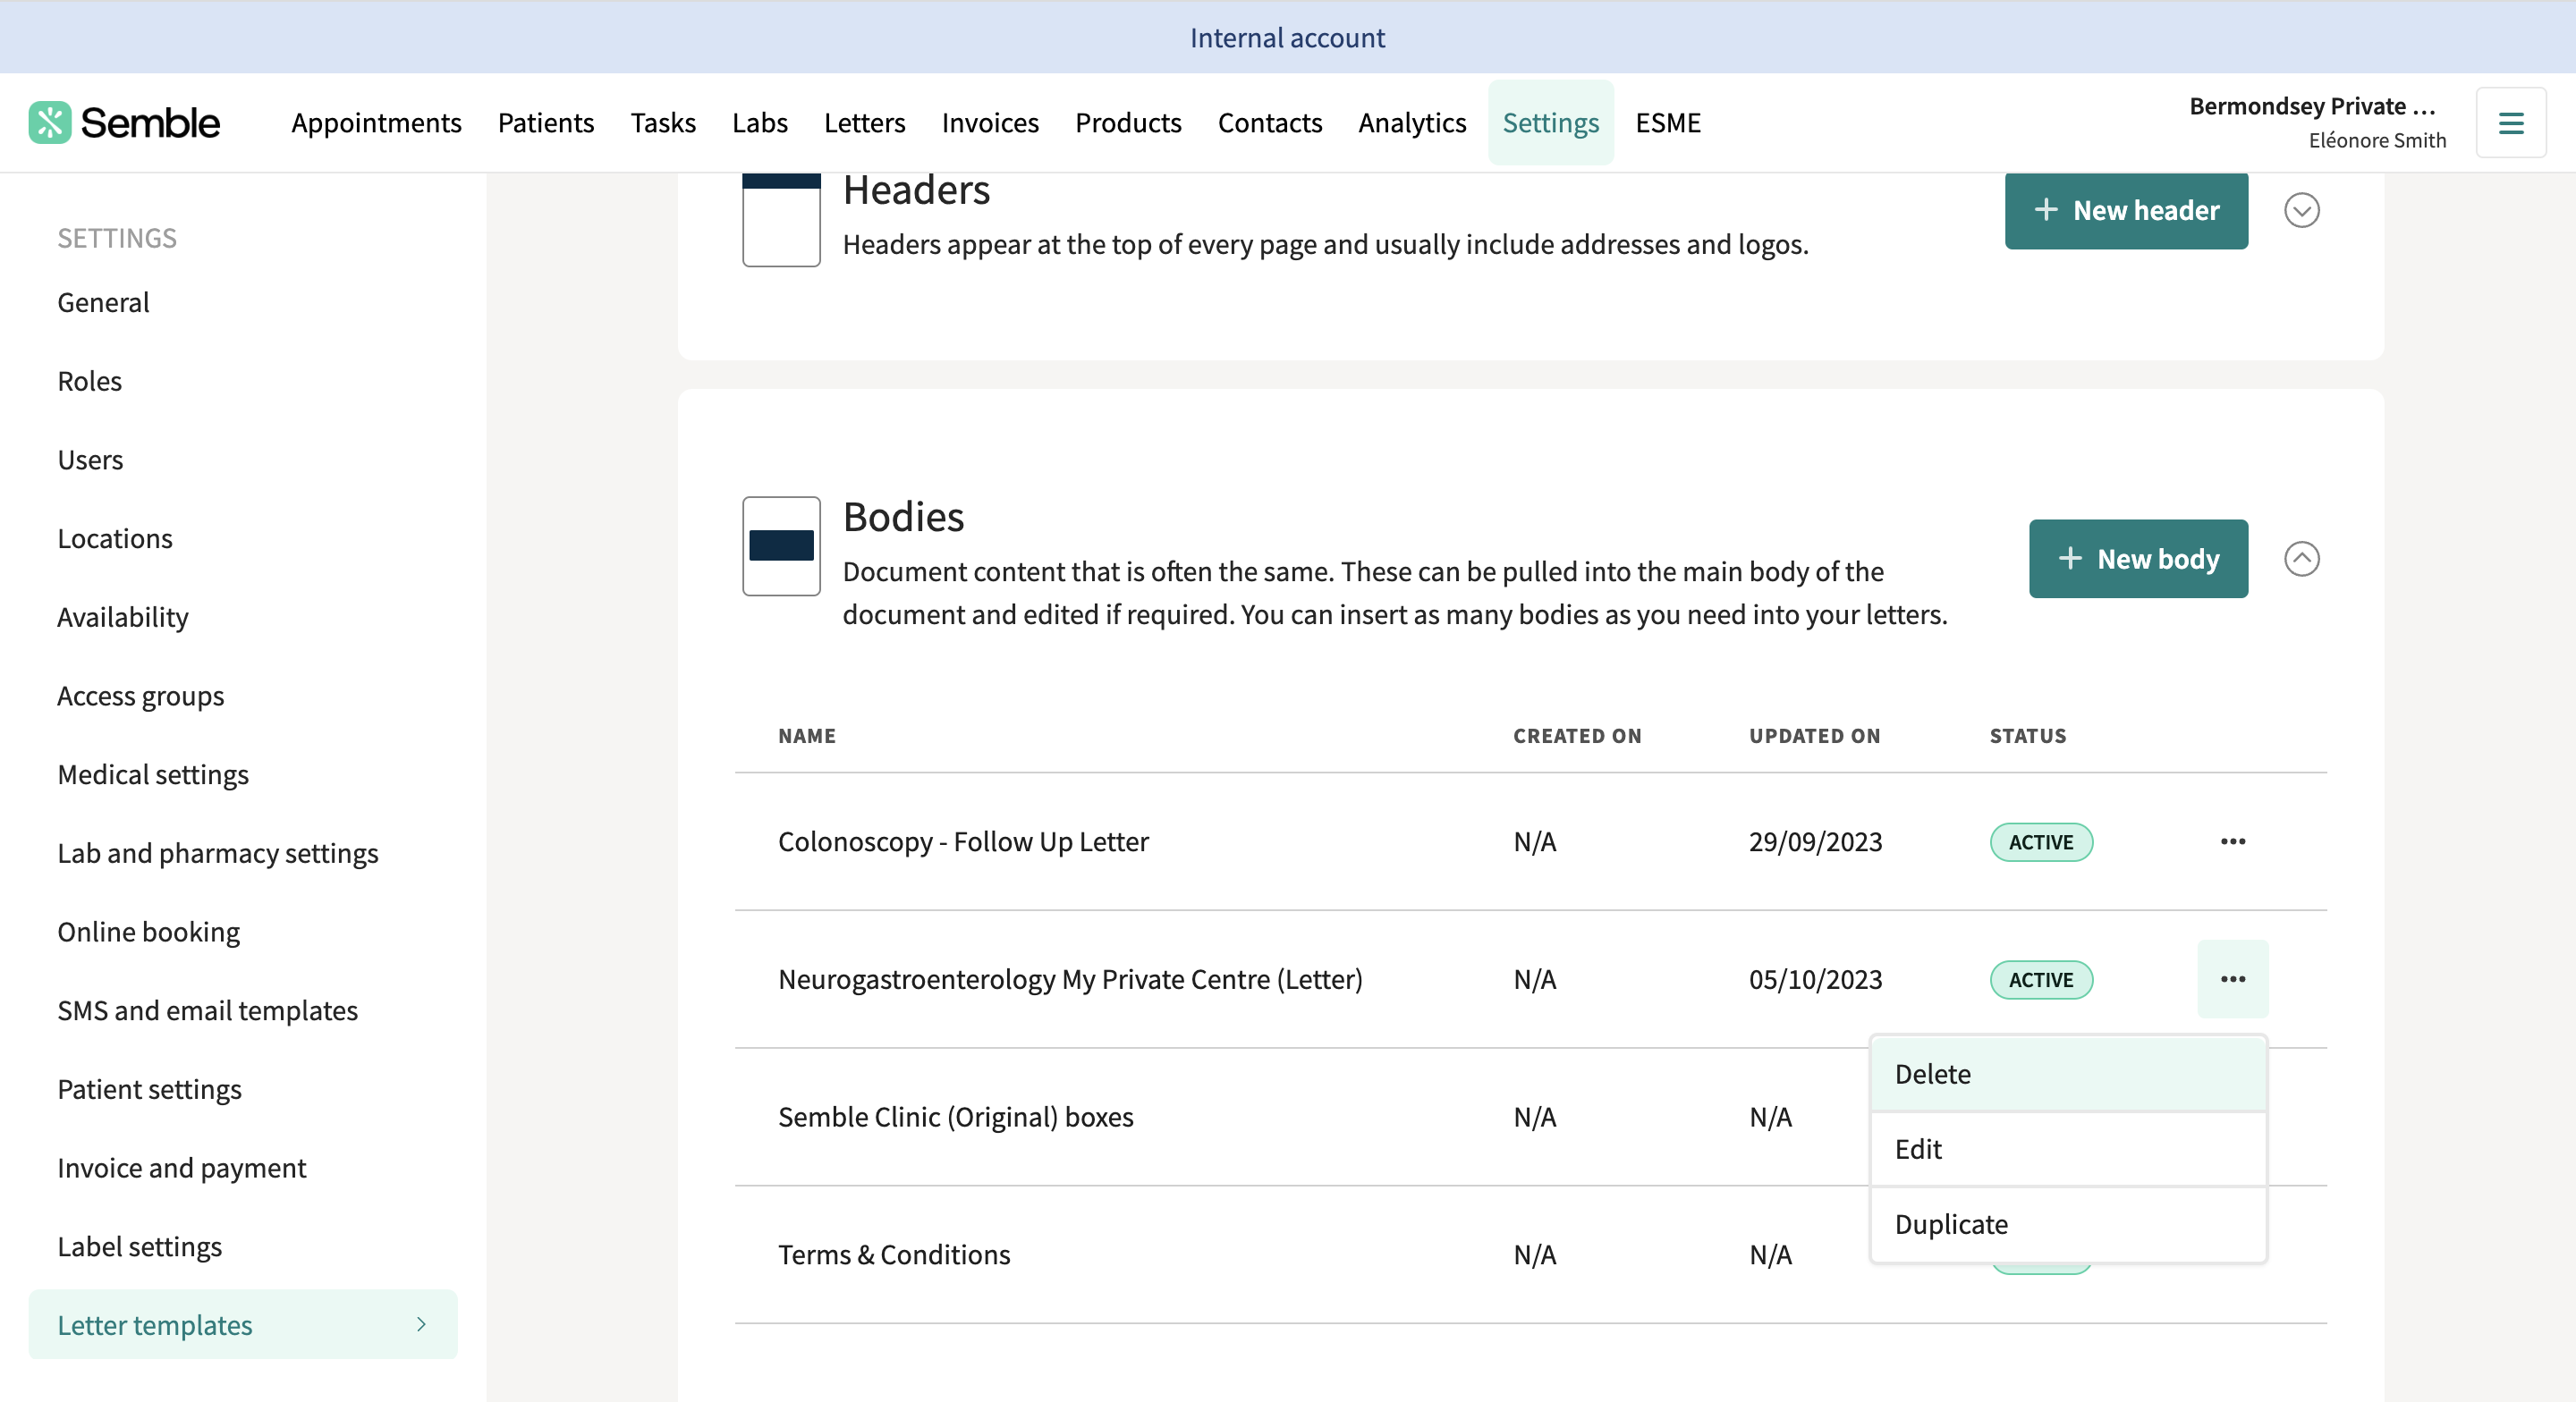
2. Click the more options icon next to the letter template you want to delete.
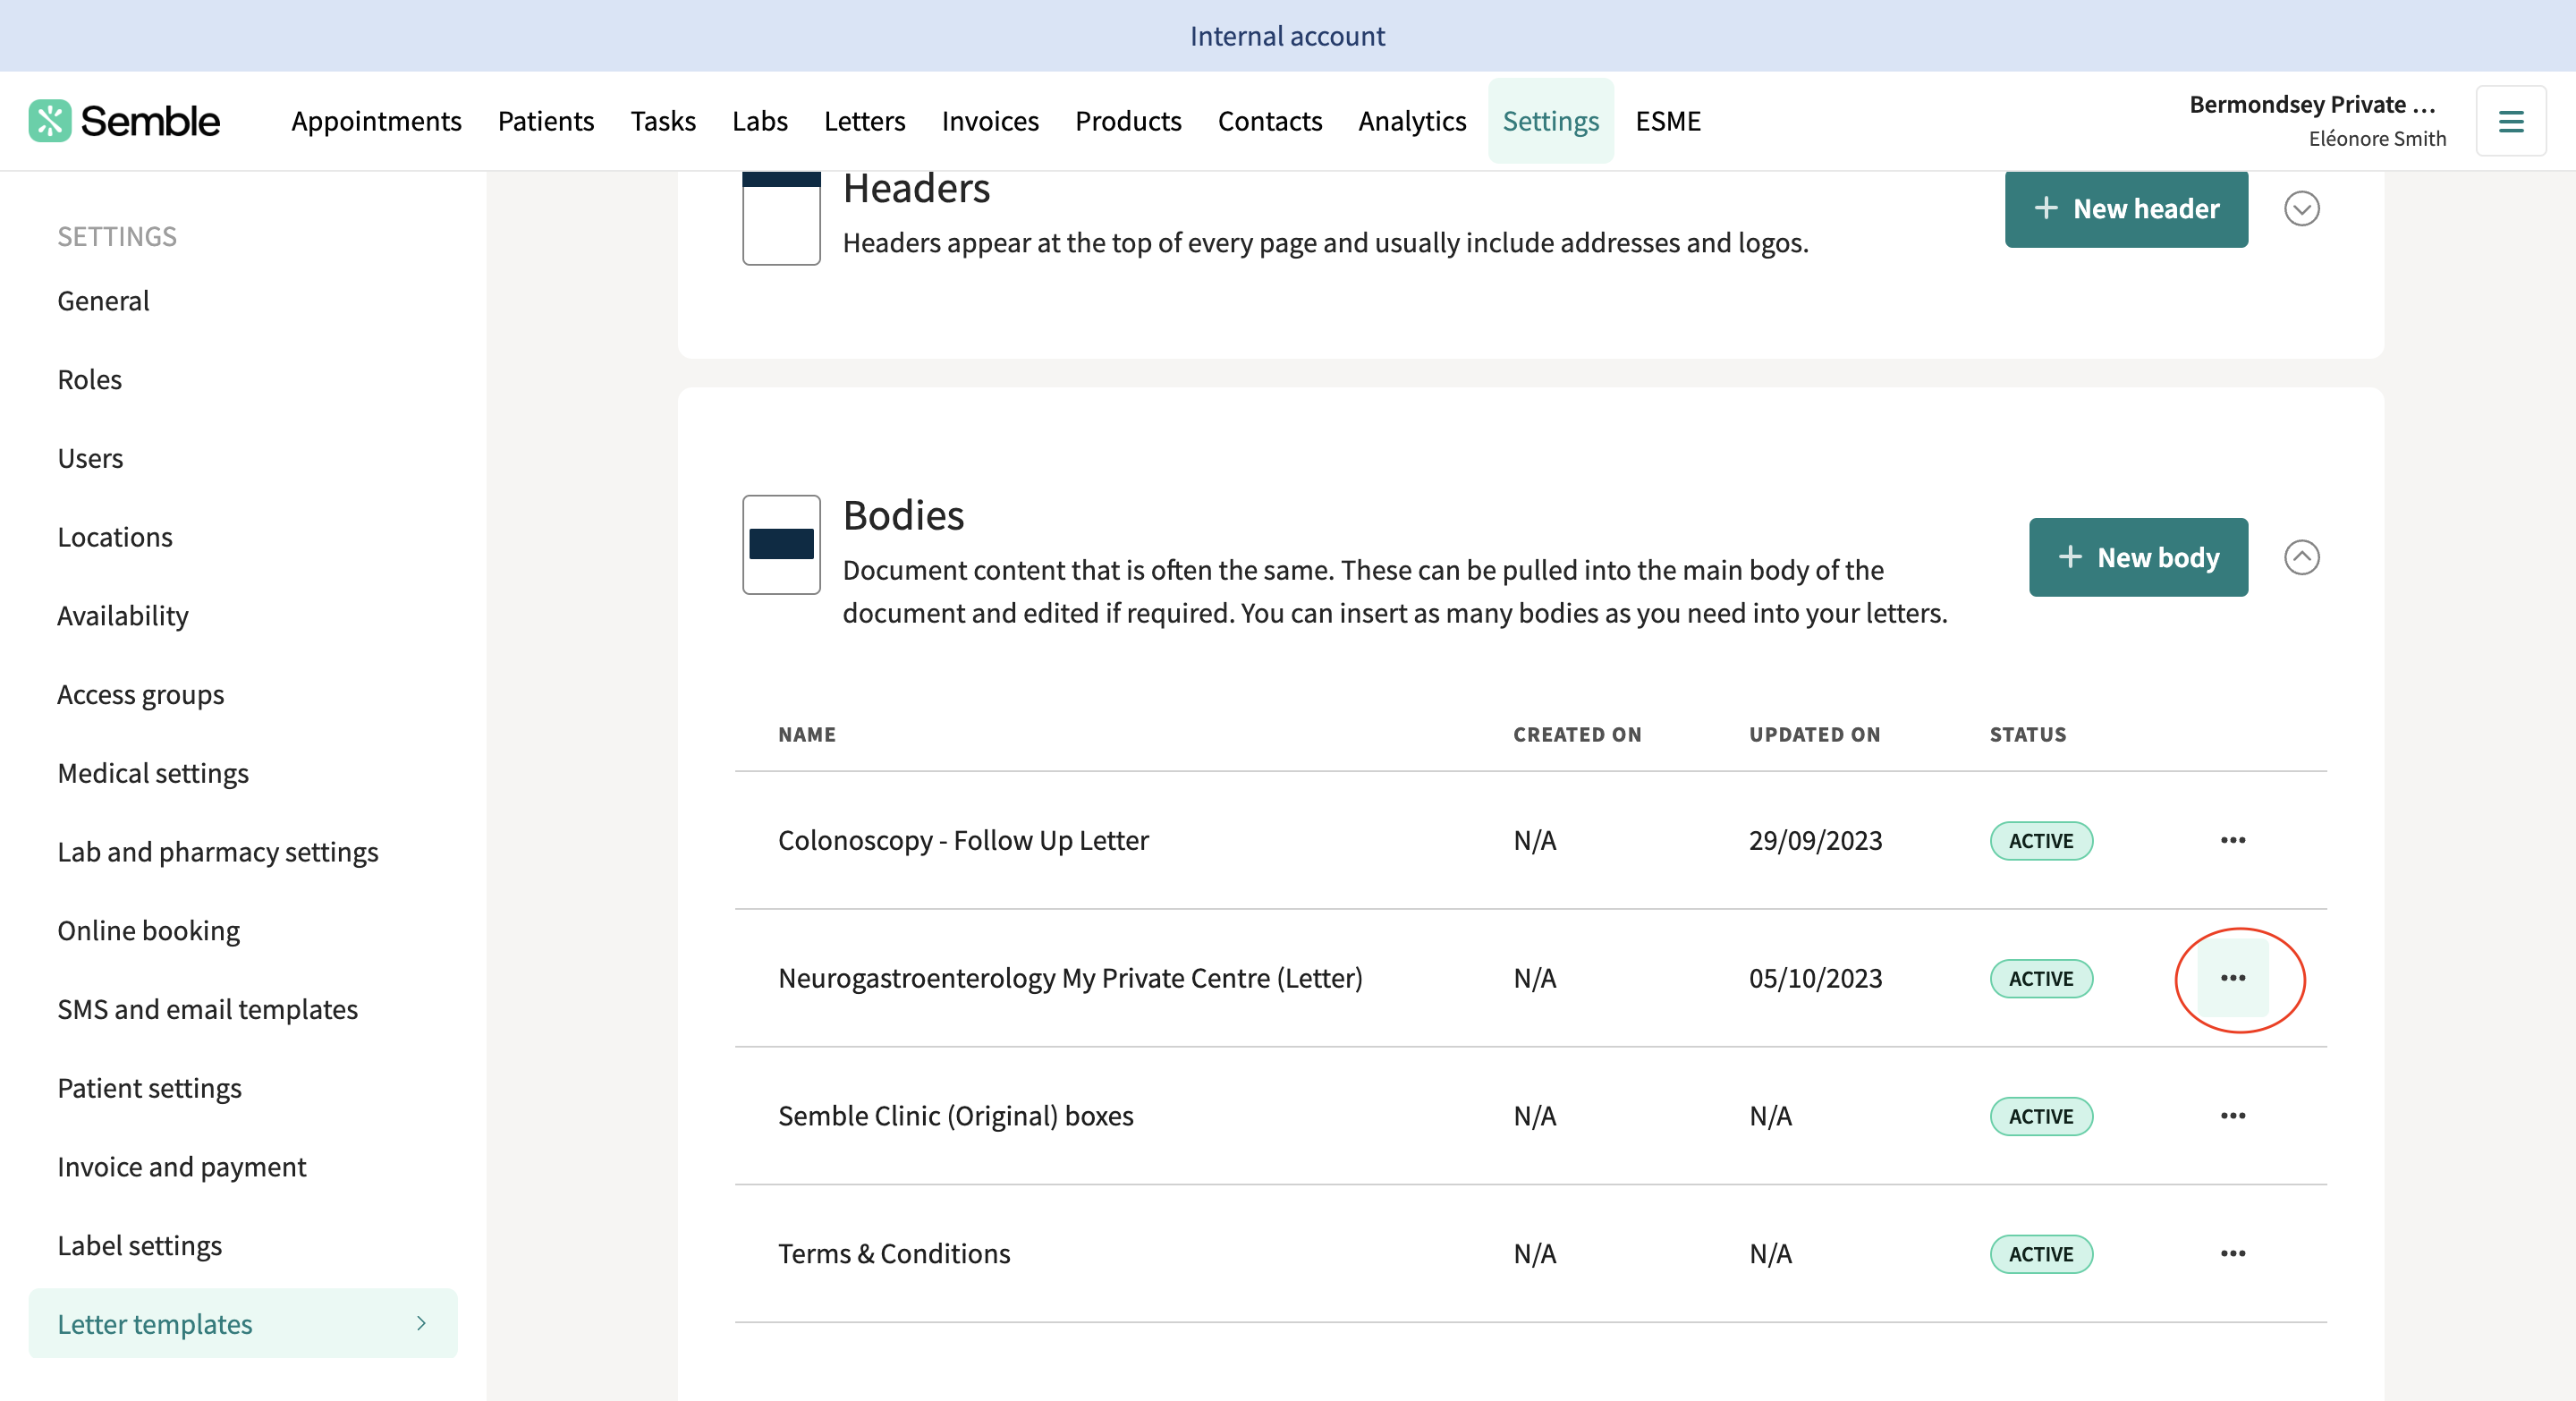
3. Select Delete.
4. Click Delete in the confirmation box.
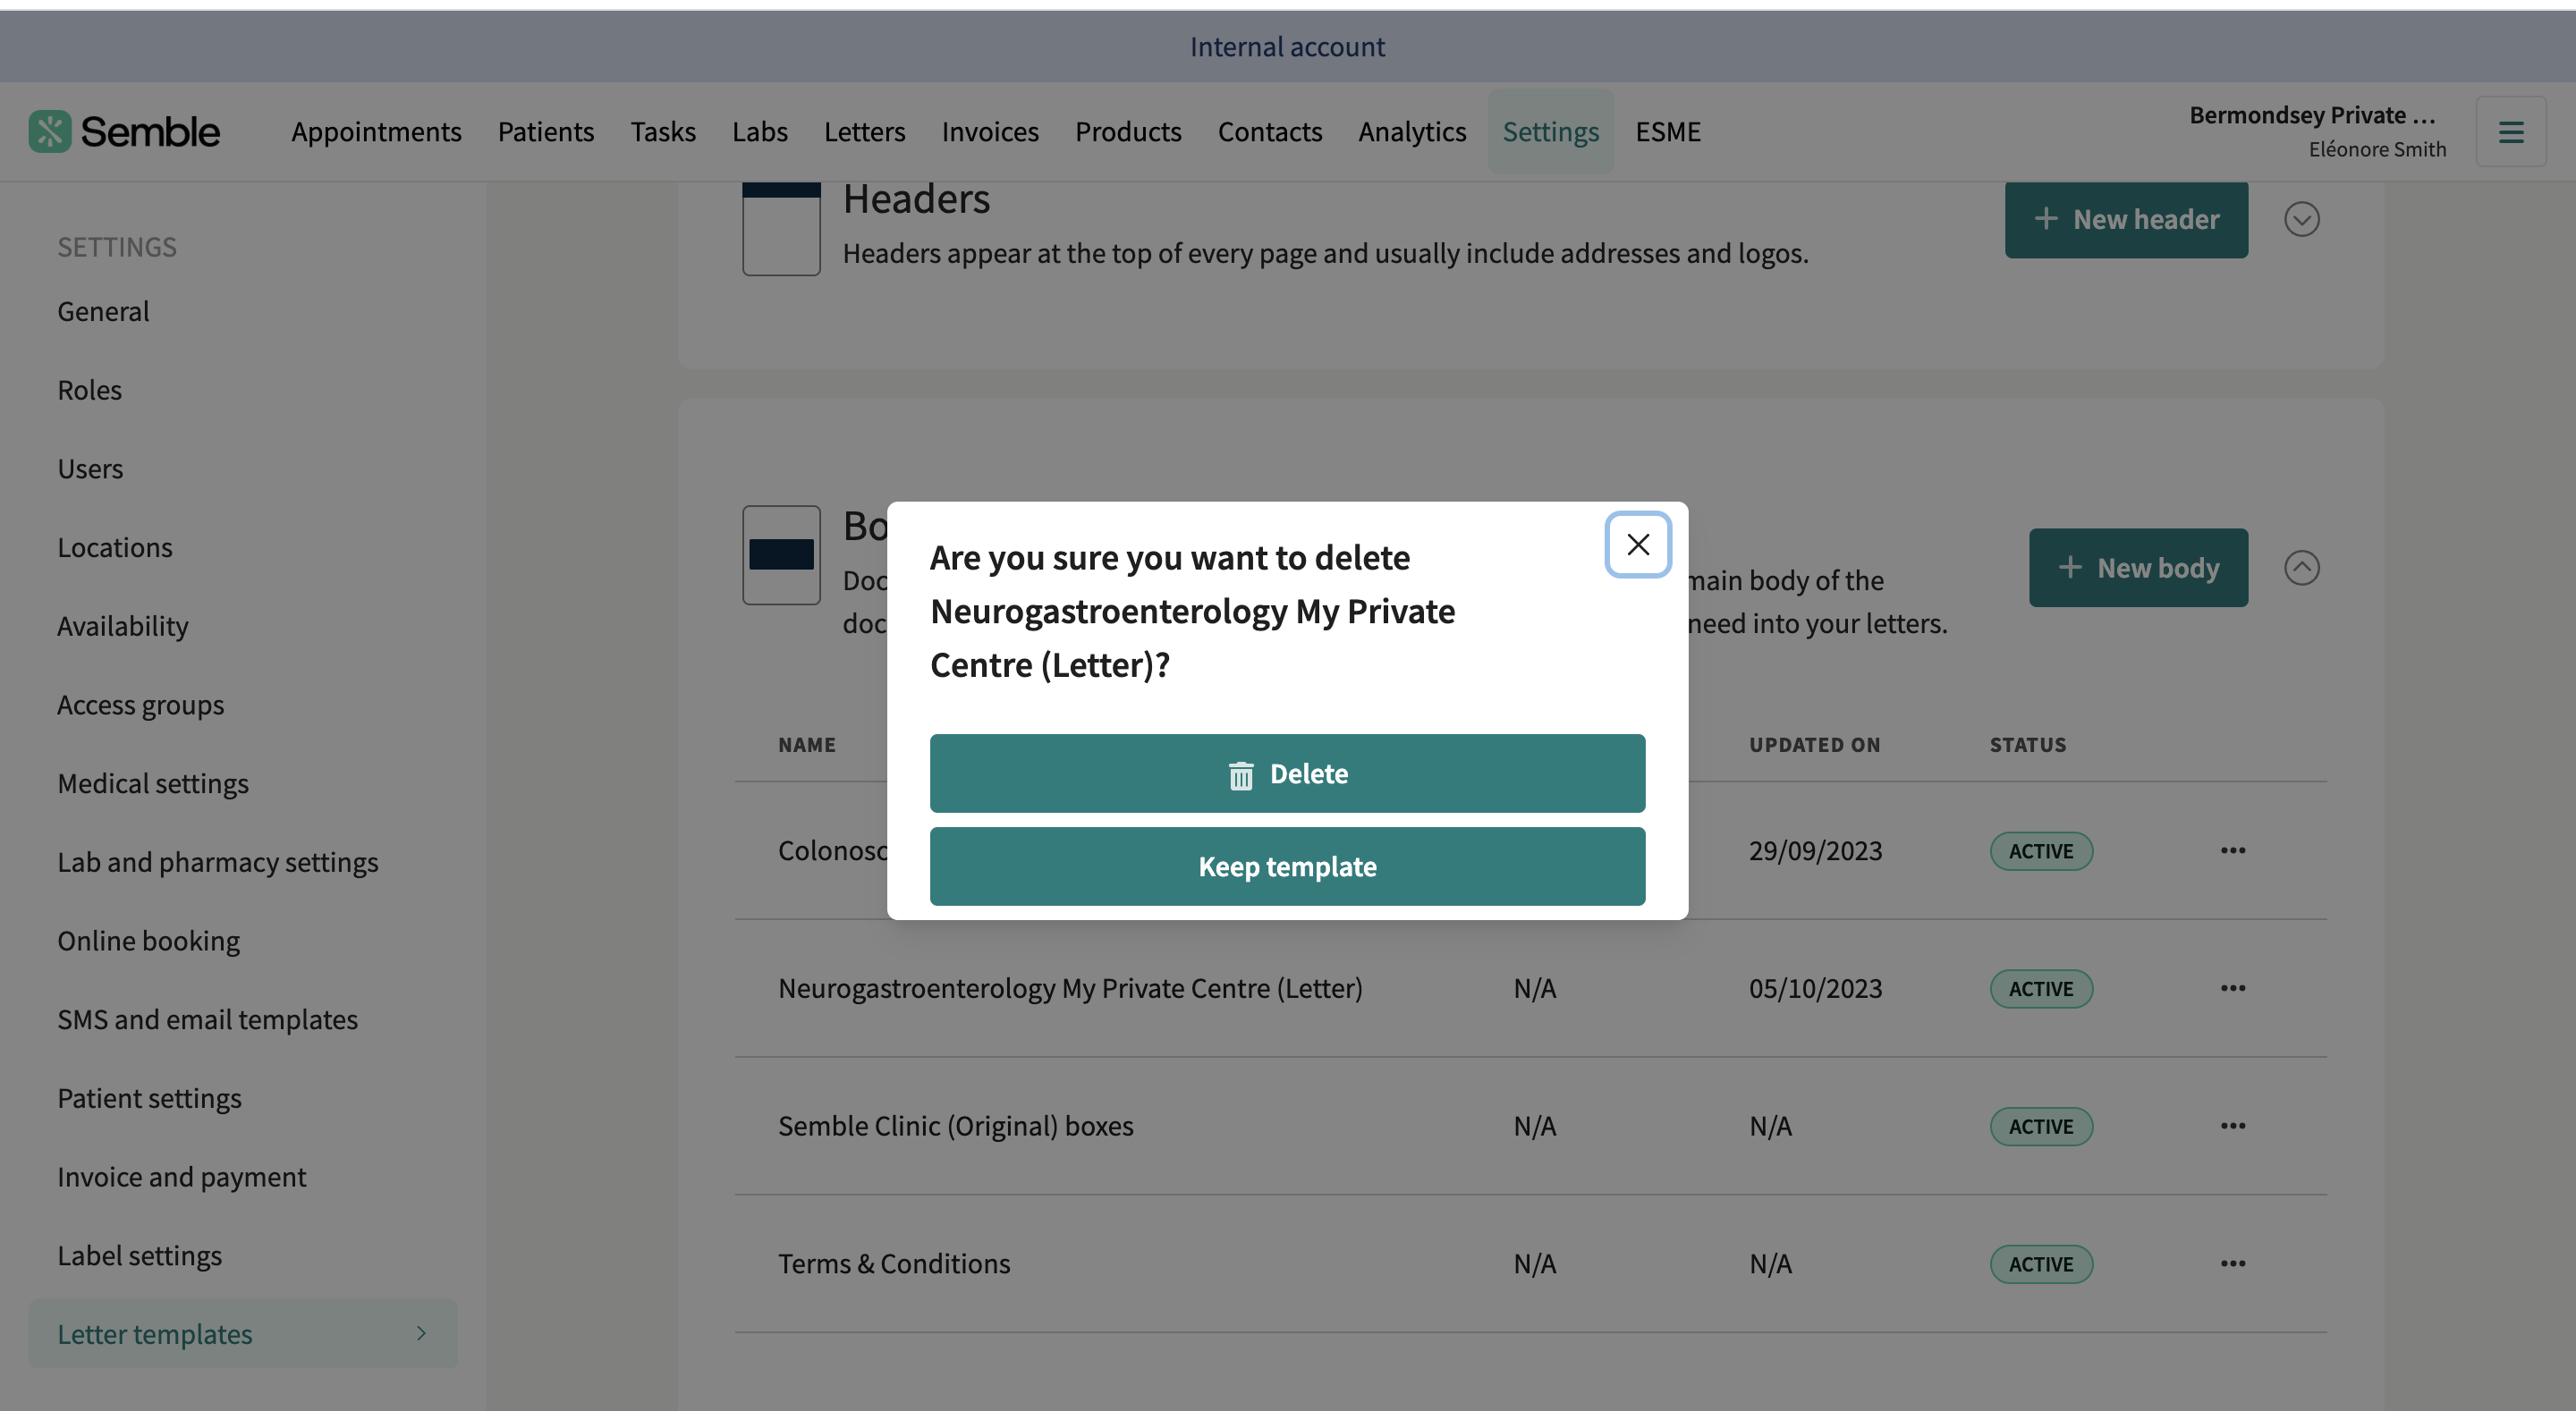
The letter template is deleted from Semble.
Placeholders available on your letter template
Placeholders are special tags that you insert into your letter template. When the template is used, these placeholders are automatically replaced with the relevant information for the specific patient.
This means you can create a single template and use it for multiple patients, saving time and ensuring consistency.
Using the above ensures that all letters follow the same format and contain all necessary information, maintaining a professional and standardised communication approach.

Here is the list of the placeholders available when creating letters on Semble:
Insert logo
Date
DD Month YYYY (e.g., 30 March 2022)
DD/MM/YYYY (e.g., 30/03/2022)
Day (e.g., 30)
Day (e.g., Wednesday)
Month (e.g., March)
Year (e.g., 2022)
Location
Adress
Full address
Street address
City
Postcode
Country
Letterhead
Clinic name
Room
Recipient
To
Title
First name
Last name
Address
Phone
Company
Notes
Copied in
It allows you to choose from one of the recipient block template you've created.
Patient
Title
First name
Last name
Age
Occupation
Company
Religion
Ethnicity
Date of birth
Date of death
Gender
Sex
Address
Phone
Communication pref.
Billing details
Payment reference
Membership
Comments
ID numbers (numbers previously created in patient settings)
Relationships
All
Anaesthetist
Emergency contact
Family member
GP
Insurance provider
Next of kin
Parent/guardian
Paying account
Practitioner
Referring clinician
Social worker
Spouse/partner
Appointment
All
Last appointment
All
Type
Location
Clinician
Date
Start time
End time
Comments
Next appointment
All
Type
Location
Clinician
Date
Start time
End time
Comments
Consultations
All
Most recent
Most recent all
Date
Clinician name
Problem heading
Presenting complaint
Medication (All acute or All repeat)
Clinician
Title
First name
Last name
Specialty
Address
Signature
Qualifications
Registration
Insert product
All
Most recent
Create a Recipient Block
A Recipient Block in Semble allows you to predefine details (like first name, last name, and email) for individuals who may need to be copied into patient letters, such as GPs or other healthcare professionals.
You can create a multiple recipient block for a letter template, from the Settings page:
1. Go to the Letter templates tab.
2. Click New Recipient block.

3. Give the recipient block template a name.
4. Add the recipient block's details by clicking on "Copied in recipient fields".

5. Click Save in the top right-hand corner.
The recipient block template appears in the Letter templates tab.
Add a Recipient Block to a Letter Template
If you have not yet created a letter template, then you can find out how to do so here. You can add a recipient block to a letter template at any time from the Settings page.
1. Go to the Letter templates tab.
2. Select the letter template that you want to add a recipient block to.
3. Scroll down to the Letter body, then click your cursor in the text editor where you want the recipient block to appear.
4. Click on the Recipient dropdown.
5. Hover your cursor over Copied in, then select the recipient block you want to add. The recipient block appears as an automated tag in the text editor.
6. Click Save in the top right-hand corner of the page.
The recipient block is now added to the letter template. Letters using this letter template can now have external recipient details automatically inserted in them.
To ensure the recipient information appears correctly when creating a letter, you must fill in the "Copied-in recipient" field at the top of the letter.

This tells the system which recipient block to use and automatically inserts the relevant details into the letter.
Insert Recipient Block Details into a Letter
When you have added the recipient as an external contact (eg. you may want to add GP details into the letter) to your practice, you can insert their details into a patient letter.
1. Create a recipient block for a letter template.
2. Create a new letter. For information on how to create a new letter, see here.
3. Select the copied in recipient from the Copied in recipients dropdown menu.

4. Insert the template that has the recipient block, into the text editor.
5. Finish writing the letter as you normally would.
6. Click Save.
If you now view the letter, the copied in recipient's details will appear where the recipient block was inserted:
Note: If your recipient block includes fields that are not filled out in the selected recipient’s profile, those fields will remain blank in the letter.
You’ll need to manually add any missing information to the relevant contact to ensure everything appears correctly.
Add a Clinician's Signature to a Letter Template
You can add a clinician's signature to a letter template at any time, from the Settings page.
Note: Before you attempt to add a clinician's signature to a letter template, you must first make sure that you have uploaded their signature to Semble.
1. Create a letter template as you normally would. For more information on how to do this, see here.
2. Go to the Letter body, and click your cursor where you want the signature to be inserted.
3. Open the Practitioner dropdown menu, then select the Signature placeholder.
4. Finish the letter template as you normally would.
When you use this letter template for a letter, the signature of the selected clinician will now be automatically added to the letter.
Add Multiple Recipient Details to a Letter
When you have created a recipient block and added it to a letter template, you will then be able to automate the details of multiple recipients for a letter. To do this:
1. Start creating a new letter for a patient as you normally would. For information on how to do this, click here.
2. Insert the letter template that you have linked to the recipient block into the text editor.
3. Go to Copied in recipients, then select the recipients who you want to appear in the letter from the dropdown.
4. Finish writing the rest of the letter.
5. Click Save at the top of the page.
The added recipients will appear on the letter with the details you configured automatically filled in:


